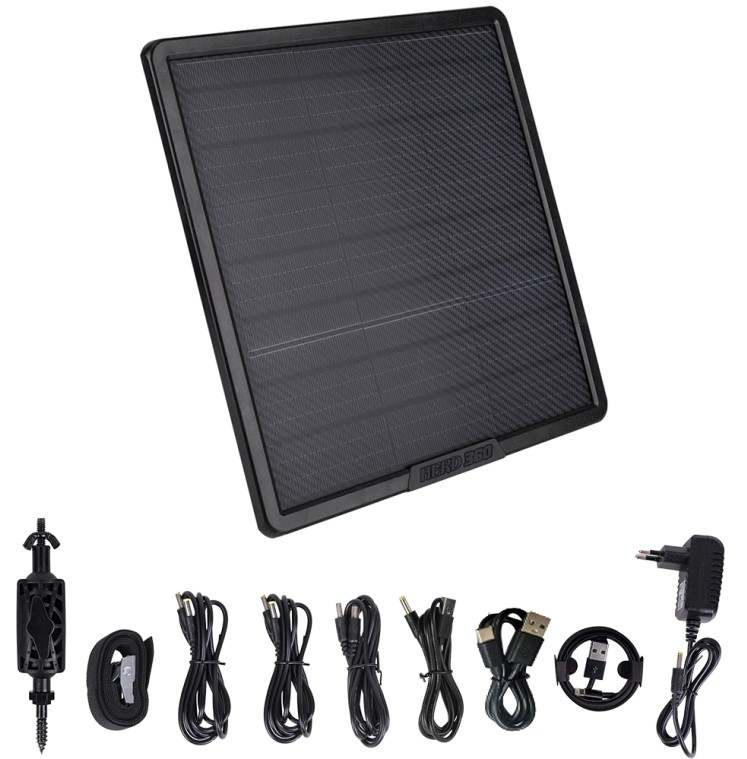
Buying a Used Deer Feeder: Inspection Guide (2026)
Disclosure: This post contains affiliate links. As an Amazon Associate, we earn from qualifying purchases at no extra cost to you.
Buy, negotiate or walk away: the 30-second route
2026 US used-feeder guide • 17-point inspection sheet • Marketplace & Craigslist buyers
Read the listing like an inspector, run a real feed cycle before paying, and price every missing part before you make an offer.
Pricing replacement parts on Amazon? Prime members get fast, free delivery on eligible items, and new members may qualify for a free trial. See Prime options →
INSPECT ▸ TEST ▸ PRICE PARTS ▸ DECIDE
Buy — after adding any battery or part you still need to the asking price.
Use the inspection sheet →Negotiate — a timer, motor, spinner kit, battery or solar panel can be priced first, then offered against.
Run the repair worksheet →Walk away — that’s a disposal job with a price tag, not a repair.
See the walk-away list →Contents
- The short answer: buy the feeder, not the story
- Before you drive out: read the listing like an inspector
- The used-feeder inspection sheet
- Hopper and structural condition
- Power and controls: timer, motor, battery, and solar
- Missing parts and manual availability
- Replacement parts worth pricing before you agree a price
- The repair-cost worksheet: repair vs. replace
- When to walk away
- Where to buy used in the United States
- After you buy: first clean and first test run
- Resources
- Frequently asked questions
- Final verdict
The short answer: buy the feeder, not the story
A used deer feeder is a good buy only when three things check out in person: the hopper and frame are sound, the power system actually runs a full feed cycle, and every missing part has already been priced. A feeder that looks clean in photos but has a dead timer, a swollen battery, a bent spinner plate, or a cracked gravity head is not a bargain. It is a repair project with an unknown bill attached, and the seller is asking you to carry that risk. The fastest way to protect yourself is to slow down at the inspection, run the feeder through a real test cycle before money changes hands, and add the cost of every missing or damaged part to the asking price before you agree to anything. If the total passes what a comparable new feeder would cost you, walk away and keep looking. There will be another feeder listed next week. There is no reason to rescue a bad one this week.
The short inspection verdict is this. Buy when the hopper holds feed without leaking, the legs or hanging hardware are straight and solid, the timer holds its program and fires the motor, the spinner plate turns freely and throws evenly, and the battery holds a charge or you have already priced its replacement. Negotiate hard when one replaceable part is missing or dead but everything else is sound, because a timer, a spinner plate and funnel kit, a motor, a battery, or a solar panel can each turn a tired feeder back into a reliable one. Walk away when the hopper is cracked through, the frame is bent or rusted thin, the control box has water damage or chewed wiring you cannot trace, the seller will not let you test it, or the manual is unavailable and you cannot identify the model at all. Those are not repair jobs. They are disposal jobs with a price tag.
This guide is written for buyers in the United States shopping on Facebook Marketplace, Craigslist, and local classifieds, and it follows the same inspection logic whether you are looking at a broadcast (spinner) feeder, a gravity feeder, a tripod feeder, or a hanging barrel feeder. Brands you will meet most often on the secondhand market include Moultrie, Wildgame Innovations, Boss Buck and American Hunter, and the replacement parts in this guide are chosen for those common designs. Where a part fits only certain models, this guide says so plainly, because a part that does not fit your feeder is not a saving at any price.
Before you drive out: read the listing like an inspector
Most bad used-feeder purchases are decided before the buyer leaves home. The listing photos look fine, the description says “works great,” and the buyer arrives already half-committed, with a truck, a friend, and an afternoon already spent. The seller knows it. The inspection then becomes a formality instead of a decision. Reverse that order. Treat the listing as a first inspection, and treat the trip as a confirmation of what the listing already told you. If the listing cannot answer the basic questions below, ask them by message before you drive anywhere. A seller who answers clearly is usually selling a feeder they understand. A seller who dodges, delays, or gets annoyed at ordinary questions is telling you something too, and it is rarely good news.
Start with identity. Ask for the brand and model, the feeder type (broadcast, gravity, tripod, or hanging), the hopper capacity in gallons or pounds, and the voltage of the system, 6-volt or 12-volt. Photograph the model label if the seller can find one, and ask for a photo of it. The model matters more than the brand name on the lid, because timers, motors, spinner plates, and funnels are not universal. Moultrie’s own manuals, for example, list different replacement parts for different feeder kits: a metal funnel and spin plate kit, a 6-volt motor, a 6-volt rechargeable battery, and a universal replacement timer appear across several kits, but the exact part numbers differ by kit. If you cannot identify the model, you cannot price the parts, and if you cannot price the parts, you cannot make a sensible offer. That alone is a reason to pass on an otherwise tempting listing.
Next, ask what is included and what is not. Does the sale include the battery, the solar panel, the legs, the lid, the funnel, the spinner plate, the varmint guard, and the mounting hardware? Used feeders are very often sold without a battery, because the battery is dead, or without legs, because the legs stayed bolted to a stand in the seller’s field. Each missing piece is a separate purchase, and the worksheet later in this guide exists precisely so you can add them up instead of discovering them one at a time after you get home. Ask directly: “Is anything missing, broken, or modified?” Then ask the follow-up that matters: “What does not work, or what has not been tested?” A feeder that “worked last season” has not been tested. A feeder that “just needs a battery” has not been tested either, and a battery is never the only thing wrong until you have proved it.
Ask for specific photos, not more photos. Request a photo inside the hopper, looking down at the funnel and the bottom seams. Request a photo of the control box open, showing the timer, the wiring, and the battery terminals. Request a photo of the spinner plate from underneath, a photo of each leg joint and foot, and a photo of the lid seal and latch. Damage hides in exactly those places: mold and caked feed in the hopper bottom, corrosion on battery terminals, a bent or cracked spinner plate, a leg that has been straightened after a hog strike, and a lid that no longer seals. If the seller cannot or will not provide those photos, assume the worst about the area they are hiding and price accordingly, or do not go. Also ask how the feeder was stored, whether it was left in the field over winter, whether feed was left inside it, and whether raccoons or hogs have damaged it. Honest answers here save you more money than any haggling technique.
Finally, ask about the manual and the reason for selling. A seller who still has the manual, or who can point you to the manufacturer’s manual page for that model, is selling a feeder you can maintain. A seller who lost the manual is not automatically dishonest, but you should confirm before you buy that the manual is available online for that exact model, because programming a timer without instructions is guesswork, and guessing wrong means feed dumped at midnight or not at all. The reason for selling matters too, but read it with judgment. “Upgrading to a larger feeder” and “sold the lease” are ordinary reasons. “Moving, must go today” combined with a refusal to test the feeder is pressure, not a reason. Pressure is a red flag in any used purchase, and this guide’s walk-away section explains why it should end the deal rather than speed it up.
Before you leave home, pack an inspection kit. Bring a fully charged battery of the correct voltage for the feeder you are viewing, or at minimum a multimeter, so you are not dependent on the seller’s dead battery to test the timer and motor. Bring a small amount of dry whole-kernel corn for a test throw if the seller agrees, a flashlight for looking inside the hopper and control box, work gloves, a rag, and a phone to photograph the model label, the damage, and the test result. Bring a friend if the feeder is large, and bring a vehicle that actually fits it: a 55-gallon drum feeder on a tripod does not fold down, and discovering that at the seller’s driveway wastes everyone’s afternoon. Agree the meeting place in advance, in daylight, in a public place where a test run is practical, or at the seller’s property only if you are comfortable and accompanied. The marketplace safety advice that runs through every reputable buying guide is the same: meet in a public, well-lit location when possible, bring someone with you, tell someone where you are going, inspect before paying, and cancel if anything feels unsafe or unclear.
The used-feeder inspection sheet
Print this section or save it on your phone and work through it in order at the feeder. Do not skip ahead to the test run, because a feeder that throws corn beautifully for ten seconds can still have a cracked hopper that leaks every time it rains, and you will not discover that until the first storm. Check each line, mark it pass, fail, or not tested, and write the part you would need to fix any failure. The repair-cost worksheet later in this guide turns those notes into a price. If the seller will not let you complete a line, mark it “not tested” and treat it as a fail when you make your offer, because an untested part is a part you are gambling on.
| Check | What to look for | Pass looks like | Fail looks like |
|---|---|---|---|
| Model identification | Brand and model label, timer model, motor markings | Model identified; manual found online or in hand | No label, no model, manual unavailable |
| Hopper exterior | Cracks, dents, UV fading, patches, holes | Solid walls, no cracks or patched holes | Cracks, holes, brittle or patched plastic |
| Hopper interior | Mold, caked feed, rust, standing water stains, insect nests | Clean, dry, smooth funnel area | Mold, caked residue, rust flakes, nests |
| Lid and seal | Lid fit, latch, hinge, gasket, venting | Lid closes tight and latches; no gaps | Warped, missing latch, gaps that admit rain |
| Legs and frame | Bends, weld cracks, rust thickness, leg joints, feet | Straight, solid welds, firm joints, feet present | Bent, cracked welds, rusted thin, missing feet |
| Hanging hardware | Cable, chain, hooks, pulley, bail | No fraying, kinks, or rusted-through links | Frayed cable, chewed rope, bent hooks |
| Gravity head and ports | Feed tubes, ports, sleeves, adjustment | Ports intact, sleeves adjust, no cracks | Cracked ports, missing sleeves, jammed adjustment |
| Timer display and buttons | Display, buttons, battery indicator, clock | Display clear, buttons respond, clock holds | Blank, faded, stuck buttons, clock resets |
| Timer program and test | Set a feed time, run the test cycle | Motor fires on schedule and on test | No fire, erratic fire, program lost |
| Motor | Sound, spin, grinding, hesitation, shaft play | Smooth spin, no grinding, firm shaft | Grinding, stalling, loose or wobbling shaft |
| Spinner plate and funnel | Bends, cracks, corrosion, set screw, alignment | Flat, centered, tight set screw, even throw | Bent, cracked, loose, off-center, uneven throw |
| Wiring and connectors | Chewed wires, frayed insulation, loose terminals, corrosion | Intact insulation, tight clean terminals | Chewed, frayed, corroded, or spliced wiring |
| Battery | Voltage under load, swelling, leaks, terminal corrosion | Holds voltage through a test cycle | Swollen, leaking, collapses under load |
| Solar panel | Glass cracks, cable damage, output in sunlight | Clean panel, intact cable, charges in sun | Cracked, dead output, damaged cable or mount |
| Varmint protection | Cage, guard, deterrent strips, box condition | Guard intact, box undamaged | Missing, bent, or chewed-through guard |
| Hardware completeness | Bolts, wing nuts, brackets, mounting plate | All mounting hardware present | Missing bolts, brackets, or mounting plate |
| Smell and residue test | Sour, moldy, or chemical smell inside hopper | Neutral smell, no residue | Sour or moldy smell, sticky residue |
Work the sheet from the outside in, and finish with the test run. Start with the hopper and frame, because structural failure cannot be fixed with a parts order. Then open the control box and check wiring, terminals, and the timer display before you connect any battery. Then connect a known-good battery, set the clock, program a short feed time, and run the test cycle. Watch the spinner plate, listen to the motor, and look at the throw pattern on the ground. An even, wide scatter is what a healthy broadcast feeder does. A tight pile directly underneath, a lopsided spray, or corn dribbling from one side usually means a bent plate, a misaligned funnel, or a motor that is not reaching full speed. Finish by asking the seller to leave the feeder running through one programmed cycle if time allows, because a timer that fires on test but drops its program is a timer that will fail you on the first morning it matters.
Photograph everything you find, including the passes. Photos protect both sides: they record the condition you agreed on, they let you check part numbers at home before ordering, and they give you a reference if a part you ordered does not fit. Photograph the model label first, because it is the single most useful photo you will take. Then photograph each failure close up, with something for scale if the damage is a crack or a bend. If you decide not to buy, those photos still help you, because they remind you exactly what you walked away from when the same feeder is relisted next month at a lower price and you are tempted to reconsider.
Hopper and structural condition
The hopper is the feeder. Everything else, timer, motor, battery, solar panel, is a replaceable accessory bolted to it. If the hopper is compromised, the feeder is compromised, no matter how new the electronics are. Start by walking around the hopper slowly and looking at it the way water would: where can rain get in, where can feed leak out, and where has the structure already given way? Check the lid first. A lid that does not close tightly or latch firmly is not a cosmetic problem. It is an open invitation to rain, and rain inside a hopper means clumped feed, mold, and the exact conditions that university extension guidance warns about. Oklahoma State University Extension advises that grain beginning to form mold or containing insects should be disposed of immediately, that feeders should be emptied, cleaned, and fully dried before refilling, and that grain feeders should be cleaned regularly. A feeder whose lid has been letting rain in for a season has been creating that problem on a loop, and the inside will show it.
Open the lid and look inside with your flashlight. A healthy hopper interior is dry, smooth, and free of residue. What you are hunting for is caked feed in the bottom and around the funnel, dark staining, mold spots, rust flakes from a metal hopper or metal fittings, insect nests, and any sour or musty smell. Caked feed at the bottom is common on neglected feeders, and it matters for two reasons. First, it blocks feed flow and can starve the spinner or clog a gravity port even after you clean the visible surfaces. Second, it tells you the feeder was stored with feed inside it, which is exactly how mold establishes itself. Texas A&M AgriLife Extension has warned hunters that warm temperatures combined with wet corn create prime conditions for aflatoxin-producing fungi, and that feeders should be clean and should not leak. The National Deer Association’s guidance is similarly direct: clean feeders regularly with a bleach solution, remove debris with soap and water first, then bleach, then let the feeder dry fully before refilling. A used feeder with a moldy interior is not automatically a write-off, because a plastic or metal hopper can be cleaned, but a hopper whose interior is stained through, pitted, or holding a permanent sour smell after cleaning has had its feed-contact surfaces damaged, and you should price it as a feeder that may never be fully trustworthy for feed again.
Check the hopper walls for cracks, especially around mounting holes, leg sockets, and the bottom seam where the funnel or gravity head attaches. Plastic hoppers become brittle with years of ultraviolet exposure, and a hairline crack at a stress point will grow under the weight of a full load. Flex the wall gently near any crack you find. If it moves, whitens, or creaks, the plastic is fatigued and the crack will spread. Metal hoppers need a different check: look for rust, and then check whether the rust is surface rust or structural rust. Surface rust on a painted steel drum can be cleaned and repainted, and older feeder manuals describe exactly that: cleaning rust with a stiff brush or steel wool and touching up with good-quality paint. Rust that has thinned the metal, pitted through it, or weakened a weld is different. Press firmly near rusted seams and welds. If the metal flexes, flakes away in layers, or shows holes, the hopper is done. The same rule applies to the bottom ring and belly band on barrel feeders: those parts carry the whole load, and a rusted-through band is a collapse waiting for a full hopper to trigger it.
Legs and frames deserve the same slow attention. Stand back and sight along each leg. A leg that is bent, even slightly, changes how the feeder sits, and a feeder that does not sit level does not feed evenly. Gravity feeders are particularly sensitive here: Boss Buck’s own assembly guidance stresses that maintaining a level hopper and proper leg angle matters for performance, and that foot pads should be used to stop feeders sinking into soft ground and becoming unlevel. Check every weld and every bolted joint. Look for cracked welds, elongated bolt holes, and joints that wobble when you push the feeder firmly from the side. A tripod feeder should feel rigid, not springy. A four-legged feeder should sit flat on all four feet without rocking. Missing feet are a common and cheap-looking defect that is actually expensive in consequences: without feet, legs sink, the feeder tilts, gravity ports feed unevenly, and the legs themselves rot or rust faster in contact with wet soil. Note every missing foot on your inspection sheet, because feet are a priced part in the worksheet, not a detail to sort out later.
For hanging feeders, inspect the hanging system as if your safety depended on it, because it does. Moultrie manuals recommend chain or steel cable rather than rope for hanging feeders, precisely because some animals chew through rope, and they put the bottom of a hanging feeder at approximately 7 feet from the ground. Check cable for fraying, kinking, and rust, check chain links for thinning and stretched links, check hooks and pulleys for bending and cracks, and check the bail or mounting point on the hopper itself for cracks around the attachment. A hanging feeder full of corn is heavy, and a failed cable drops that weight without warning. If any part of the hanging system is frayed, kinked, chewed, or bent, treat the whole hanging system as a replacement item, not a single-link repair. And never accept a rope-hung feeder at face value: if the seller hung it on rope, ask when the rope was last replaced, and plan to replace it with chain or cable before you hang it yourself.
Gravity feeders need their own structural check, because their working parts are the feed ports and the head, not a motor. Inspect each feed port and tube for cracks, missing caps, and damaged sleeves. Ports that are cracked or have lost their adjustable sleeves will spill feed continuously or let rain in, and both failures waste feed and invite varmints. Check the gravity head for cracks where it meets the hopper neck, and check that the head sits square and tight. A head that wobbles or sits crooked will not seal, and a poor seal on a gravity feeder is a slow leak that empties your corn onto the ground between visits. Check the lid fit on gravity feeders with extra care, because gravity heads depend on the hopper staying dry, and a loose-fitting lid, which some designs use deliberately for ventilation, still needs to keep rain out while it breathes. If the lid is warped or its thumbscrew closure is missing, note it. It is a small part with an outsized effect on feed quality.
Power and controls: timer, motor, battery, and solar
Power and controls are where most used broadcast feeders fail, and they are also where most sellers are most optimistic. “Just needs a battery” is the single most common sentence in used-feeder listings, and it is true only some of the time. The only way to know is to test the system in the right order, isolating each component so a dead battery cannot hide a dead timer and a dead timer cannot hide a dead motor. The order matters. Test the battery first, then the motor directly, then the timer. Feeder manuals and troubleshooting guides converge on exactly this sequence: check the battery with a known-good replacement first, and only then suspect the timer or motor. If you test in the wrong order, you will replace the wrong part, and you will do it twice.
Start with the battery, and start by looking at it before you measure it. A swollen case, a leaking terminal, white or green corrosion crusting the terminals, or a case that is cracked or warped means the battery is finished, regardless of what any meter says. Corrosion on terminals is common and sometimes cleanable, but heavy corrosion that has eaten into the terminal posts or the cable connectors means the connection will stay unreliable even after cleaning. Measure voltage with your multimeter, with the solar panel disconnected, because a panel in sunlight will show you the panel’s voltage, not the battery’s. That disconnection step is one that experienced feeder owners repeat for a reason: a failing battery can look healthy in daylight while a solar panel is feeding the meter. Then measure voltage again while the motor runs, or watch the timer’s battery indicator under load during a test cycle. A battery that reads acceptably at rest but collapses the moment the motor draws current is a dead battery wearing a good reading. Treat any battery the seller includes as a bonus, not as a working component, unless it passes both the resting and under-load checks. If the feeder uses a 6-volt system, make sure you are testing and pricing a 6-volt battery, and if it uses a 12-volt system, do the same. Mixing voltages is not a shortcut. It is how timers and motors get damaged.
Next, test the motor directly, bypassing the timer. With the battery connected and the spinner plate clear of obstructions, connect the motor leads directly to the battery, as feeder troubleshooting guidance describes: if the motor is working, the spinner plate will spin immediately. Listen as much as you watch. A healthy motor spins smoothly and reaches full speed quickly, with a steady hum. Grinding, clicking, hesitation, or a motor that starts and stalls points to a worn motor, an obstructed spinner, or a battery that cannot deliver current under load, and you have already ruled the battery in or out in the previous step, so you can read the result with confidence. Try turning the spinner plate by hand with the power disconnected. It should turn freely. If it sticks, drags, or catches at one point in its rotation, look for caked feed, a bent plate rubbing the housing, a foreign object, or a shaft that has developed play. A shaft that wobbles side to side is a worn bearing, and a worn bearing is a motor replacement, not a cleaning job. Also check the set screw that holds the spinner plate to the motor shaft. A missing or loose set screw is a classic used-feeder defect: the motor spins, the plate does not, and the seller honestly believes the motor is dead. Tighten or replace the set screw and retest before you condemn anything more expensive.
Then test the timer, and test it as a timer, not just as a switch. A timer that fires on its test button but cannot hold a program is not a working timer. Set the clock to the correct time, program a feed time a few minutes ahead, set a short run duration, and wait for it to fire on its own. Then check that the program is still there afterwards. Check the display for fading, missing segments, or a backlight that no longer works, and check every button for response. Buttons that stick, double-register, or do nothing are a sign of moisture damage inside the control box, and moisture damage rarely stops at the buttons. Look inside the control box for water stains, corrosion on the circuit board or terminals, and any smell of damp electronics. Check the timer’s fuse if the model has one: a blown fuse is cheap, but a fuse that blows repeatedly points to a motor, harness, or wiring fault that will eat the next fuse too. Moultrie manuals for several kits describe the same first troubleshooting step for a feeder that will not run: replace the battery with a known-good one, and if the problem persists, contact customer service. That advice exists because battery, timer, and motor symptoms overlap so closely that guessing is expensive.
Spinner plates and funnels deserve their own moment in this section because they sit between the motor and the feed, and their condition decides whether a working motor actually feeds deer. Inspect the spinner plate for bends, cracks, and corrosion, and check that it sits centered under the funnel with even clearance all the way around. A bent plate throws feed to one side, a corroded plate throws it unpredictably, and a plate mounted off-center will rub and wear the motor shaft. Inspect the funnel for dents, cracks, and caked feed, especially at the throat where feed narrows into the spinner. Pellet feeds that are not mixed with corn can absorb moisture and clog a feeder, a warning that appears across Moultrie manuals, so a funnel caked with old pellet residue tells you both that the feeder was fed pellets and that it was not cleaned. Clean the funnel and plate during your inspection if the seller allows it, and retest. A plate and funnel that look rough but clean up and throw evenly are a pass. A plate that stays bent or a funnel that stays cracked after cleaning is a parts order, and both parts are in the cards below.
Solar panels are the last power component, and they are easy to over-trust. A panel that looks intact can still be dead, and a panel with a cracked face can still produce some power while it slowly fails. Inspect the glass or face for cracks, check the cable for chew marks, cuts, and UV cracking, and check the mount and bracket for rust and looseness. Then test output in direct sunlight with your multimeter, following the same logic as the battery check: a healthy 12-volt panel should read above 12 volts in full direct sunlight, and a 6-volt panel should be checked against its own rating and against whether it actually raises the battery voltage over time. Never connect a solar panel to non-rechargeable batteries, a warning that appears in Moultrie camera and feeder guidance alike, because the panel will try to charge cells that cannot be charged. Check that the panel’s voltage matches the feeder’s system: a 6-volt panel on a 6-volt system, a 12-volt panel on a 12-volt system. A mismatched panel is not a bonus. It is a part you will need to replace, and it goes on the worksheet as such.
Finally, check the wiring as a system, not as individual wires. Follow each wire from battery to timer to motor, looking for chewed insulation, frayed strands, loose terminals, corroded connectors, and splices wrapped in tape. Raccoons and squirrels chew wiring, and Field & Stream’s feeder guidance notes that both animals can chew through wiring and cause feeder failure. A single chewed wire with clean copper showing is repairable. Wiring that has been chewed in several places, spliced repeatedly, or repaired with tape and hope is a harness problem, and on many feeder kits the harness is not sold separately from the timer or motor assembly. That is a pricing question, not a repair question: if the wiring damage forces you to replace a whole assembly, price the assembly, not the tape. Note every wiring fault on your inspection sheet before you make an offer, because wiring is the defect most likely to be waved away with “it’s just a wire” and most likely to strand you with a feeder that works in the driveway and fails in the field.
Missing parts and manual availability
Missing parts are the quiet cost of every used feeder. A feeder can look complete from ten feet away and still be missing the funnel, the lid latch, two leg bolts, the varmint guard, and the battery, and each of those absences is a separate order, a separate wait, and a separate chance to discover that the part is discontinued. The discipline here is simple: inventory the feeder against its own parts list before you agree a price. If you have the manual, use its parts list. If you do not have the manual, find it online before you buy, using the brand and model from the label you photographed. Moultrie manuals, for example, are explicit that only certain parts are user-replaceable on each kit, and they list those parts by number: hardware packages, motors, metal funnel and spin plate kits, 6-volt rechargeable batteries, battery chargers, and universal replacement timers. That list is useful in both directions. It tells you what you can order, and it tells you what you cannot: if the part you need is not on the user-replaceable list, you are looking at a manufacturer repair, a donor feeder, or a walk-away, and you should know which before you pay.
Work through the feeder in assembly order. Is the lid present, and does its latch or thumbscrew work? Is the funnel present and undamaged? Is the spinner plate present, and is its set screw present? Is the motor present, and is it the correct voltage for the timer? Is the timer present, and does it match the kit? Are the legs complete, with all sections, bolts, and feet? Is the mounting plate or belly band present? Is the varmint guard or cage present? Are the battery and its cables present? Small hardware matters disproportionately on feeders, because a missing wing nut or bracket can prevent the whole assembly from mounting safely, and hardware that looks generic often is not: leg bolts, hopper neck bolts, and mounting brackets are sized for the feeder, and substituting the wrong size can crack a plastic hopper or strip a threaded insert. Boss Buck’s gravity feeder assembly guidance warns against over-tightening bolts into threaded inserts, which is exactly the kind of damage a previous owner creates when they force mismatched hardware. If hardware is missing, ask the seller whether they have it in a shed or a parts box. If they do not, price the hardware package for that model, not a bag of assorted bolts from a hardware store, and confirm the package is still available before you commit.
Manual availability is a separate check with its own consequences. A manual tells you how to program the timer, how to set feed times and run durations, what battery the feeder takes, what feed it handles, and what parts are replaceable. Without it, you are reverse-engineering someone else’s feeder in the field. Moultrie feeder kits illustrate why this matters: some timers program up to four feed times a day with run durations from 1 to 20 seconds, others program up to ten feed times with durations from 1 to 60 seconds, and some factory settings are 7:00 AM and 6:00 PM while others default to a 4-second or 10-second run. Those are not interchangeable settings, and guessing them wastes feed. Before you buy, search the manufacturer’s site or a manual archive for the exact model and confirm the manual is available. If it is, save a copy to your phone before you leave the seller’s property. If it is not available anywhere, and the seller does not have a paper copy, treat the feeder as a higher-risk purchase and discount it accordingly, because every future question about that feeder will be harder to answer. A feeder with no manual and no model label is a feeder you cannot maintain, and that is a walk-away in this guide’s terms unless the price reflects a parts-donor value rather than a working-feeder value.
Also check for modifications, and check for them skeptically. Previous owners modify feeders constantly: they drill extra holes, add homemade varmint guards, splice in different timers, swap motors between brands, and adapt gravity heads to barrels they were never designed for. Some modifications are improvements. Most are compromises that the seller will describe as upgrades. A drilled hole in a hopper is a leak path unless it is sealed properly. A swapped timer may work, but it may also be the wrong voltage, or wired in a way that bypasses the fuse. A homemade varmint guard may protect the spinner, or it may interfere with the throw pattern. Ask the seller what has been modified and why, inspect each modification for workmanship, and check whether it voids any remaining manufacturer support. If a modification touches the control box wiring or the hopper structure, and you cannot verify that it was done correctly, price the feeder as if the modified part needs replacing. That is not pessimism. It is the only honest way to price someone else’s workmanship.
One more missing item is easy to overlook: the feed itself. Never accept feed left inside a used feeder as part of the deal, and never feed it to deer. Feed that has sat in a used hopper through weather, insects, and unknown storage has an unknown history, and extension guidance is unambiguous that moldy, clumping, or insect-contaminated grain should be disposed of, not fed. Oklahoma State University Extension advises disposing of grain that is beginning to form mold or that contains insects immediately, and never refilling a feeder without first emptying, cleaning, and fully drying it. If the seller’s feeder still contains old feed, ask them to empty it before you inspect the hopper interior, and dispose of that feed yourself rather than leaving it for wildlife. A seller who insists the old corn is “still good” is giving you information about how they maintained the feeder, and it is not reassuring information.
Replacement parts worth pricing before you agree a price
The ten parts below are the ones most likely to decide whether a used feeder is worth buying. Each card explains what the part does, what failure looks like on inspection, and what to check for fit before you order. Prices are deliberately not stated here: no price is quoted in this guide unless it was verified on a live page when this guide was written, and Amazon’s listing pages do not permit agent verification, so every part below is linked for you to check at the time you buy, when the price you see is the price you pay. That is the honest version of a price, and it is the only version this guide will give you. Use the worksheet in the next section to add the current price of each part you need to the asking price, and let that total make the decision.
1. Wildgame 12V Motor — Best for reviving a dead broadcast feeder
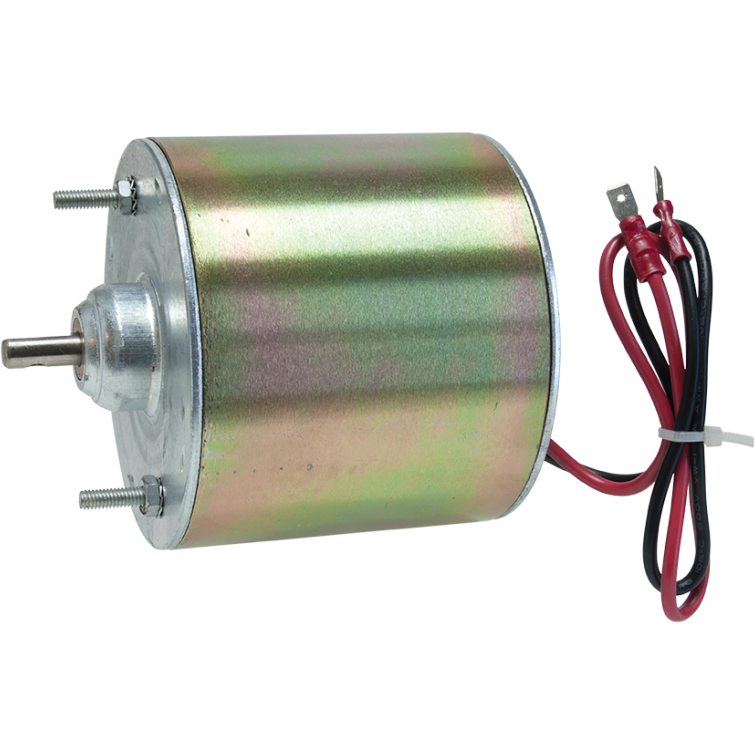
The motor is the heart of a broadcast feeder. It spins the plate that throws the feed, and when it fails, nothing else in the system matters. On inspection, a failed or failing motor shows up as grinding, hesitation, stalling under load, or a shaft that wobbles when you move the plate by hand. Before you order a replacement, confirm the voltage of the feeder you are buying. This is a 12-volt motor, and it belongs on a 12-volt system. Fitting a 12-volt motor to a 6-volt feeder, or the reverse, is not an upgrade. It is a mismatch that will either underperform or damage the timer. Also confirm the motor’s mounting and shaft fit for your feeder’s kit, because motors are not universal across brands even when the voltage matches.
✅ Pros: Restores a feeder whose hopper and timer are sound; a single-part fix for the most common broadcast failure; lets you keep an otherwise solid used feeder in service.
❌ Cons: Useless if the timer or wiring is also faulty, so test those first; voltage and fit must match your exact feeder; a motor will not fix a bent spinner plate or a clogged funnel.
Verdict: Buy the used feeder if the motor is the only power failure and the timer fires correctly with a known-good battery. Walk away if a new motor still leaves you with a dead timer and chewed wiring, because you are then replacing the system, not a part. Check Price on Amazon →
2. Moultrie Spinner Plate & Funnel Kit — Best for uneven or one-sided throw
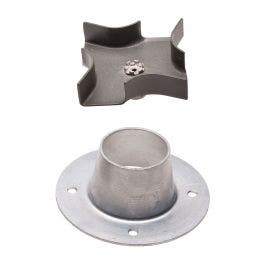
The spinner plate and funnel work as a pair: the funnel meters feed onto the plate, and the plate throws it. When either is bent, cracked, corroded, or caked with old feed, the throw goes lopsided, piles up under the feeder, or dribbles instead of scattering. Moultrie manuals list a metal funnel and spin plate kit as a user-replaceable part across several feeder kits, which makes this one of the most sensible repairs on a used Moultrie feeder. On inspection, look for a plate that is no longer flat, a funnel throat narrowed by caked residue, and a set screw that is missing or will not hold. Clean both parts before you condemn them, because caked feed can mimic a bent plate, but if the plate stays bent or the funnel stays cracked after cleaning, order the kit rather than nursing the old parts through another season.
✅ Pros: Fixes the most visible feeding problem, uneven throw, in one kit; metal parts last longer than the worn parts they replace; a straightforward swap on compatible Moultrie kits.
❌ Cons: Fit is model-specific, so confirm your kit before ordering; will not cure a weak motor or a dying battery; a new plate on a wobbling motor shaft will wear out fast.
Verdict: A strong negotiating point, not a deal-breaker, when the hopper, timer, and motor are sound. Price the kit into your offer and buy with confidence. Check Price on Amazon →
3. Moultrie Timer III — Best for a timer that will not hold a program
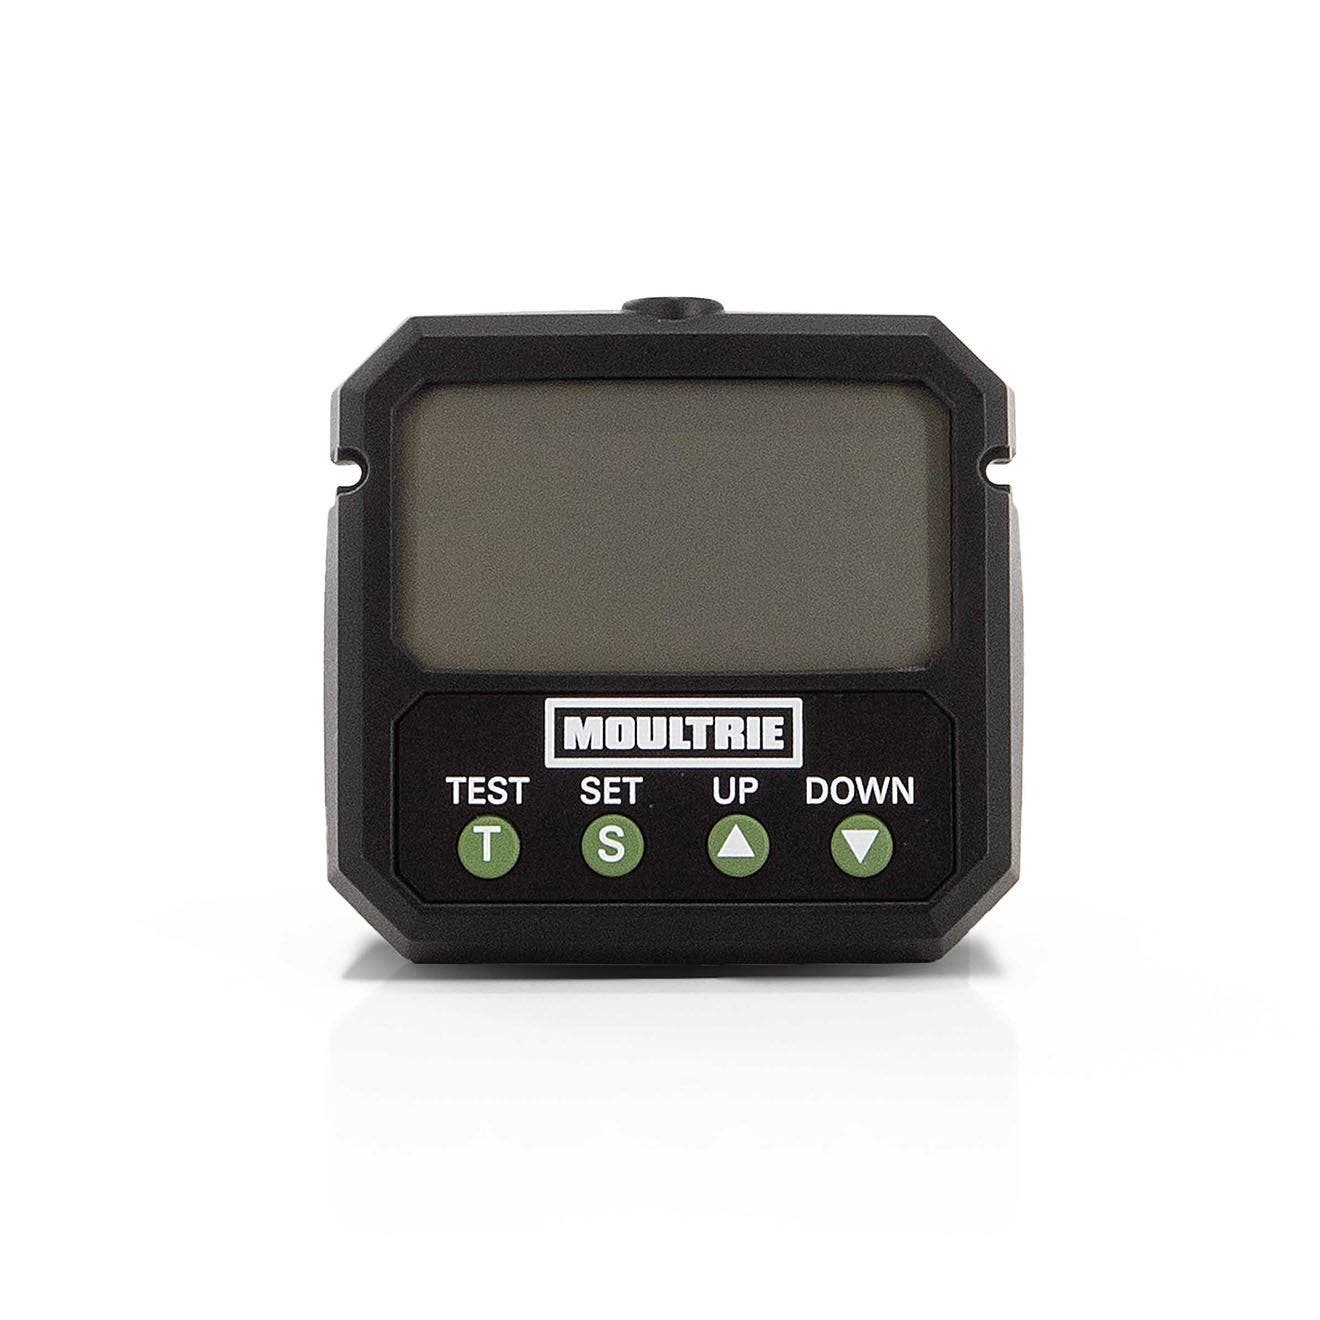 Timer III sold out at Amazon itself? The Moultrie Timer II is in stock
The timer is the brain of a broadcast feeder. It holds the clock, the feed times, and the run durations, and it decides when the motor fires. A timer that has a blank or faded display, stuck buttons, a clock that resets, or a program that vanishes is not a timer you can trust, even if it fires once on its test button. Moultrie manuals list a universal replacement timer as a user-replaceable part for several kits, which is good news for used buyers, because it means a dead timer does not have to mean a dead feeder. Before ordering, confirm the replacement timer’s compatibility with your feeder’s voltage and kit, and confirm that the wiring connectors match, because a timer that does not connect cleanly is a rewiring job, not a swap.
✅ Pros: Rescues feeders whose only fault is electronic; restores programmable feed times and run durations; a known, orderable part rather than a mystery repair.
❌ Cons: Will not fix a dead motor, a dead battery, or chewed wiring, so isolate those faults first; programming still requires the manual for your feeder; moisture damage in the control box may affect more than the timer.
Verdict: Buy if the hopper and motor pass and the timer is the single failure. Walk away if the control box shows water damage beyond the timer itself, because the next failure is already inside the box. Check Price on Amazon →
4. Wildgame Trophy Hunter Timer — Best for a Wildgame feeder with timer trouble
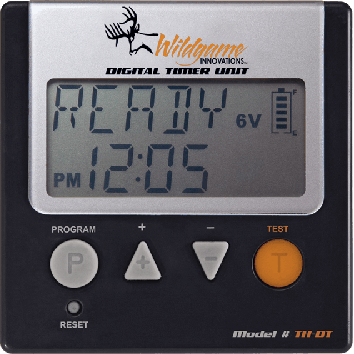
Wildgame feeders have their own timer designs, and a Moultrie timer is not a drop-in substitute for a Wildgame timer unless the kit explicitly allows it. If you are buying a used Wildgame feeder and the timer is dead, dim, or erratic, price the Wildgame replacement timer for that system, not a generic timer that happens to be available. On inspection, run the same timer tests as for any feeder: set the clock, program a feed time, confirm it fires on schedule, and confirm the program survives. A timer that only works on its test button, or that loses time when the battery is disconnected briefly, is telling you its memory or display circuit is failing. Note also whether the timer’s housing seals against the control box, because a timer that fits loosely lets in the moisture that killed its predecessor.
✅ Pros: Brand-matched replacement for Wildgame systems; restores scheduled feeding without replacing the whole feeder; worth pricing before you negotiate.
❌ Cons: Model fit must be confirmed; a new timer cannot compensate for a weak battery or a worn motor; test the full program, not just the test button, before deciding.
Verdict: A fair repair on a structurally sound Wildgame feeder. Add it to the worksheet and negotiate from the total, not from the asking price alone. Check Price on Amazon →
5. Power-Sonic PS-640 F1 Battery — Best for a battery that collapses under load

Batteries are consumables, and on a used feeder the battery should be treated as consumed until proved otherwise. A 6-volt rechargeable battery of this type suits 6-volt feeder systems, and it is the part most often hidden behind the phrase “just needs a battery.” On inspection, reject any battery that is swollen, leaking, or heavily corroded at the terminals, and test any battery that looks sound both at rest and under load, with the solar panel disconnected. Remember that a battery can read acceptably at rest and still collapse the moment the motor draws current. Also confirm the terminal type, F1 in this case, matches your feeder’s connectors, because a battery with the wrong terminals is a battery you cannot connect without adapters that introduce their own failure points.
✅ Pros: The cheapest common rescue for a used feeder; a fresh battery often reveals whether the timer and motor are actually healthy; rechargeable, so it pairs with a solar panel.
❌ Cons: A new battery will not fix a dead timer or motor, so do not let it become a diagnostic crutch; terminal type and voltage must match; a battery stored dead for a season may already be degraded when new.
Verdict: Always budget for a battery on a used feeder unless the included battery passes a load test in front of you. A feeder priced as if its dead battery were free is honestly priced. A feeder priced as if its dead battery were working is not. Check Price on Amazon →
6. Moultrie 6V Solar Panel (MFA-15110) — Best for a feeder that will live far from the road

A solar panel keeps a rechargeable battery topped up between visits, which matters most on feeders that sit deep on a property where battery swaps are a chore. On a used feeder, inspect the panel the way you would any outdoor electrical part: check the face for cracks, the cable for chew marks and UV damage, and the mount for rust and looseness. Then test output in direct sunlight. A panel that produces nothing in full sun is dead, and a panel with a cracked face is dying even if it still produces something today. Confirm the panel voltage matches your system, 6-volt panel for a 6-volt feeder, and never pair a solar panel with non-rechargeable batteries. If the used feeder has no panel at all, adding one is a genuine improvement, but price it as an addition, not as a repair, and do not let it distract you from a dead timer or motor that matters more.
✅ Pros: Reduces battery swaps on remote feeders; keeps a healthy battery healthy rather than rescuing a dead one; a clean addition to a sound used feeder.
❌ Cons: Cannot revive a sulfated or swollen battery; a cracked or dead panel is a replacement cost, not a cosmetic flaw; voltage must match the system.
Verdict: Buy the feeder with a working panel as a bonus, and buy a feeder without one if the rest of the system is sound. Do not pay a premium for a cracked or untested panel. Check Price on Amazon →
7. Moultrie Gravity Feeder Kit — Best for converting or repairing a gravity setup
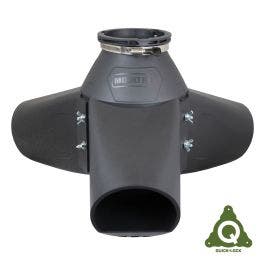
Not every used feeder problem is electronic. Gravity feeders fail mechanically: ports crack, heads wobble, sleeves jam, and lids stop sealing. A gravity feeder kit addresses the working end of a gravity system, and it is also the route some owners take when converting or rebuilding a feeder around a sound hopper. On inspection, check each port and sleeve for cracks and free movement, check the head-to-hopper seal, and check that the kit’s parts match your hopper’s neck and mounting. A gravity kit that does not fit your hopper is not a bargain at any price, and a gravity head that wobbles on its neck will leak feed no matter how new it is. If the used feeder you are viewing is a gravity feeder with a damaged head but a sound hopper and frame, this kit is the repair that decides the deal.
✅ Pros: Fixes the parts of a gravity feeder that actually wear out; can rebuild a sound hopper into a reliable feeder; no battery, timer, or motor to fail afterwards.
❌ Cons: Fit is critical and model-specific; will not fix a cracked hopper or bent frame; a gravity system still needs a dry hopper and a level stance to feed evenly.
Verdict: A good repair when the hopper, legs, and lid are sound and only the gravity head or ports are damaged. Price the kit before you offer, and walk away if the hopper itself is cracked. Check Price on Amazon →
8. Boss Buck Shark Teeth — Best for a feeder that hogs and raccoons have already found
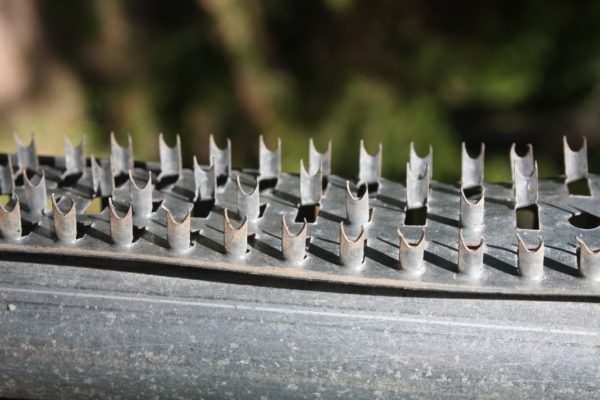
Shark Teeth are galvanized deterrent strips that mount on feeder legs to discourage hogs from rubbing or bumping the feeder and raccoons from climbing it. Boss Buck’s own description is practical: apply strips to the inside of legs to keep hogs from rubbing or bumping them, and to the outside to prevent raccoons from climbing, with two strips per leg recommended for best results, and with the strips formed to fit round as well as square legs. On a used feeder, look for the damage that makes this part necessary: legs polished smooth by hog rubbing, bent legs from hog strikes, chewed control boxes, and spinner plates that raccoons have learned to spin. If the used feeder you are viewing already has Shark Teeth, check that they are still sharp, still tight, and still covering the legs fully, because strips that have been bent flat or torn off are decoration. If it has none and the feeder shows varmint damage, price a set into your offer, because the damage will repeat without protection.
✅ Pros: Addresses the cause of repeat damage, not just the damage itself; fits round and square legs; a one-time addition that protects every other repair you make.
❌ Cons: Will not repair legs that are already bent or welds that are already cracked; strips must be installed fully, two per leg, to work as described; sharp edges demand gloves during installation.
Verdict: Add to any used feeder that will sit where hogs or raccoons are active, and treat a feeder with heavy varmint damage and no protection as a feeder that needs both repair and protection, priced together. Check Price on Amazon →
9. Moultrie Feeder Feet Gen 2 — Best for a feeder that rocks, tilts, or sinks
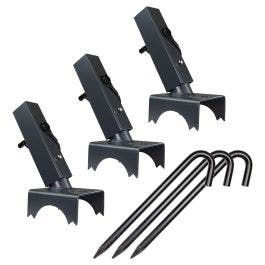
Feeder feet look trivial and behave critically. They spread the load of a full feeder, stop legs sinking into soft ground, and keep the feeder level, which keeps gravity ports feeding evenly and broadcast feeders throwing symmetrically. Boss Buck’s assembly guidance makes the same point from the manufacturer’s side: foot pads are strongly recommended to protect feeders from sinking, and anything that prevents sinking and keeps the feeder level will work. On inspection, count the feet, check each one for cracks and wear, and push the feeder from the side to feel whether it rocks. A feeder missing one foot will tilt toward the missing corner, and a feeder missing all its feet has been sinking a little further with every rain. Feet are a cheap part with an expensive absence, so they belong on every inspection sheet and every worksheet, even when the rest of the feeder looks perfect.
✅ Pros: Cheap protection against tilting, sinking, and uneven feeding; easy to fit; extends the life of legs by keeping them out of wet soil.
❌ Cons: Fit must match your leg type; feet will not straighten a leg that is already bent; a feeder that rocks because a weld is cracked needs welding, not feet.
Verdict: Always price missing feet into a used-feeder offer. They are the smallest line on the worksheet and the easiest reason a good feeder feeds badly. Check Price on Amazon →
10. Moultrie Hog Light — Best for a feeder site where hogs visit after dark
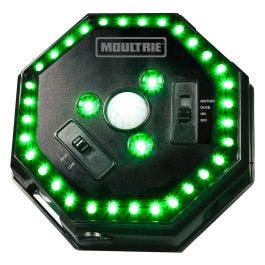
A hog light is an accessory, not a repair, and it belongs in this guide for a specific reason: it changes how you judge a used feeder’s site, not just the feeder. If hogs are visiting the feeder at night, they are also rubbing, bumping, and stressing the legs, the control box, and the hopper, and the damage you see on inspection is the visible part of a pattern that will continue. A light that lets you see and manage that night-time activity is useful, but it is not a substitute for Shark Teeth, feet, and a sound frame. On a used feeder, treat a hog light as a bonus if one is included and working, and as an optional addition if it is not. Never let an accessory distract you from a structural or electrical failure, and never pay a premium for a light on a feeder whose timer does not work.
✅ Pros: Useful night-time visibility at a hog-active site; a genuine bonus when included and working; pairs with physical protection rather than replacing it.
❌ Cons: An accessory, not a repair; adds nothing to feed delivery or feeder reliability; check compatibility and power requirements before buying.
Verdict: Nice to have, never a reason to buy a bad feeder. Price it separately from the feeder’s repair total, and only after the feeder itself passes inspection. Check Price on Amazon →
The repair-cost worksheet: repair vs. replace
This is the section that turns an inspection into a price. Copy the worksheet, fill it in at the feeder or immediately afterwards, and do not make an offer until every line has either a current checked price or a zero with a reason. The rule is simple and unforgiving: the true cost of a used feeder is the asking price plus every missing or damaged part plus transport plus the value of your time to clean and repair it. If that total is close to or above the price of a comparable new feeder, the used feeder is not a deal. It is a new feeder with extra steps and no warranty. Sellers sometimes react to this arithmetic as if it were an insult. It is not. It is the same arithmetic any buyer should do for any used machine, and a seller with a fairly priced feeder will not be threatened by it.
| Worksheet line | Your entry | How to fill it in |
|---|---|---|
| Asking price | ______ | The seller’s price, not your hoped-for price. |
| Motor (if failed or untested) | ______ | Check the current price of a voltage- and fit-matched motor, for example the Wildgame 12V Motor for 12-volt systems. |
| Timer (if failed or untested) | ______ | Check the current price of the brand-matched timer, for example the Moultrie Timer III or the Wildgame Trophy Hunter Timer. |
| Spinner plate and funnel kit (if bent, cracked, or missing) | ______ | Check the current price of the Moultrie Spinner Plate & Funnel Kit for compatible Moultrie kits. |
| Battery (if dead, swollen, or untested) | ______ | Check the current price of a voltage- and terminal-matched battery, for example the Power-Sonic PS-640 F1 battery for 6-volt systems. |
| Solar panel (if cracked, dead, or missing and wanted) | ______ | Check the current price of a voltage-matched panel, for example the Moultrie 6V Solar Panel for 6-volt systems. |
| Gravity kit (if gravity head or ports damaged) | ______ | Check the current price of the Moultrie Gravity Feeder Kit for compatible gravity setups. |
| Varmint protection (if damaged or missing) | ______ | Check the current price of Boss Buck Shark Teeth if hog or raccoon protection is needed. |
| Feeder feet (if missing or cracked) | ______ | Check the current price of Moultrie Feeder Feet Gen 2 for compatible feeders. |
| Hardware, lid latch, brackets, mounting plate | ______ | Price the model-specific hardware package if available; do not assume generic bolts will fit. |
| Cleaning supplies and touch-up paint | ______ | Cleaning solution, brushes, and paint for surface rust, if the hopper needs it. |
| Transport (fuel, trailer, helper) | ______ | Real cost of getting a large feeder home, not zero because you own a truck. |
| Your repair time (hours × what your time is worth) | ______ | Be honest. A Saturday spent rebuilding a feeder is a cost even if no money changes hands. |
| TRUE COST TOTAL | ______ | Compare this total to a comparable new feeder before offering. |
Two habits make this worksheet work. First, price parts at the time you buy, not from memory and not from this guide, because parts prices change and a price remembered from last season is not a price. Second, treat “untested” as “failed” on every line. If the seller would not let you test the timer, the timer line gets a price. If the battery was not tested under load, the battery line gets a price. This feels harsh, and it is meant to: the seller is asking you to accept the risk of the untested part, and the only fair way to accept risk is to price it. If the part turns out to be healthy after all, you have a pleasant surprise and a spare. If it turns out to be dead, you already paid for it in your offer, and the deal still makes sense.
Repair vs. replace: how to read the comparison
| Situation found on inspection | Repair path | Replace path (buy new instead) | Which usually wins |
|---|---|---|---|
| Dead battery only; everything else passes | One battery; feeder returns to service immediately | A whole new feeder for a consumable part | Repair, clearly |
| Dead timer only; motor and hopper pass | One brand-matched timer; reprogram from the manual | A whole new feeder for one electronic part | Repair, if the timer is still available |
| Bent spinner plate and funnel only | One plate and funnel kit; even throw restored | A whole new feeder for a wear part | Repair |
| Dead battery plus dead timer plus worn motor | Three major parts plus diagnosis time; feeder still has a used hopper | A new feeder with warranty and a known history | Replace, unless the hopper is exceptional |
| Cracked hopper or rusted-through frame | No reliable repair; patches fail under a full load | A new feeder | Replace, always |
| Chewed wiring through the harness | Full assembly replacement on many kits, if available at all | A new feeder | Replace, unless the assembly is orderable and cheap |
| Gravity head damaged; hopper and legs sound | One gravity kit; no electronics involved | A whole new gravity feeder | Repair |
| Missing feet, latch, and hardware | Small parts plus an hour of fitting | A whole new feeder for small parts | Repair, but price every small part first |
| Model unidentifiable; manual unavailable | Guesswork parts ordering with returns and delays | A new feeder with a manual and support | Replace |
| Multiple structural plus electrical failures | A rebuild that costs more in parts and time than the feeder is worth | A new feeder | Replace |
Read that table as a decision rule, not as a suggestion. One failed replaceable part on a sound feeder is a repair. Two failed major parts plus a used hopper is a judgment call that usually goes to replacement once you add transport and time. Any structural failure, a cracked hopper, a rusted-through frame, a cracked weld that carries load, is a replacement, because structure is not a part. It is the feeder. And any feeder you cannot identify or cannot find a manual for is a replacement, because you cannot maintain what you cannot identify, and a feeder you cannot maintain will fail again at the worst time. Apply the worksheet first and the table second, and let the numbers, not the seller’s enthusiasm, decide.
When to walk away
Walking away is a skill, not a failure, and it is the skill that saves used buyers more money than any other. The following are walk-away conditions, not negotiation points. If any one of them applies, thank the seller, leave, and keep looking. Do not try to price your way out of a walk-away condition, because the condition is not about price. It is about a feeder that cannot be made reliable at any price you should pay.
Walk away if the seller will not let you test the feeder. A refusal to test is not a quirk. It is information. A feeder that works can be shown working in two minutes with a battery and a test button. A seller who will not show it working either knows it does not work or does not want you to discover what does not work, and both reasons lead to the same decision. The same applies to a seller who will only show you a video of the feeder working “last season.” Last season is not a test. Today is a test. Walk away if the model cannot be identified and no manual can be found. Walk away if the hopper is cracked through, if the frame is bent or rusted thin, if a load-bearing weld is cracked, or if the hanging system is frayed or compromised. These are structural failures, and structural failures do not have a parts-order solution.
Walk away if the control box shows water damage, if wiring has been chewed in multiple places, or if the timer, motor, and battery are all failed at once. That combination means you are buying a hopper with a mystery attached, and the mystery will cost more than the hopper is worth. Walk away if the feeder smells strongly of mold or chemicals even after you have seen inside it, or if the hopper interior is stained through and pitted, because feed-contact surfaces that cannot be cleaned cannot be trusted with feed. Walk away if the feeder has been modified in ways you cannot verify, particularly modifications to wiring or to the hopper structure, because you are being asked to trust someone else’s workmanship without evidence. And walk away if the deal is pressured: a seller who demands a deposit before inspection, who insists on payment before testing, who wants to move the meeting to an unsafe location, or who creates false urgency with phantom buyers is running a pressure sale, and pressure sales exist to stop you inspecting. The marketplace safety guidance is consistent on this point: inspect before paying, do not pay before receiving the item, and cancel if anything feels unsafe or unclear.
There is one more walk-away that buyers resist because it feels wasteful: walk away when the true-cost total passes the new price, even if you like the feeder and have already driven out to see it. The drive is a sunk cost. The afternoon is a sunk cost. The feeder at a bad total is a future cost, and future costs are the ones that matter. A polite “thank you, but the repair total puts it past a new one for me” leaves the door open for the seller to call you back at a realistic price, and sellers often do, once the next three viewers walk away for the same reason. If they do not call back, you have lost nothing but a feeder you could not afford to own. That is a good outcome, and it is worth saying plainly, because the used market rewards patience more reliably than it rewards bargaining skill.
Where to buy used in the United States
Facebook Marketplace is where most used feeders in the United States change hands, because it is local, visual, and fast. Its strengths are also its risks: listings are written by individuals, condition descriptions are optimistic, and there is no return policy on a local cash pickup. Use Marketplace’s tools in your favor. Check the seller’s profile and history, read the listing carefully for what it does not say, save the listing and the conversation, and keep communication on the platform so there is a record. Search with several terms, because sellers list feeders under many names: “deer feeder,” “corn feeder,” “game feeder,” “tripod feeder,” “gravity feeder,” and brand names like Moultrie, Wildgame, and Boss Buck. Set alerts for your area, and be ready to move quickly on a good listing, but never so quickly that you skip the inspection. Speed matters on Marketplace. It does not matter more than testing.
Craigslist remains useful, particularly in rural areas where it has been the classifieds of record for years, and local classifieds, farm papers, feed-store bulletin boards, and hunting-lease networks all produce feeders that never appear online. The inspection discipline is identical wherever you find the feeder, and the safety discipline is identical too. Local papers and bulletin boards have one advantage: the seller is often someone whose name is known in the community, which is a mild but real accountability signal. They have one disadvantage: less written record, so write down the seller’s description yourself, photograph the feeder at inspection, and keep any messages you exchange. Auction sales and estate sales occasionally produce feeders, but they are the hardest venue for a careful buyer, because testing is often impossible and sales are final. At an auction, apply the walk-away rules strictly, and treat any feeder you cannot test as a parts donor priced accordingly, or do not bid.
Transport planning belongs in this section because it decides whether a good feeder stays a good feeder on the way home. Measure the feeder, or ask the seller for its dimensions, before you leave. A tripod feeder does not disassemble into a car trunk, a 55-gallon drum feeder needs a truck bed or trailer, and a gravity feeder with a wide head needs protection for its ports during transport. Bring straps, blankets or padding for the hopper, and a helper for loading. Empty the feeder completely before transport, and dispose of any old feed rather than hauling it home. Secure the feeder so it cannot shift, roll, or bounce, because a hopper cracked in transit is a hopper you bought broken. And plan the unloading: a full-size feeder is awkward, heavy even when empty, and easy to drop on a leg joint that was already the weakest part of the assembly.
Payment and paperwork deserve a short, firm paragraph. For local pickups, cash after inspection is the cleanest arrangement, and it is the arrangement that keeps your leverage where it belongs: with you, before money changes hands. Do not send deposits for a local item you have not inspected, do not pay through peer-to-peer apps that offer no buyer protection when the seller insists on moving off the platform, and do not accept a seller’s payment link or escrow site that you did not verify independently, because fake payment pages are a documented marketplace scam pattern. Get a simple written receipt, even a text message confirming the item, the price, and the date, and photograph the feeder loaded in your vehicle. None of this is suspicion for its own sake. It is the paper trail that protects you if the feeder turns out to be materially different from its description, and it costs you nothing to create.
After you buy: first clean and first test run
Do not fill a used feeder and hang it the day you bring it home. Give it a first clean and a first test run at home, where you have tools, light, and time, rather than discovering its problems at your lease with a truck full of corn and no parts. Start by emptying it completely and disposing of any old feed. Then wash the hopper with soap and water, scrub the funnel and the bottom seams where residue collects, and clean the spinner plate and any gravity ports. Extension guidance for feeder hygiene is consistent: remove debris with soap and water, clean with a bleach solution, and let the feeder dry fully before refilling. The National Deer Association describes a solution of one part household bleach to six parts water for this purpose, used after the soap-and-water step and followed by complete drying. Let the hopper dry in the sun with the lid open, because a feeder refilled while damp starts its next mold cycle immediately. While it dries, clean the battery terminals, check the wiring once more in good light, tighten every bolt to the manufacturer’s guidance without over-tightening threaded inserts, and fit any replacement parts you ordered, starting with the ones that affect feed delivery.
Then run a full test at home. Connect a known-good battery, set the clock, program two feed times, and let the feeder fire on its own schedule at least once, not just on its test button. Watch the throw pattern on a clear patch of ground, check that the run duration matches the setting, and confirm the program is still stored the next day. For gravity feeders, fill with a small test amount of clean, dry feed, check that each port feeds freely without spilling, and check that the lid seals and the feeder sits level on its feet. For any feeder, check the site rules before you install it: feeding and baiting rules vary by state, and some states restrict or prohibit feeding deer entirely, while others restrict it by season, location, or disease-management zone. This guide deliberately gives no state-by-state rules, because those rules change and a guide that guesses them will be wrong somewhere. Check your own state wildlife agency’s current regulations before you place any feeder, new or used, and follow them exactly. That single check protects you, the deer, and the investment you just made.
Finally, set a maintenance rhythm for the used feeder from day one, because a used feeder that is maintained lasts, and a used feeder that is neglected becomes the next person’s bad listing. Check the feeder every two to three weeks during active feeding seasons, inspect the battery and terminals, clear the spinner plate and funnel of buildup, check the lid seal, and look for new varmint damage. Clean the hopper before and after the hunting season, and whenever feed has sat through wet weather. Keep the manual with the feeder’s records, note the date you replaced each part, and keep the part numbers for your model where you can find them. A used feeder bought carefully, cleaned properly, and maintained on a schedule is not a compromise. It is a working feeder that cost less than a new one, and that is the whole point of buying used in the first place.
Resources
- Best Deer Feeders: 16 Top-Rated Models Compared
- Best Gravity Deer Feeders
- Best Tripod Deer Feeders
- Best Deer Feeder Timer
- Best Protein Deer Feeders
- Keep Raccoons, Hogs, and Pigs Off Your Deer Feeder
- Deer Feeder Solar Panel Guide
- Best Deer Feeder With Camera App Control
- Oklahoma State University Extension: Aflatoxins in Wildlife Feed
- National Deer Association: Aflatoxin in Corn
Frequently asked questions
Should I buy a used deer feeder that “just needs a battery”?
Only after you test it with a known-good battery of the correct voltage. “Just needs a battery” is the most common untested claim in used-feeder listings, and a dead battery hides dead timers and dead motors. Bring your own charged battery or a multimeter, run a full test cycle, and price a replacement battery into your offer unless the included battery passes a load test in front of you.
What is the first thing to check on a used feeder?
The hopper and frame, before any electronics. A cracked hopper, a bent leg, or a rusted-through frame cannot be fixed with a parts order, while a dead timer or battery can. If the structure fails, walk away no matter how good the electronics look.
How do I test a used feeder timer before buying?
Connect a known-good battery with the solar panel disconnected, set the clock, program a feed time a few minutes ahead, and wait for it to fire on its own. Then confirm the program is still stored. A timer that only fires on its test button, or that loses its program, is a timer that needs replacing.
Can I use a 12-volt part on a 6-volt feeder?
No. Match the voltage of every electrical part, motor, timer, battery, and solar panel, to the feeder’s system. Mixing voltages causes underperformance or damage, and a mismatched part is a part you will need to replace again.
Is a moldy hopper a deal-breaker?
Not always, but treat it seriously. Empty the feeder, dispose of the old feed, wash with soap and water, clean with a bleach solution, and dry it fully before refilling, following extension guidance. If the interior stays stained, pitted, or sour-smelling after cleaning, the feed-contact surfaces are damaged and the feeder should be priced as untrustworthy or passed over.
What parts should I price before agreeing a price?
At minimum: the battery, the timer, the motor, the spinner plate and funnel kit, the solar panel if fitted or wanted, feeder feet, and any missing hardware or varmint protection. Use the repair-cost worksheet in this guide, price each part at its current checked price, and add the total to the asking price before you offer.
Are used gravity feeders safer buys than used broadcast feeders?
They have fewer electrical failure points, since there is no timer, motor, or battery to fail, but they have their own risks: cracked ports, damaged gravity heads, poor lid seals, and legs that let the feeder sit unlevel. Inspect the ports, head seal, lid, and stance with the same care you would give a broadcast feeder’s electronics.
Should I trust a used feeder with no manual?
Only if you can find the manual online for that exact model before you buy, and save a copy. Timer programming, battery type, and replaceable parts all vary by model. A feeder with no model label and no available manual is a feeder you cannot maintain, and that is a walk-away unless it is priced as a parts donor.
Is it legal to feed deer where I live?
It depends on your state, and sometimes on your county, season, and disease-management zone. Feeding and baiting rules vary widely across the United States and change over time, so this guide gives no state-by-state rules. Check your own state wildlife agency’s current regulations before placing any feeder.
How do I stay safe buying a feeder on Facebook Marketplace or Craigslist?
Meet in a public, well-lit location when possible, bring someone with you, tell someone where you are going, keep communication on the platform, inspect and test the feeder before paying, and do not send deposits for an item you have not inspected or pay through unverified off-platform links. Cancel if anything feels unsafe or unclear.
What does varmint damage tell me about a used feeder?
It tells you the feeder’s site has active raccoons or hogs, and that the damage will repeat without protection. Check legs for rubbing and bending, the control box for chewing, and the spinner plate for spin damage. Price protection such as Boss Buck Shark Teeth into the deal alongside the repairs, because fixing damage without preventing it is a temporary fix.
When is a used feeder not worth it at any price?
When the hopper is cracked through, the frame is bent or rusted thin, the wiring harness is chewed through, the model cannot be identified, or the true-cost total, asking price plus parts plus transport plus your time, passes the price of a comparable new feeder. In each case the honest move is to walk away and keep looking.
Final verdict
The best used deer feeder is not the cheapest one, the closest one, or the one with the most enthusiastic listing. It is the one whose hopper and frame are sound, whose timer fires on schedule, whose motor spins smoothly, whose spinner throws evenly, and whose missing parts you priced before you offered. Buy that feeder, clean it properly, fit the parts it needs, and maintain it on a schedule, and it will serve you for seasons at a fraction of new cost. Pass on the feeder that fails structure, that cannot be tested, that cannot be identified, or whose true-cost total passes new, and you will have saved more money by walking away than any bargain ever saved a buyer who stayed. Check the current prices of the replacement parts linked in this guide at the time you buy, bring your inspection sheet and your multimeter to every viewing, and let the feeder prove itself before your money moves. That is how you buy used well.
Last updated: October 25, 2026.
Products mentioned in this guide
Wildgame Innovations 12V Replacement Motor
Check Price on Amazon →Confirm price and availability on AmazonMoultrie Spinner Plate & Funnel Kit
Check Price on Amazon →Confirm price and availability on AmazonMoultrie Universal Digital Timer III
Check Price on Amazon →Confirm price and availability on AmazonWildgame Innovations Trophy Hunter Digital Timer
Check Price on Amazon →Confirm price and availability on AmazonPower-Sonic PS-640 F1 6V Feeder Battery
Check Price on Amazon →Confirm price and availability on AmazonMoultrie 6V Feeder Solar Panel
Check Price on Amazon →Confirm price and availability on AmazonMoultrie Gravity Feeder Kit
Check Price on Amazon →Confirm price and availability on AmazonBoss Buck Shark Teeth Varmint Guard
Check Price on Amazon →Confirm price and availability on AmazonMoultrie Feeder Feet Gen 2
Check Price on Amazon →Confirm price and availability on AmazonMoultrie Feeder Hog Light
Check Price on Amazon →Confirm price and availability on AmazonAs an Amazon Associate, we earn from qualifying purchases.