
Deer Feeder Solar Panel: 7 Smart 6V & 12V Buying Checks
The right deer feeder solar panel starts with your feeder’s battery and charging system—not the biggest panel or the lowest price. A compatible solar accessory can make a remote feeder easier to maintain. The wrong connector, an aging battery, a shaded mounting position or a damaged cable can leave you driving back to the property anyway.
This guide helps you choose between 6V and 12V options, compare documented products, and work through a feeder battery that keeps losing charge. It draws on manufacturer information and the owner reports in our research workbook. We have not performed hands-on panel tests, and our recommendations are based on compatibility and documented information rather than a measured “best performance” ranking.
Affiliate disclosure: As an Amazon Associate I earn from qualifying purchases. Amazon buttons open model-specific search results using our affiliate link. Confirm the exact voltage, SKU, connector, seller and return terms before buying. Manufacturer and support links are included so you can check fit first.
Research checked: October 8, 2026. Product designs and seller listings can change. Manufacturer photographs below are product illustrations, not photographs of our own installations.
Quick answer: which deer feeder solar panel should you buy?
Choose a solar charging accessory that your feeder manufacturer approves for your exact battery voltage, battery chemistry and control unit. A panel sold for compatible 6V feeder systems is the starting point for a 6V setup; a 12V system needs an approved 12V charging solution. Then verify connector shape, polarity, charging arrangement, cable reach and mounting hardware. A “6V/12V” listing needs its own setup instructions: do not assume it automatically detects your battery.
For a Moultrie system, identify both the feeder kit and the panel SKU before ordering. For Wildgame Innovations, the manufacturer lists separate Edrenaline 6V and 12V products. Field & Stream offers a retailer-listed 6V/12V panel, but the correct voltage-selection procedure should be confirmed before installation. If your current battery cannot power the feeder after a proper charge, investigate the battery and feeder first rather than immediately buying a second panel.
- Identify battery voltage and chemistry
- Confirm an approved panel SKU
- Check connector and cable reach
- Plan mounting and protection
- Compare sellers and return terms
Uncertain at any step? Confirm fit with manufacturer support before buying.
Seven smart checks before buying
- Photograph the battery label and feeder-kit model number.
- Read the manual’s solar-accessory and battery requirements.
- Compare the exact panel SKU and connector with the approved setup.
- Measure the intended cable route, including service access.
- Check seller identity and the selected product variation.
- Read return terms and confirm whether a battery is included.
- Plan the approved installation and initial operation check.
If those seven checks pass, open the matching purchase link. If one remains unclear, use the manufacturer-support link first. A brief compatibility check is more useful than an impressive-looking panel that cannot connect to your feeder.
What a solar panel changes—and what it cannot fix
A battery-powered spin feeder needs stored energy when the motor runs. Solar charging adds energy during suitable daylight; it does not make the battery optional unless the manufacturer describes a different, self-contained power system. Think of the panel, battery, timer and motor as one chain. Every link needs to work for the feeder to run dependably.
This distinction matters on a hunting lease where a missed feeding cycle can go unnoticed for days. Seeing a charging icon or a bright sunny afternoon is encouraging, but it is not the same as confirming that the motor completes its scheduled run. You still need to check the battery’s condition, the feeder’s operation and the physical installation.
A solar accessory also does not solve a blocked spinner, a motor problem, a damaged timer or an empty hopper. If the feeder has stopped distributing corn, separate the electrical problem from the feed-delivery problem before shopping. Our deer feeder timer programming guide covers the schedule side, while the 6V and 12V feeder battery guide explains battery selection.
For some properties, avoiding an electrical system entirely is a better fit. A gravity feeder generally uses a different dispensing arrangement from a timed spin feeder. If simplicity matters more than controlling feed times, compare the systems in our spin versus gravity feeder guide before buying accessories for a setup you may replace.
Deer feeder solar panel compatibility: 6V versus 12V
Read the battery label before reading the sales page
Start with the equipment you actually own. Open the battery compartment only as the feeder manual permits, make the setup safe for servicing, and locate the battery’s printed voltage and chemistry. Write down the feeder-kit model separately from the barrel or hopper name. Two feeders that look alike can use different electrical kits.
The voltage label is a useful first filter, but it is not the whole compatibility decision. A rechargeable battery must be supported by the charging accessory. Power-Sonic’s charging guidance explains why choosing a charger for the battery chemistry matters. Changing battery chemistry because another battery fits the compartment is not an automatic upgrade. If the manual specifies a particular battery type, use that requirement when comparing products and ask support about alternatives.
Avoid using a connector that happens to fit as proof of electrical compatibility. Physical fit, polarity and charging suitability are different checks. A listing for “deer feeder solar panels” can show multiple voltage options, replacement cables or a complete power unit under similar pictures. Read the selected variation immediately before checkout, especially when a marketplace page groups several products together.
A bigger voltage number is not a better upgrade
A 12V panel is not a performance upgrade for a 6V system simply because the number is larger. Charging equipment must be appropriate for the battery and the feeder’s design. Do not connect an unapproved panel and hope the timer will regulate it. If you want to change a feeder from 6V to 12V, treat that as a manufacturer-approved system conversion, not a one-part swap.
The same caution applies in the other direction. A product intended for a 6V charging system should not be assumed capable of maintaining a 12V battery. Solar-product names usually describe the intended system class; they do not supply a complete explanation of open-circuit voltage or charging regulation. Use the accessory manual rather than interpreting a product title as a wiring specification.
| Your setup | Starting shortlist | Must verify |
|---|---|---|
| 6V rechargeable system | Approved 6V charging accessory | Chemistry, control-unit support, connector and polarity |
| 12V rechargeable system | Approved 12V charging accessory | Same checks; do not substitute a 6V accessory |
| 6V/12V accessory listing | Only after reading its setup instructions | Voltage configuration, supported battery and connection |
| Unknown or modified setup | Find model documentation first | No purchase or wiring decision based on appearance |
Match the connector, polarity and battery requirements
Before ordering, compare close-up photographs of the charging plug and the feeder’s intended solar port. Check whether the approved accessory connects through an external port or through another manufacturer-specified arrangement. Do not confuse a battery terminal with a solar-input port. Take a clear photograph so support can identify what you are looking at without guessing from a brand name.
For battery terminals, shape and size matter as much as they do for plugs. A panel supplied with clips, spade connections or a molded plug may not be suitable for every battery and control box. We do not recommend cutting plugs, splicing cables or making improvised adapters to achieve fit. Ask for the approved accessory or an explicitly supported adapter instead.
Also check the cable path with the box closed. A connection that fits on the workbench may be unreachable once the panel is mounted. Allow room to service the battery without pulling on a connector. Keep the installation within the manufacturer’s instructions, including any requirements for cable entry, strain relief and weather protection.
Product comparison: four options worth checking for fit
These are compatibility-based buying options, not winners from a head-to-head field test. The table separates what the source establishes from what you must still confirm. We intentionally omit unverified wattage figures, live Amazon prices and seller ratings. Current price and availability are shown by the retailer when you open its listing.
| Option | Documented identity | Fit question | Shopping link |
|---|---|---|---|
| Moultrie 6V Deluxe | 6V; MFHP-12349 | Is this SKU approved for your Moultrie kit? | Compare Amazon options |
| Wildgame Edrenaline 6V | 6V; WGI-WGISO0010 | Is your 6V control unit supported? | Compare Amazon options |
| Wildgame Edrenaline 12V | 12V; WGI-WGISO0003 | Is your 12V control unit supported? | Compare Amazon options |
| Field & Stream 6V/12V | Retailer item 253294499 | How is the supported voltage setup configured? | Check retailer listing |
Moultrie 6V Deluxe: a candidate for an approved Moultrie setup
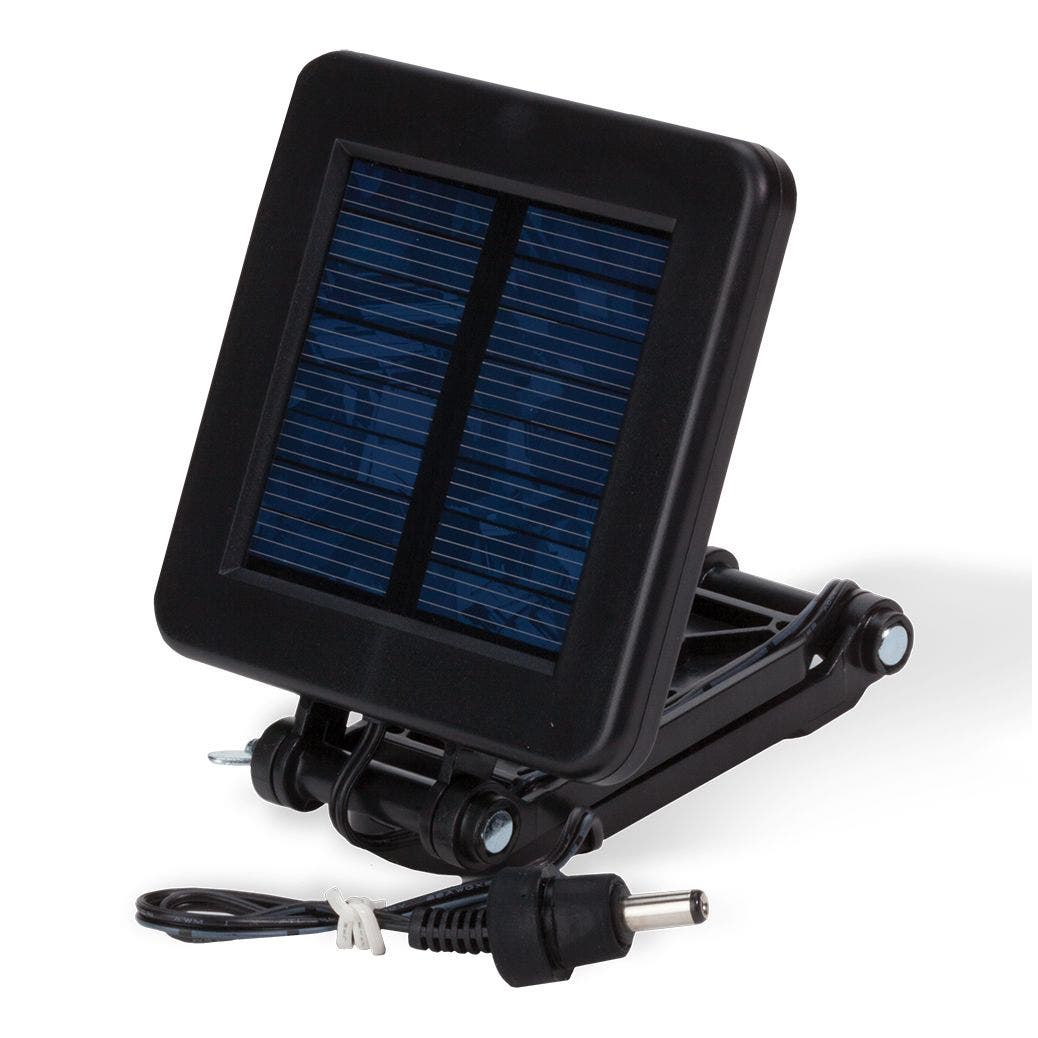
Moultrie’s support article identifies the 6V Deluxe Solar Panel as MFHP-12349. Use that number to distinguish it from other Moultrie solar accessories. The official setup page provides installation illustrations and directs owners to identify their device before proceeding. This makes the support page a better starting point than a generic marketplace search.
This is a sensible shortlist option when Moultrie confirms it is the correct accessory for your feeder kit. It is not a blanket recommendation for every Moultrie product, trail camera or battery. The resource workbook recorded conflicting retailer wording about camera compatibility, so this guide does not infer camera fit or a verified panel wattage from those listings.
Before buying, ask whether the exact SKU supports your feeder-kit model and battery, and confirm the supplied connector and cable reach. If you are replacing an older panel, compare the current version with what is already installed rather than assuming the cable and bracket are unchanged. Keep the purchase record and packaging until the fit check is complete.
Choose it when: your Moultrie kit’s documentation or support team confirms MFHP-12349. Pause when: the seller omits the SKU, shows a different connector or describes a camera accessory rather than the feeder panel you need.
Confirm the exact voltage, model and connector on the selected listing. Prices and availability are provided by the seller.
Wildgame Edrenaline 6V: the named 6V control-unit option
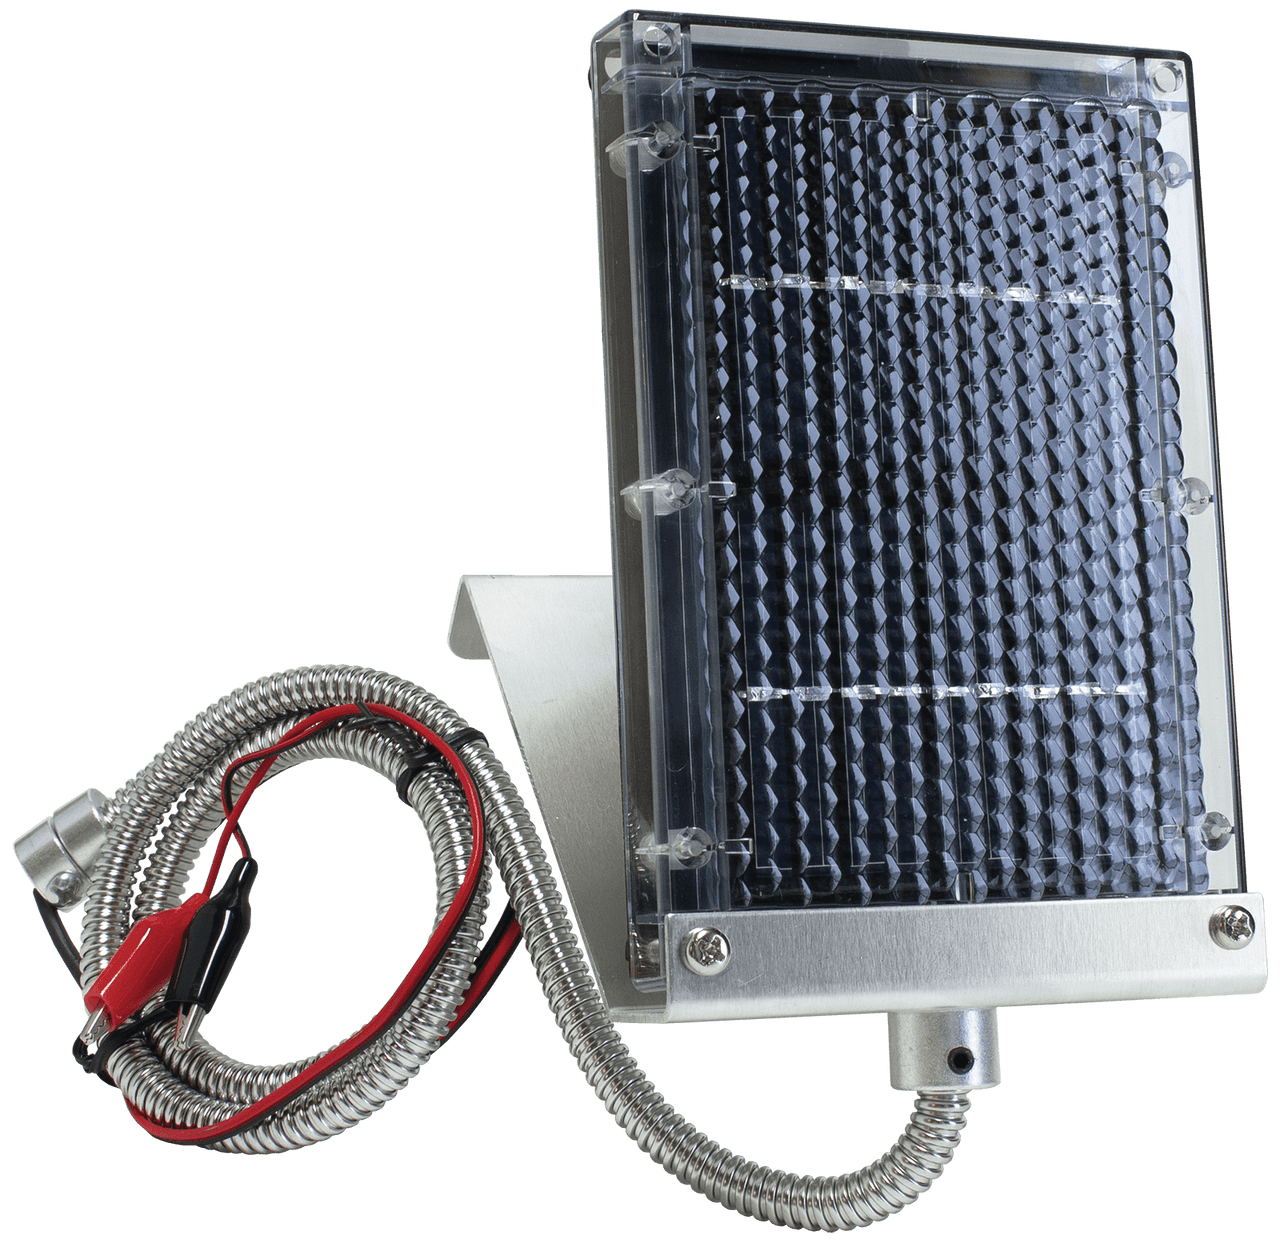
Wildgame Innovations identifies its 6V Edrenaline Solar Panel as WGI-WGISO0010 and lists compatibility with 6V power control units. The manufacturer describes an adjustable mounting arrangement and amorphous-silicon solar technology. Those are documented product descriptions, not evidence that this panel will outcharge another model in your particular location. See the official 6V product page before comparing sellers.
The useful buying distinction is its stated 6V application. If you already own a compatible Wildgame control unit, staying with an approved accessory can simplify the fit question. Still check your particular unit’s manual, connector and installation requirements. The brand name alone does not establish fit across every generation of feeder kit.
For a shaded site, do not assume the technology label removes the need for useful sunlight. Evaluate the mounting position first and ask the manufacturer about the supported setup. A panel that mounts securely and reaches the intended connection is a stronger purchase than a loosely described “universal” alternative with unclear instructions.
Choose it when: your 6V control unit supports this exact accessory. Pause when: your battery is 12V, the product variation is unclear, or support cannot confirm the connection arrangement.
Confirm the exact voltage, model and connector on the selected listing. Prices and availability are provided by the seller.
Wildgame Edrenaline 12V: keep the 12V version separate
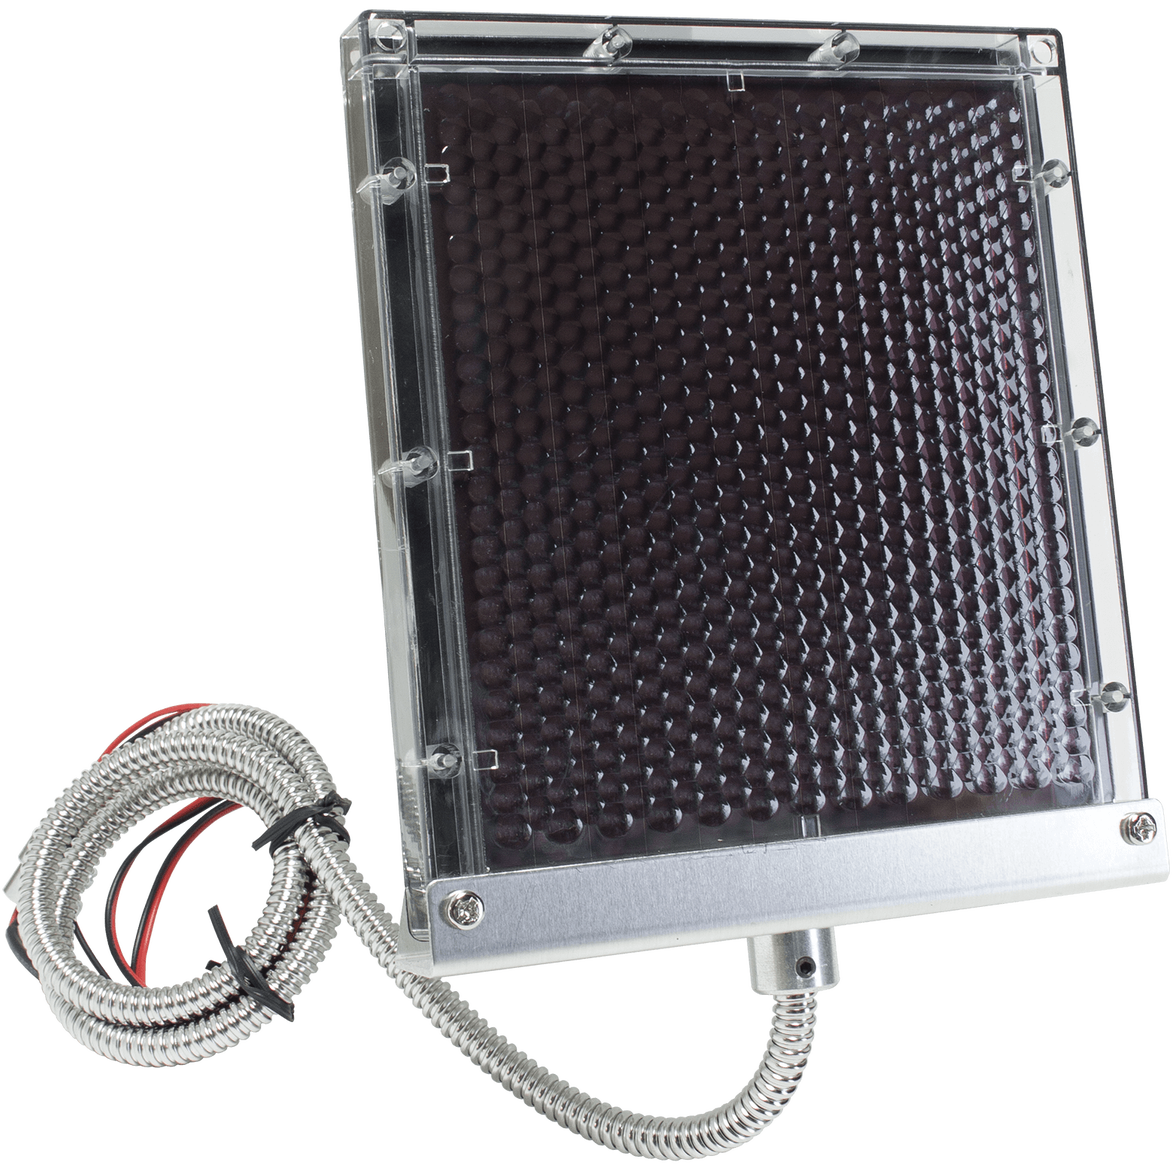
The manufacturer separately lists the 12V Edrenaline Solar Panel, WGI-WGISO0003, for compatible 12V power control units. It also describes an adjustable angle and amorphous-silicon construction. Keeping its SKU separate from the 6V model avoids one of the easiest ordering mistakes: buying a similar-looking panel in the wrong voltage version. Check the official 12V product page.
This option belongs on the shortlist for a confirmed compatible 12V setup. It does not belong on a 6V feeder because someone describes 12V as “stronger.” A complete, correctly matched installation matters more than comparing the voltage numbers in isolation. If you are replacing a panel, verify the old and new part numbers instead of relying on the photograph.
A U.S. buyer ordering before a weekend property visit should also check delivery timing and returns. Receiving the right brand but the wrong variation can waste the trip just as effectively as receiving nothing. Save a photograph of the feeder label to your phone and compare it with the item in the cart before finalizing the order.
Choose it when: your supported 12V control unit requires this accessory. Pause when: the listing mixes 6V and 12V variations without clearly showing which one is selected.
Confirm the exact voltage, model and connector on the selected listing. Prices and availability are provided by the seller.
Field & Stream 6V/12V: verify the dual-voltage setup
Tractor Supply lists the Field & Stream 6V/12V Amorphous Solar Panel for Game Feeders, item 253294499, for 6V and 12V battery systems. Its listing describes mounting hardware, a protective conduit, a glass cover and an aluminum frame. The retailer product page is the place to check current availability and delivery restrictions.
The important unanswered question for a buyer is how the approved 6V or 12V arrangement is configured. We have not verified a voltage-selection procedure from a manual, so we do not call it automatic or provide guessed connection steps. Obtain the instructions and confirm the connector and battery requirements before installation.
Treat this as an option to investigate if you want a retailer-supported dual-voltage product and can verify its setup. An accessory described as broadly compatible still needs to fit your battery, control box and mounting position. If the instructions do not resolve your specific combination, choose a documented alternative rather than experimenting on the feeder.
Confirm the exact voltage, model and connector on the selected listing. Prices and availability are provided by the seller.
What actual owners report about deer feeder solar panels
Owner reports are valuable because they show the ordinary problems a specification table misses. They do not establish failure rates, controlled comparisons or guaranteed battery life. We use them to identify checks worth making before purchase and installation, and we keep each report’s limits attached to the claim.
Moultrie review patterns: cable reach, instructions and battery uncertainty
The Walmart review page displays Moultrie-syndicated feedback. One March 2025 reviewer reported easy connection with a cable-reach adjustment. Another reported missing instructions. An April 2025 reviewer described raccoon damage to an earlier cable. A January 2025 reviewer reported over two years without manual charging; another owner described falling charge readings despite solar recovery and suspected the battery. A positive rating submitted before use was excluded from our performance evidence.
These are individual accounts, not separate Walmart and Moultrie tests. Their practical value is the shopping checklist they suggest: verify reach, get instructions and investigate the battery before assigning blame. We do not turn the long-runtime report into a promise for a different battery, feeding schedule or property.
Field & Stream reports: installation deserves a closer look
On the Tractor Supply page, accessible reviews mention extra mounting hardware, making a bracket, awkward cable-clamp access and a successful model-specific connection. One reported charging over a two-week period. Some display verified-owner labels; one also displays a sweepstakes indicator. Relative review dates were shown, so we do not substitute invented exact dates.
The takeaway is to check the installation instructions and included parts before traveling to the feeder. These reports do not validate improvised wiring or prove season-long performance. We have not reproduced the reported setups, and a custom workaround described by a reviewer should not override the manufacturer’s instructions.
Forums: useful problems, older equipment
The workbook records an older TexAgs discussion in which an owner associated lost charging with a fallen, mud-covered panel after hog damage. It also records a Long Range Hunting thread where replies identified meter-connection and range errors after implausible voltage readings. The latter involved a camera application using feeder-related batteries, not a controlled feeder test.
These examples support two questions to ask during diagnosis: is the panel still mounted and exposed, and was the measurement made correctly? Their age and different setups limit what they tell us about products sold today. Neither is a reason to publish a universal durability claim or an exact expected meter reading.
Why this guide does not invent YouTube or Facebook experience
The resource workbook contains YouTube, Reddit and Facebook leads whose videos, full comments or posts were not accessible for verification. They are useful research leads, but they are not cited here as watched tests or verified owner conversations. We will add specific findings if the underlying material can be reviewed and attributed accurately.
When you check a video yourself, look for the model labels, the battery used, the weather, the duration of the test and any commercial disclosure. A short demonstration may establish that a connector fits; it rarely establishes how the system behaves through several cloudy weeks. Match the claim to what the demonstration actually shows.
How to choose without wasting money
Buy the charging accessory your system supports
Begin with the approved part, then compare sellers. This reverses the common shopping mistake of choosing the cheapest panel and trying to make the feeder accommodate it. A small price difference can be less important than avoiding an incompatible plug, an unsupported battery or a second drive to the property.
Keep a simple purchase note: feeder kit, battery voltage and chemistry, approved panel SKU, connector, cable reach and mounting position. If a seller cannot answer a question that affects fit, check the manufacturer instead. Customer support can often give a much more useful answer when you supply the model number and a photograph rather than asking whether a panel works with “a deer feeder.”
Decide whether you need a panel, a battery or a complete feeder
If a properly charged, supported battery runs the feeder and the existing panel is physically damaged, a matched replacement panel may be the appropriate purchase. If the battery cannot support the motor after the approved charge procedure, assess the battery first. If the control kit is failing or parts are unavailable, compare the cost of repair with a replacement system.
Do not buy every accessory at once just because each is listed as commonly purchased together. A supported battery and charging accessory can be a useful pairing, but the case for replacing the timer or motor should come from the diagnosis. If you are starting fresh, our best deer feeders guide helps you compare complete feeder types before committing to a power system.
Judge value by your maintenance needs
A reader who lives ten minutes from a feeder has a different problem from a lease member who drives several hours. Write down your actual travel cost, time, access restrictions and how often you refill the hopper. Solar charging may reduce battery-related maintenance without eliminating the visits needed for corn, inspections and other upkeep.
For example, suppose an owner estimates a dedicated maintenance trip costs $25 and consumes two hours. That is an illustrative planning assumption, not a measured saving from any panel in this guide. If charging can be checked during the normal refill visit, a panel may save less travel than expected. If a proven charging problem causes extra trips, compatibility and dependable installation become more valuable.
Compare the total setup cost: panel, any approved bracket or cable, battery if required, shipping and time to install. Then compare that with the problem you are trying to solve. The goal is an appropriate purchase that improves your routine, rather than paying for features you cannot use or expecting a panel to make a feeder maintenance-free.
Installation planning: make the first property visit count
Prepare at home before mounting anything
Read the panel, feeder and battery instructions together. Confirm the parts in the package against the contents list, and test the physical fit using only the manufacturer’s approved procedure. Keep the feeder safely disabled for service. A clear workbench is a better place to discover a missing bracket or incompatible plug than a muddy lease road with limited daylight remaining.
Make a short checklist for the visit: approved tools and mounting parts, the instructions, a charged compatible battery if required, a phone with model photographs, and the contact information for support. Do not assume a general tool kit includes what the accessory requires. If instructions call for a particular sealing or mounting method, confirm that requirement before leaving rather than improvising later.
If your setup needs new holes or another modification, check that the manufacturer approves it and explains where it can be done. Avoid damaging hidden wiring, weather seals or the control box. We do not supply a universal drilling pattern because barrel shapes, electrical kits and panel mounts differ. A model-specific installation is the correct reference.
Choose a useful mounting position
Stand where the panel will sit and look for obstructions rather than judging the property’s sunlight from an open road. The hopper, tree canopy, stand, adjacent equipment and seasonal vegetation can affect the panel’s exposure. Take photographs at different times during an ordinary visit if you cannot tell how the shade moves.
Use the manufacturer’s orientation and mounting guidance, then inspect the actual installation over time. Do not publish or rely on a single universal tilt angle for every U.S. property. A hunting location in a wooded hollow presents a different exposure problem from an open pasture. The point is to give the supported panel a workable position without compromising access or cable protection.
Keep the mount secure and the connection serviceable. You should be able to refill the feeder and reach the control box without putting strain on the panel lead. A mounting position that looks tidy in a photo is less useful if opening the battery door pulls the connector loose. Check that the approved installation leaves enough room for normal maintenance.
Protect the cable without inventing a repair
Owner reports make cable protection a worthwhile purchasing question. Look for a product’s documented protection and an approved routing method, then examine the points near the connector and cable entry. A protected middle section does not automatically mean the exposed ends are protected, and no cable should be treated as animal-proof without supporting evidence.
Route and secure the cable as the instructions allow so it is not hanging loose, rubbing on a sharp edge or trapped by a lid. Do not cover connectors in a way that prevents their intended seal from working or makes inspection impossible. If a cable is chewed, cracked or exposes conductors, stop using the damaged accessory and ask about the supported replacement.
For the broader feeder setup, see our guides to keeping squirrels out of a deer feeder and keeping raccoons and hogs away. A charging accessory is only one part of managing animal damage around the feeder.
Confirm the whole feeder works after installation
After completing the approved installation, check the feeder’s normal operation according to its manual. Verify the timer settings, battery indication and a permitted motor test. Keep clear of the spinner and moving parts. Record the installation date, accessory SKU and any observations so that later troubleshooting starts with a known baseline.
Return for an early inspection instead of assuming the first successful test proves the setup is ready for months unattended. Look for loosened mounting parts, new cable contact points, dirt on the panel and changes in the feeder’s behavior. A small adjustment identified during a planned visit is easier to resolve than an unexplained failure during the season.
Deer feeder solar panel not charging? A practical diagnosis
Start by describing the actual symptom. “The solar panel is bad” is a conclusion, not an observation. Does the timer show a low battery? Does the motor start and stop? Has the scheduled run changed? Is the panel loose or dirty? A precise description helps support distinguish a charging problem from a battery, timer or mechanical problem.
| Observation | First area to check | Avoid assuming |
|---|---|---|
| Motor does not complete a run | Supported battery check and normal feeder diagnosis | A bigger panel will fix the motor or battery |
| Visible cable damage | Stop using damaged accessory; obtain approved replacement | A homemade splice restores the intended weather protection |
| Panel displaced or dirty | Approved mounting and cleaning procedure | The original position is still unchanged |
| Strange meter result | Meter manual and model-specific test procedure | An unexplained reading proves panel failure |
| Connector does not fit | Exact SKU and supported connection | Cutting the plug makes the electrical system compatible |
Step 1: inspect the installation before replacing parts
Look for physical damage and obvious changes since the feeder last worked. Check whether the panel has moved, the mounting has loosened or the cable has been pulled. Inspect the connection using the safe service procedure in the manual. A plug that looks seated from a distance can still deserve a closer inspection when the system behaves differently.
Check the panel face for contamination and the surrounding area for shade. Clean only as the product instructions permit, without abrasive methods or chemicals that could damage the surface or seals. If the panel is cracked, the housing is damaged or water has entered a part that should remain sealed, contact support rather than continuing to experiment.
Step 2: establish whether the battery can run the feeder
Follow the supported charge and battery-check procedure before testing whether solar maintenance is sufficient. A charger intended for the wrong chemistry or voltage is not a valid diagnostic tool. If the battery is swollen, leaking, unusually hot or otherwise damaged, stop using it and obtain guidance from the battery or feeder manufacturer.
After an approved charge, determine whether the supported battery can operate the feeder normally. If it cannot, a larger panel may not resolve the underlying problem. The next question is whether the battery, connection, timer or motor needs attention. Our feeder battery buying guide is the relevant companion if replacement is indicated.
Step 3: compare the operating schedule with your baseline
Record the number of daily feeding events and their programmed duration. Note whether those settings changed around the time the issue appeared. Do not assume that a system behaving well on one schedule will behave identically after the operating pattern changes. Also record whether another accessory has been connected to the same power arrangement.
Use the manufacturer’s limits and your intended feeding plan rather than arbitrarily shortening runs to hide a problem. A motor that struggles during a normal cycle may need diagnosis even if a shorter cycle makes the display look better. See our feeding-frequency guide for planning context, and keep electrical troubleshooting separate from the question of how often to feed.
Step 4: look for a repeatable charging trend
One display reading is a snapshot. Record observations under comparable conditions: date, weather, time, feeder behavior and any panel or connection changes. If the display is a percentage estimate, label it as such rather than treating it as a measured capacity test. This gives support something more useful than an isolated “100%” or “low battery” report.
If the system repeatedly loses the ability to run despite an approved, healthy battery and suitable installation, ask the manufacturer to guide the next test. Depending on the model, that may involve a supported panel test, a replacement lead or service to the feeder kit. Avoid replacing several parts simultaneously if you want to learn which change actually resolved the problem.
Step 5: use a meter only when you understand its procedure
The workbook’s meter-confusion example is a reminder to check the instrument before trusting an alarming result. If the manual calls for a voltage measurement, follow the meter’s voltage-measurement instructions and the equipment’s approved test procedure. Do not turn a voltage check into a guessed current test or put meter leads into unfamiliar sockets.
We do not provide a universal “good panel” voltage threshold because a panel measurement depends on the product and test conditions, and it is not interchangeable with a battery measurement. Ask support what to measure, where to measure it and what result applies to the exact accessory. If you are uncertain, a qualified person can perform the check without risking the equipment or producing a misleading diagnosis.
How much panel power do you need?
There is no verified universal wattage recommendation in this guide. The workbook contains conflicting or incomplete wattage information, and we have not measured these products under matched conditions. We therefore avoid a tidy but unsupported rule such as “every 6V feeder needs the same number of watts.” The approved accessory specification and your actual operating conditions are the starting point.
Panel output, useful daylight, battery condition and the feeder’s load all belong in the same discussion. A wattage number by itself cannot tell you how many unattended days your feeder will manage. Nor does a larger panel automatically solve a poor connection or make an unsupported battery suitable. Ask the manufacturer whether the proposed accessory is appropriate for your setup and usage.
Use a planning calculation as a question, not a promise
An illustrative energy calculation can help frame a support conversation. A hypothetical 2-watt panel operating at its rated output for four hours would produce 8 watt-hours before accounting for real-world losses. That is arithmetic, not a measured output from any product shown here, and it does not establish how much energy actually reaches the battery.
To assess whether a setup is adequate, you would need reliable information about the feeder’s energy use, actual charging behavior and battery requirements. We have not collected those measurements. The calculation is useful because it shows why “hours of daylight” and “panel wattage” cannot replace a complete system check. It is not a shopping specification or a claim about a specific panel’s performance.
Be cautious with bigger panels and extra devices
Adding a larger panel, an external controller or another powered accessory changes the system. Get approval for that arrangement rather than assuming a standard feeder input can accept whatever a generic solar kit supplies. Read the instructions for every component and confirm what regulates charging, what protects connections and which batteries the arrangement supports.
Do not share a feeder battery with a camera simply because both mention 6V or 12V. Camera power requirements and connection arrangements need their own verification. Our camera and app-control feeder guide covers that broader buying decision, but it does not make this panel comparison a universal camera-power guide.
A seasonal maintenance routine for U.S. properties
Before hunting season
Inspect the equipment while there is still time to obtain replacement parts. Confirm the battery’s supported charging procedure, check the panel and cable, and verify the programmed schedule. Photograph the labels if they have faded or are awkward to read. Save the relevant manuals where you can reach them offline at the property.
Walk through the refill and service routine after the panel is mounted. Check that another person who helps maintain the feeder can identify the correct connection and knows which parts should not be modified. On a shared lease, a simple record of the approved setup can prevent someone from substituting an incompatible battery or unplugging the wrong cable.
During ordinary refill visits
Combine the electrical inspection with visits you already make. Observe the mount, cable and panel face, check the timer and look for changes in operation. Record a problem when you see it rather than waiting until several people remember different versions of the issue. A dated photograph often communicates a damaged connector or shifted bracket more effectively than a long description.
Keep a supported spare battery or accessory only if your maintenance plan justifies it. A spare is useful when it matches the equipment and has been maintained correctly; an unknown battery left in the truck is not an assured backup. Label parts clearly so voltage versions and old replacements are not mixed together.
After storms, changes in shade or physical disturbance
Inspect when something around the feeder has changed. A fallen branch, moved barrel, animal impact or altered mounting position can affect an otherwise successful setup. Compare the current installation with your baseline photograph and restore it only using the approved procedure. If damage is present, assess it before running another test.
If a property becomes harder to access, revisit the maintenance plan rather than declaring the equipment unattended indefinitely. Solar charging does not remove the need to inspect feed condition, physical damage and the rest of the feeder. Consider whether your feeder type, capacity and service interval still match the way you can manage the property.
When the feeder is taken out of service
Follow the battery and feeder manufacturer’s storage instructions. Do not assume leaving the battery connected to an idle setup is the correct approach. Record what was disconnected or removed so the next season’s setup can be checked systematically rather than assembled from memory.
Keep the service log short enough that you will use it. Model numbers, installation date, observed operation, relevant weather and the action taken are sufficient for a practical starting record. The value comes from consistent entries, not from a complicated spreadsheet that no one updates.
| Visit / event | Record | Action |
|---|---|---|
| Initial installation | Models, date, battery and mounting photo | Complete approved setup and operation check |
| Normal refill visit | Panel, cable, timer and feeder observations | Address changes using the manual |
| Physical disturbance / storm | Damage and changes from baseline photo | Assess before another operation test |
| Problem repeats | Comparable readings and behavior | Give support the complete system details |
| Out of service | Storage steps and parts removed | Follow feeder and battery storage instructions |
Check local feeding rules before investing in a setup
Before buying a feeder or upgrading its power system, check the current requirements for your exact state, property type and location with the relevant wildlife agency. Use the agency’s current hunting regulations and disease-management information, not an old forum comment or a general statement about an entire state. A solar panel does not change the status of the underlying feeding or baiting activity.
For Texas, start with Texas Parks and Wildlife hunting information and its chronic wasting disease information. For another state, use that state’s official wildlife agency. This guide does not determine whether a particular feeder placement or hunting practice is legal; verify the applicable rules before operating it.
Frequently asked questions
Can I use a 12V deer feeder solar panel on a 6V battery?
Do not connect an unapproved 12V charging accessory to a 6V setup. Confirm the charging system with the battery and feeder manufacturer. A panel’s voltage class is not an invitation to experiment, and a plug that fits does not establish compatibility. Choose an accessory explicitly supported for the complete setup.
Will a solar panel run the feeder without a battery?
Do not assume so. For a battery-maintenance accessory, the battery remains part of the system. Some products may use a different self-contained power arrangement, so read the exact manual. This guide compares charging accessories and does not recommend operating a conventional battery-powered feeder with its battery removed.
Why does my battery still die with a solar panel connected?
Possible areas to investigate include battery condition, damaged or loose connections, cable damage, panel exposure, changed operating settings and the feeder itself. These are diagnostic categories, not a confirmed explanation for your unit. Start with the approved battery check and installation inspection, then ask support for a model-specific test if the issue continues.
Is a 6V/12V solar panel automatically compatible with both?
The listing alone does not establish the configuration procedure. Verify how the particular product supports each system, which battery types it accepts and how it connects. We have not confirmed the Field & Stream voltage-selection method from a manual, so we do not describe it as automatic. Obtain those instructions before installation.
Which deer feeder solar panel is best for a shaded location?
We have not conducted a matched shade test, so we cannot name a verified winner. Check the intended mounting position and ask the manufacturer about your setup. A technology label or a few positive reviews does not prove adequate charging in your shade conditions. If practical exposure cannot be achieved, consider another supported maintenance arrangement.
Do I need a charge controller?
That depends on the approved charging system. Some accessories incorporate a particular charging arrangement; other solar systems require additional components. Follow the manufacturer’s instructions for the actual panel, battery and feeder combination. Do not add or remove a controller based on a generic diagram that does not identify your equipment.
Can I use a lithium battery with an existing feeder panel?
Only if the complete combination is explicitly supported. Battery chemistry affects charging requirements, and fitting inside the box is insufficient. Verify the battery, charging accessory and feeder instructions together. If the documentation only supports a different battery type, ask the manufacturer before changing chemistry.
Are protected cables raccoon-proof?
Do not treat a protective cover or conduit as proof that animals cannot damage the cable. Check the documented protection, approved routing and exposed points near connectors. Inspect periodically. Owner reports make this a worthwhile buying consideration, but they do not establish a guaranteed animal-proof product.
Should I buy a new battery and solar panel together?
Buy both when the diagnosis or a new supported installation requires both. If the existing battery is healthy and approved, replacing it may be unnecessary. If the battery cannot run the feeder after the approved charge procedure, address that problem before expecting a panel to fix it. Match every replacement to the system requirements.
How long will the battery last with solar charging?
We cannot give a verified runtime for these products. It depends on the supported system, battery condition, operating pattern, installation and actual charging conditions. A long-runtime owner report is an individual experience, not a specification. Use the manufacturer’s guidance and keep a record of how your own installation behaves.
Where should I buy a replacement panel?
Choose a seller that clearly identifies the correct SKU and voltage variation, shows useful connector information and provides understandable return terms. Amazon links below are searches, so check the selected listing carefully. If the match is uncertain, the official manufacturer or an authorized retailer may offer clearer compatibility support.
How can I tell whether a video review is useful?
Look for exact model labels, a visible setup, described test conditions and a disclosure of commercial relationships. Match the claim to the demonstration: installation footage can help with physical fit but does not prove long-term charging performance. Avoid relying on comment summaries when the actual comments or their context cannot be checked.
Choose by your feeder model, then check the listing
If you have identified the battery requirements and approved panel, you are ready to compare sellers. Use the model-specific button, recheck the selected variation and keep the order details. If compatibility is unresolved, return to the support links rather than forcing a decision. A useful buying guide should help you avoid the wrong purchase as confidently as it helps you find the right one.
For a complete setup, compare our best deer feeders and then use the battery guide for the chosen control kit. If your current feeder works well, a correctly matched solar accessory may be the only change you need. Preserve the working parts and solve the actual maintenance problem.
Sources, evidence limits and updates
This guide uses the supplied improved resource workbook’s manufacturer references, accessible owner-report summaries and compatibility questions, with current manufacturer product pages rechecked during preparation. We did not conduct hands-on field tests, verify Amazon customer-review histories or watch the inaccessible YouTube videos. We do not cite unverified Facebook or Reddit comments as firsthand findings. Reviewer and forum-user names have been omitted.
The recommendations above are editorial judgments about which documented option to investigate for a matching system. They are not paid-placement rankings or measured performance awards. Retailer-syndicated reviews are treated as one underlying source, and a rating given before use is excluded from performance evidence. A missing specification remains missing instead of being inferred from a similar product.
- Moultrie 6V Deluxe setup — official SKU and setup reference
- Wildgame Edrenaline 6V — official 6V identity and supported control-unit class
- Wildgame Edrenaline 12V — official 12V identity and supported control-unit class
- Tractor Supply Field & Stream listing and reviews — retailer specifications and individual owner reports
- Walmart Moultrie review page — Moultrie-syndicated owner reports; not an independent second sample
- TexAgs owner discussion — older anecdote recorded in the workbook
- Long Range Hunting meter discussion — workbook-recorded thread; different application; repeat access restricted
- Power-Sonic lead-acid charging guidance — battery-chemistry and appropriate-charger background
- TPWD hunting regulations — official starting point for Texas rule checks
- TPWD CWD information — official disease-management information
Update record: October 8, 2026—initial evidence-based guide prepared; separate Wildgame SKUs checked; Moultrie support SKU confirmed; conflicting camera and wattage claims left unresolved. Future revisions should record the actual date of any specification check or completed field test. If you find a model-specific discrepancy, include the feeder-kit number, panel SKU and current manufacturer reference when reporting it.


