
Best Hanging Deer Feeder: 9 Smart Buying Checks
BestDeerFeeders.com · US buying guide · Research checked October 9, 2026
Choosing the best hanging deer feeder starts with one practical question: can you fill, inspect and maintain it comfortably after it is installed? A bucket that looks convenient in a product photo can become frustrating when you have to carry corn uphill, reach an awkward lid or untangle hanging hardware in the dark.
This guide helps you compare current hanging models, understand older listings and budget for the whole setup. You will find a short buying shortlist, model-specific power differences, refill examples, real owner observations and a checklist you can use before ordering. The aim is to buy a feeder that suits your property and service routine, rather than pay for features you will rarely use.
Affiliate disclosure: As an Amazon Associate I earn from qualifying purchases. Amazon buttons in this guide open searches for the specified model using our affiliate tag. Search results can contain other products, so confirm the exact SKU, seller and included accessories before buying. Prices and availability can change.
Quick answer: Start with a compact broadcast bucket if portability matters most, a metal broadcast bucket if you want a rigid hopper, or a directional model if the feeding area needs to be concentrated on one side. A tree-strapped gravity bag is a different option for passive feeding. Your final choice should follow a check of legal use, mounting support, refill access and the exact model’s power requirements.
The best hanging deer feeder shortlist for different needs
The three current Moultrie models below are useful comparison starting points because their differences are identifiable in manufacturer specifications. These are editorial options matched to use cases, not winners from a hands-on durability test. We have not independently measured their throw distance, battery endurance or resistance to animal damage.
Compact, movable setup
COMPACT & PORTABLE
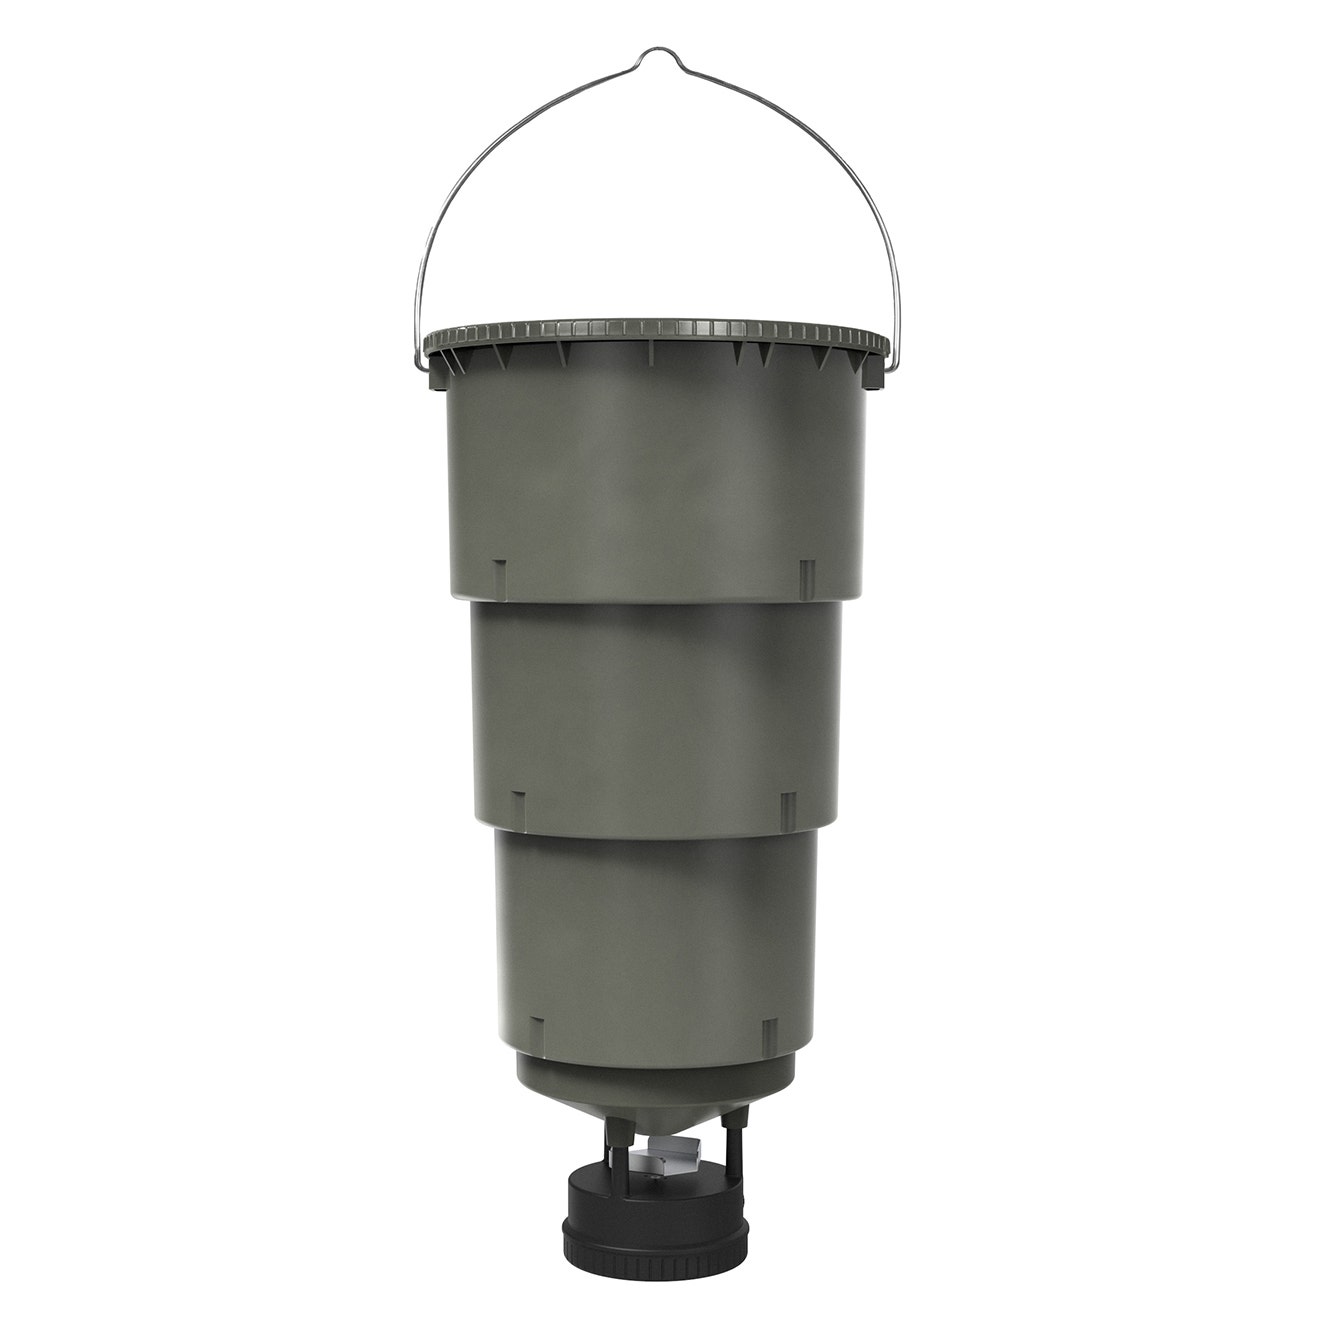
Moultrie 30LB All-in-One
Shortlist it when packing, moving and servicing a smaller hopper matter more than maximizing capacity.
Rigid broadcast hopper
METAL BROADCAST
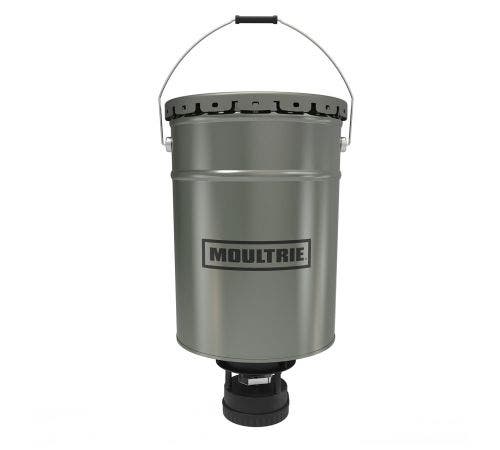
Moultrie 40LB Hanging
Shortlist it when you prefer a metal bucket and want feed distributed around the location.
Focused feeding area
DIRECTIONAL OPTION
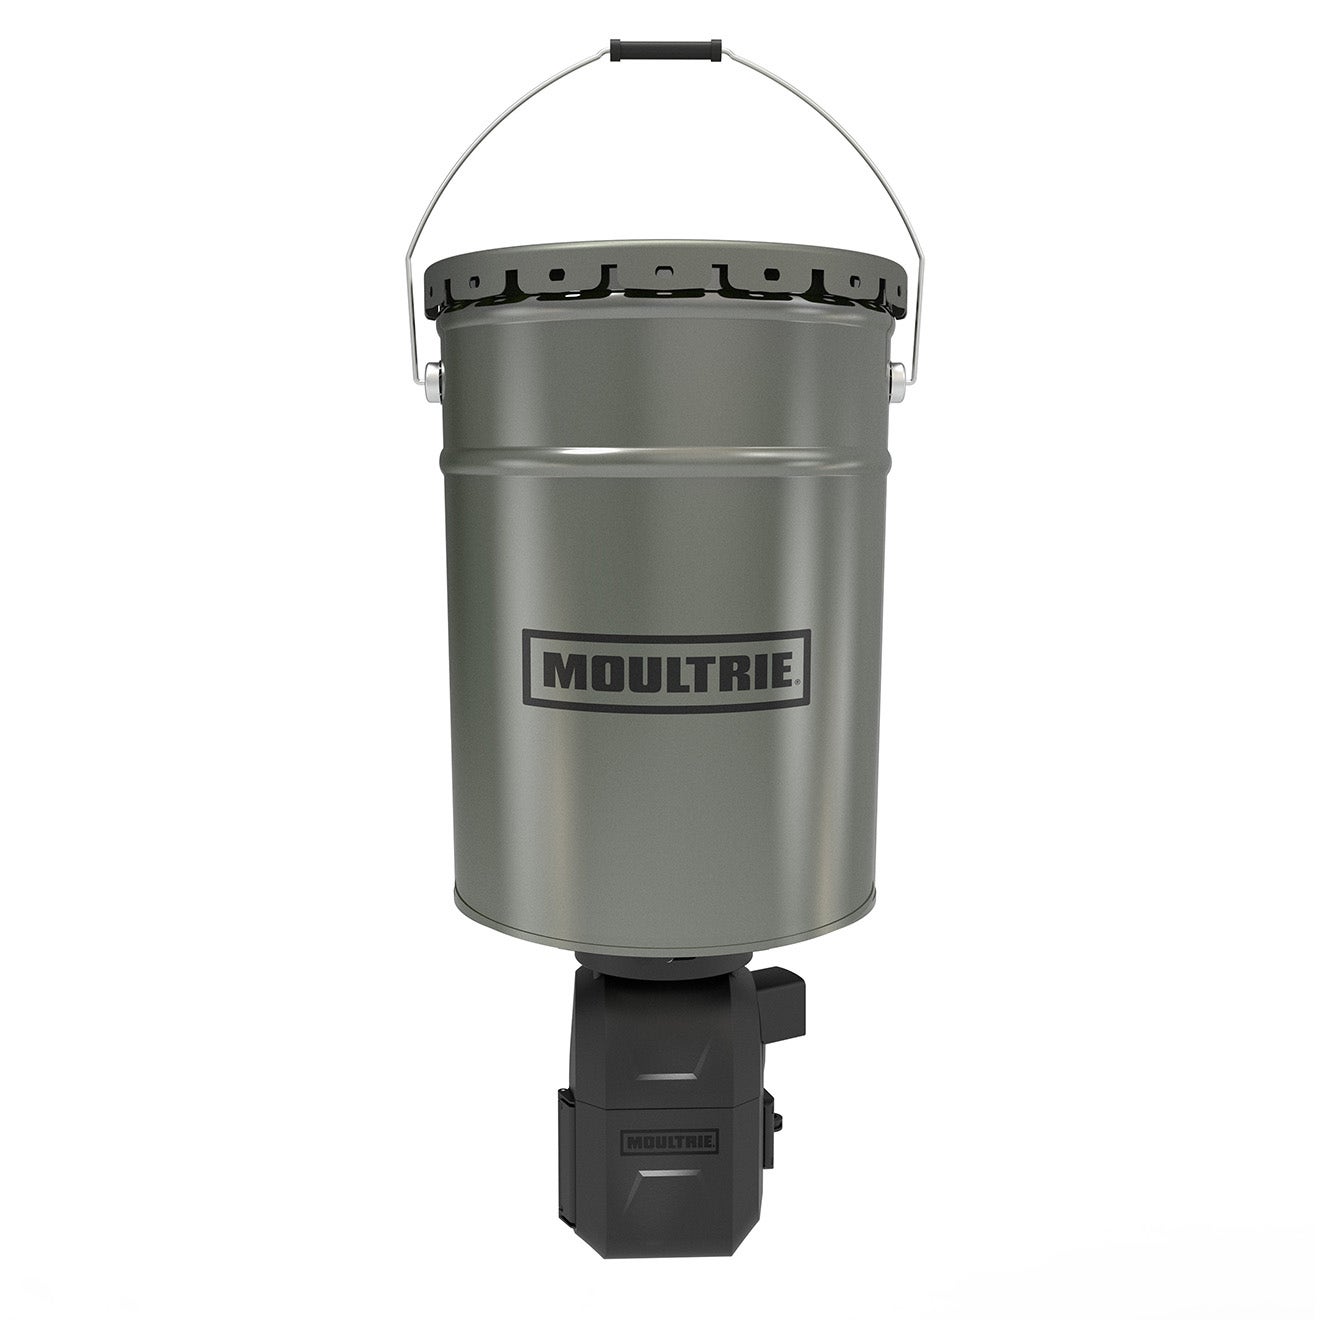
Moultrie 40LB Directional
Shortlist it when discharge direction matters and you are prepared to manage a separate rechargeable battery.
Need a broader comparison first? See our main deer feeder buying guide for alternatives beyond hanging designs.
In this guide
- Compare the exact models
- Compact bucket buying advice
- Metal bucket buying advice
- Directional feeding advice
- Gravity bags and older listings
- Nine buying checks
- What owners report
- Calculate refill frequency
- Budget for the complete setup
- Setup and maintenance
- Useful video demonstrations
- Buyer questions answered
Compare models by SKU, not by a familiar product name
Search results can mix old and new versions, replacement feeder kits and complete feeders. A photo of a green bucket does not tell you which timer, battery arrangement or connection features are included. The SKU is a better starting point than a shortened listing title. Save it before comparing sellers.
| Current model | SKU and capacity | Power listed | Distribution and schedule | Main buying distinction |
|---|---|---|---|---|
| Moultrie 30LB All-in-One Hanging Check Amazon offers → | MFG-15100 30 lb | 4 AA batteries; 8 for extended operation | Broadcast; up to 4 daily feeds | Collapsible hopper, All-in-One II kit, Bluetooth |
| Moultrie 40LB Hanging Check Amazon offers → | MFG-15101 40 lb | 4 AA batteries; 8 for extended operation | Broadcast; up to 4 daily feeds | Metal hopper, All-in-One II kit, Bluetooth |
| Moultrie 40LB Hanging Directional Check Amazon offers → | MFG-15102 40 lb | 6V tab-top rechargeable battery, sold separately | Directional; up to 10 daily feeds, listed duration 1–60 seconds | Pro Hunter III Directional kit; listed solar compatibility |
Manufacturer sources: MFG-15100, MFG-15101 and MFG-15102. Specifications checked October 9, 2026.
One specification needs confirmation: the current 30LB page describes a 1–60-second feed duration, while its specification table says 1–20 seconds. We have not resolved that discrepancy with the manufacturer. Ask support about the exact version if a longer duration is important to your plan.
Use the table to eliminate unsuitable models before reading prices. Someone who already owns equipment for a rechargeable system may value compatibility differently from a buyer who wants to carry spare household batteries. Likewise, a narrow feeding strip calls for a different decision than an open location where a circular spread is acceptable.
Moultrie 30LB All-in-One: consider it for a compact setup
A smaller hanging bucket makes the most sense when you are still deciding where a feeder should live. Perhaps you are evaluating two openings on a private property, or you want a manageable wildlife-viewing setup near a service path. In either situation, easy access and a workable routine matter more than squeezing in the largest possible load.
The compact option in our shortlist is worth comparing if you will move the empty feeder occasionally. Do not confuse portability with permission to move or lift it while full. Plan the move around emptying the hopper, checking the mounting arrangement and reinstalling the unit according to its instructions. That turns a location change into a controlled task instead of an awkward lift.
Who should put it on the shortlist?
Consider this route if you can visit regularly and do not need a large reserve between trips. It also fits buyers who prefer a simple service kit: suitable replacement batteries, basic cleaning supplies and whatever rated mounting equipment their installation requires. Keep that service kit together so a quick check does not turn into a search for missing parts.
Before buying, picture the actual refill. Where will you place the bag of corn? Can you open the hopper with both feet on stable ground after lowering it? Is the lid easy to keep clean during filling? Those questions are more useful than judging convenience from an empty feeder hanging at chest height in a showroom photo.
Who should keep looking?
If reaching the property requires a long drive, frequent refills could erase the saving from a cheaper feeder. A larger system may be the more sensible purchase even when its initial price is higher. You should also keep looking if you need precise feeding in one direction or want a charging arrangement not explicitly supported by the exact model.
Our buying view is straightforward: choose the compact route because it fits the location and service schedule. Do not choose it on an assumed promise that a small feeder needs no maintenance. Every feeding setup still needs inspection, clean feed and an accessible way to work on the mechanism.
Moultrie 40LB Hanging: consider it for a rigid broadcast setup
A rigid bucket can suit a buyer who intends to keep the feeder at one established location and prefers a more substantial hopper. The choice still needs to fit the supporting structure and refill method. A stronger-looking container is only one part of the installation, and it cannot compensate for unsuitable hanging hardware.
When comparing the metal option, think about handling rather than assuming it is automatically the better feeder. The empty container has to be carried to the site, lowered for service and inspected around its seams and lid. If your access route is tight or steep, that work may matter more than an attractive capacity figure.
When the metal option makes sense
It is a useful shortlist choice for a permanent location where you want broadcast feeding and already have a practical service area. Imagine a stable spot near your access route with enough room to lower the feeder, position supplies and examine the underside without rushing. That is a better foundation for ownership than putting the feeder somewhere difficult solely because deer tracks look promising.
Compare the hopper construction, lid fit and service access in seller photos. Ask for the exact package contents if the listing is unclear. Some sellers offer a complete feeder; others show a replacement kit near images of a hopper. Confirming what arrives in the box prevents a bargain from becoming an unfinished project.
What metal construction does not establish
We have not tested this unit against raccoons, squirrels or bears. Metal construction should not become a blanket animal-proof claim. The motor area, openings, supporting hardware and spilled feed still affect what happens around a feeding location. Inspect those parts of the system separately.
Likewise, a rigid hopper does not remove weather checks. A lid can look secure while residue collects at its edge, and feed around the outlet can be exposed differently from feed deeper inside. Your ownership routine should include a visual inspection after severe weather, especially when the unit is new or the installation has changed.
Choose this option if the rigid bucket and broadcast layout solve a problem you actually have. If your only reason is that it appears tougher in a product image, pause and compare the full installation, operating method and service burden first.
Moultrie 40LB Directional: consider it when discharge direction matters
Directional feeding is worth considering when the location has a clear useful side and a clear side you want to avoid. An open trail edge, a restricted service area or an awkward boundary can make discharge direction more relevant than the hopper’s appearance. The benefit depends on careful placement and a real check of where the feed lands.
Do not assume a directional feeder places every kernel inside a neat rectangle. We have not independently mapped this model’s spread. Trees, surrounding vegetation, setup position and operating conditions can affect the usefulness of any arrangement. Confirm clearance and test the actual result before treating the feeding area as settled.
What to budget for before ordering
Review the power requirement in the comparison table and build a complete accessory list. A rechargeable setup needs a suitable way to charge, transport and maintain the battery. If you plan to add solar equipment, match the exact connector and supported charging arrangement instead of assuming any small panel will fit.
Our deer feeder solar panel guide explains the compatibility checks. Our feeder battery guide helps with battery selection. Use both as supporting resources rather than replacing the model’s own instructions with general advice.
Buy the direction you need, not the largest feature list
More scheduling options are useful only if you have a reason to use them. Start with the feeding pattern you want and work backward to the controls required. A long feature list can sound impressive while adding nothing to a simple routine. The right system is the one you can set, verify and maintain consistently.
This option belongs on your shortlist when its distribution pattern helps the site and you are comfortable with the power system. If you simply want an uncomplicated bucket for an open area, revisit the broadcast choices. Spending more on specialized equipment is worthwhile when it solves a location problem, not merely because the product name sounds more advanced.
Gravity bags, pail feeders and older versions: keep the categories separate
“Hanging feeder” is sometimes used loosely. A suspended automatic bucket and a bag strapped around a tree both avoid a conventional tripod, but they do not offer the same control. Make the mechanism the first distinction. Then compare mounting, capacity and servicing within the category that suits you.
Wildgame Treehugger: a gravity alternative
The Wildgame Treehugger TRUBark HD is described by its manufacturer as a PVC gravity bag attached with straps and a buckle. It replenishes the feeding opening as animals consume feed. That makes it a passive alternative rather than a timed spinning bucket.
Consider a gravity bag when passive access is what you want and the location permits a suitable installation. Keep continuous access, feed use and animal pressure in the decision. A soft bag should not receive a durability verdict based only on a setup demonstration. Our research did not establish an independently measured service life for this product.
If controlling release times is your central requirement, a gravity bag is the wrong mechanism to compare against a digital timer. For a more detailed explanation of the two approaches, read spin versus gravity feeders. Buyers looking for larger passive systems can also explore our gravity feeder guide.
Wildgame Quick-Set 50: verify the version first
A Wildgame manufacturer page for the Quick-Set 50 describes a portable pail-style feeder and dawn/dusk operation. We have not confirmed a current retail package against that older page. Treat it as a candidate to investigate, rather than assume every listing with a similar name uses the same timer.
Ask the seller whether the timer is light-triggered or clock-programmed, what power source is required and which accessories are included. A buyer who wants exact clock times should resolve that question before ordering. Changing daylight conditions and a fixed daily schedule are different requirements.
Older Moultrie 5-gallon listings
The legacy five-gallon listing at Tractor Supply is a useful example of why generation matters. It identifies an AA-powered All-in-One feeder, but it should not be used to establish the features of every newer version.
Older products can still be sensible purchases when the price, condition and replacement support fit your needs. Check them on their own merits. A discounted listing is not a good deal if you expected a newer connection feature, received an older timer or cannot identify the correct manual.
9 buying checks before choosing the best hanging deer feeder
Work through these checks in order. They narrow the choices without requiring you to become an equipment expert. By the end, you should have a specific model, a complete installation plan and a realistic idea of how often you will need to return.
1. Confirm legal use and property permission
Start with the rules for the exact location, season and activity. Wildlife viewing, supplemental feeding and hunting over bait should not be assumed to share the same requirements. Private ownership of a property also does not settle every wildlife rule that may apply there.
Use the relevant state wildlife agency and any property or hunt-area instructions. For example, Texas Parks and Wildlife hunt details contain area-specific conditions. That is a reason to check the actual location, not a basis for a nationwide rule. Recheck before deployment and when seasons or restrictions change.
2. Match the release method to your purpose
Write down whether you want timed release, passive access or discharge toward a defined area. That one sentence will eliminate many unsuitable choices. Do not let a low sale price pull you into a mechanism that conflicts with your purpose.
If you want to learn about animal activity, decide what observation would be useful before setting the feeder. A camera log can help you understand visits at a specific location, but equipment alone does not guarantee a particular deer response. Keep observations tied to the actual conditions rather than turning a few appearances into a broad promise.
3. Plan your refill interval
Capacity only becomes meaningful when you compare it with daily output and your travel schedule. A small hopper can work well when the location is easy to reach. It can be inconvenient when you must drive a long distance and cannot inspect it between visits.
Choose a conservative initial refill plan, measure output and adjust from actual use. Leave room for inspection rather than waiting until the theoretical final day. Feed remaining in an inaccessible corner, unexpected animal pressure or a change in settings can make the simple capacity calculation less useful than it first appears.
4. Account for the entire suspended load
Feed is only part of the weight. Add the empty feeder, attached power equipment and hanging hardware. Check the support and every relevant component against the manufacturer’s installation guidance. A bucket’s advertised feed capacity is not a load rating for a tree limb, cable or pulley.
Do not improvise with electrical cable or an unidentified rope because it resembles something used in a forum photo. Use equipment rated for the intended application. If the support or installation is uncertain, get appropriate installation help instead of guessing from appearance.
5. Make lowering and servicing practical
Your plan should let you inspect the underside, replace batteries and open the lid without balancing under a load. Ask how you will secure the feeder during service, where you will stand and how supplies will be kept clear. The useful answer is a repeatable procedure, not “I will manage somehow.”
A difficult refill can encourage rushed handling or skipped checks. Consider the whole service visit: approaching the site, securing equipment, accessing the lid, inspecting feed and restoring the unit. If any step depends on an awkward reach, improve the arrangement before filling the hopper.
6. Verify the exact power and charging arrangement
Read the package and manual for the specific SKU. A brand name, bucket size or timer family is not enough to establish battery compatibility. Check included parts separately from supported optional parts so the accessory budget reflects what you actually receive.
For rechargeable systems, make a charging plan before installation. For replaceable-cell systems, follow the specified cell type and replacement procedure. Keep receipts and record the installed batteries so troubleshooting later begins with known information rather than memory.
7. Separate nearby control from remote control
A phone-control feature can describe different connection arrangements. Nearby adjustments and changes made from another location are different capabilities. Ask what additional equipment, account setup, signal coverage or service costs apply to the remote arrangement you intend to use.
Test the required workflow while you are at the location. Being able to change a setting in your driveway does not establish that every connected feature will work on a remote property. Our camera and app-control feeder guide is a useful next read if remote management is part of your plan.
8. Inspect animal access and weather exposure separately
Look at the lid, hopper walls, outlet, motor area and paths animals could use to reach them. Then consider where dispensed feed lands. Preventing an animal from entering a hopper and preventing it from eating corn on the ground are different problems.
Weather inspection should be equally specific. Check the lid seal, sheltered areas, exposed openings and feed condition after the first serious rain. Avoid replacing these checks with a general claim that a product is “outdoor” or “heavy duty.” The actual installation matters.
9. Confirm seller details and replacement support
Before checkout, compare the SKU, complete package contents, return terms and available manual. Keep a screenshot or copy of the listing details. If the seller uses several similar photos, ask which exact unit will ship and whether the pictured accessories are included.
Locate support information before you need it. Replacement parts and clear instructions can matter more over time than a small price difference today. A purchase is easier to maintain when you know whom to contact and can identify the feeder without relying on a generic description.
What real owners report about hanging feeder setups
Owner reports are useful because they reveal work that product specifications rarely describe. They are also individual accounts, not controlled comparisons. The examples below come from readable forum discussions. They do not establish how the current products in our shortlist will perform on your property.
Lowering the feeder can make service easier
In a September 12, 2023 post on GON’s raccoon discussion, user DannyW describes a hanging arrangement with a pulley and manual winch that lowers for filling. Another contributor, HuntingFool, reports plastic damage despite protective additions. These are reasons to examine service access and material exposure separately.
The practical lesson is to judge the entire arrangement, not just the purchase. A feeder that can be brought to a comfortable service position offers a different ownership experience from one that stays out of reach. The forum description is not an engineered installation plan, so use rated components and appropriate instructions rather than copying dimensions blindly.
A lid does not settle every rain problem
In the GON homemade feeder discussion, Davexx1 describes a design intended to shed water and later notes that feed at the opening can get wet in hard rain. That report concerns a homemade feeder, but it raises a useful inspection question for any system: which parts of the feed path remain exposed?
Use that question when you examine a commercial feeder. Inspect both stored feed and the release area. If you find wet material, investigate and follow suitable cleaning guidance before refilling. Do not treat a dry-looking lid as evidence that every part of the system remained dry.
Protecting equipment is different from controlling ground access
In GON’s broadcast-versus-gravity thread, Davexx1 reports convenient lowering for filling and battery work. Another owner describes hogs arriving quickly at timed releases. The contrast is useful: installation can improve access to the equipment while the surrounding feeding activity still needs observation.
Before spending on protective accessories, identify the mechanism of the problem. Is an animal opening a lid, reaching the spinner, damaging a hopper or simply consuming dispensed feed? Different problems call for different decisions. Our raccoon and hog feeder guide and squirrel prevention guide provide further context.
These reports are paraphrased and attributed. We did not independently verify the owners’ installations or apply their results as durability ratings for the shortlist models.
How long will a hanging feeder last between refills?
There is no trustworthy universal answer based on bucket size alone. You need usable feed capacity, output per run and the number of runs each day. The most useful calculation begins with a measurement rather than an assumed amount of corn dispensed per second.
Measure output
Pounds dispensed per run
Calculate daily use
Output × runs per day
Estimate refill interval
Usable capacity ÷ daily use
Measure your own output
Follow the manufacturer’s safe testing procedure and keep clear of moving parts. Use a suitable collection method that does not obstruct the mechanism, then weigh the dispensed feed. Record the exact feed type, timer setting and power condition. Repeat the measurement so one unusual run does not define the entire plan.
Keep the circumstances consistent when comparing runs. If you change the feed, setting or power arrangement, record the change and reassess output. A refill estimate is useful only when its assumptions resemble the current setup. Do not transfer a measured result from one feeder to a different model simply because both use a spinner.
| Illustrative scenario | Usable capacity | Output each run | Runs daily | Calculated interval |
|---|---|---|---|---|
| Small hopper, modest output | 30 lb | 0.5 lb | 2 | 30 days |
| Larger hopper, same output | 40 lb | 0.5 lb | 2 | 40 days |
| Larger hopper, higher output | 40 lb | 1 lb | 2 | 20 days |
These are arithmetic examples, not measured performance of the products above. They assume usable capacity, unchanged settings, no theft and no feeding interruption. Plan inspection before the estimated empty date.
Use a simple refill log
Write the fill date, approximate pounds added, settings and next inspection date in one place. At the next visit, note feed remaining and anything unusual. After several visits, the log becomes more useful than a seller’s broad maintenance claim because it reflects your own location and routine.
A log also helps separate feed consumption from operating problems. An unexpectedly full hopper may mean reduced activity, but it can also justify checking whether scheduled runs occurred. An unexpectedly empty hopper may reflect higher output or unwanted access. Inspect before changing the schedule, and avoid drawing wildlife conclusions from feed level alone.
For schedule planning, see how many times a day to run a deer feeder. For controls, use our timer programming guide alongside the exact model’s manual.
Budget for the complete setup, not just the feeder
The purchase price is only one part of ownership. Mounting equipment, the specified power source, charging equipment where applicable and the cost of service visits belong in the comparison. A lower-priced feeder can be the more expensive choice if it creates a routine you cannot maintain.
Make two lists before shopping: what is included, and what you still need. Do not put an accessory on the included list just because it appears beside the product in a photograph. Read the package description and confirm anything that affects installation or operation.
| Cost item | What to confirm | Common buying mistake |
|---|---|---|
| Feeder package | Hopper, kit, timer and model SKU | Ordering a kit while expecting a complete feeder |
| Power | Specified batteries and included quantities | Assuming all hanging units share one battery type |
| Charging | Exact compatible charger or panel if supported | Buying a generic accessory before checking fit |
| Mounting | Rated support and hardware for the installation | Using hopper capacity as a hardware load rating |
| Service visits | Distance, time and likely refill frequency | Comparing capacity without considering access |
| Maintenance | Cleaning supplies and available replacement parts | Choosing a version with unclear support |
Use a break-even question
Ask how many extra trips a smaller feeder would create during the period you plan to use it. Then compare the time and travel expense with the difference in purchase cost. You do not need a complicated financial model. A short written estimate can reveal that your cheapest shortlist option is not the cheapest to own.
Keep the estimate honest. Fuel prices, travel distance and your actual refill pattern differ from another owner’s. Use your own figures rather than an invented “average hunter” cost. If the feeder is close to home, extra service visits may be easy. If it is on a distant property, reserve capacity and reliable access can matter much more.
Compare sellers after choosing the correct model
Once you know the SKU and required accessories, compare total delivered cost, seller reputation, return terms and availability. Avoid jumping between similar listings before you have settled the model. That often encourages comparing unlike products because one package includes extras and another does not.
The buying buttons here use model-specific Amazon searches so you can inspect current offers. They do not promise that the first result is correct, in stock or the least expensive. Open the listing, verify the package and compare it with the manufacturer specification before completing the order.
A practical setup and maintenance routine
A feeder is easier to own when you create a routine from the first day. Keep the manual, model details, receipt and a short service log together. You will need those details if the timer behaves unexpectedly, a part requires replacement or a seller asks which version you purchased.
Before the first fill
Inspect the shipment for damage and compare the contents with the order. Read the installation instructions before assembling the system. Check that the planned support, service access and clearances suit the actual equipment rather than the dimensions you assumed from a photo.
Configure and test the controls according to the manual before taking the feeder to a difficult location. If the app or timer does not behave as expected, resolve the issue while the equipment is accessible. Record the settings you intend to use so you can compare them with what is saved after installation.
During the first service visits
Inspect the hopper, lid, release area, mounting components and power access. Look for unexpected movement, loose parts, rubbing or feed buildup. Compare the feed level with your refill estimate, and investigate differences before changing several settings at once.
When troubleshooting, change one relevant variable at a time and record it. A new battery, a different feed and a new timer duration introduced together make it difficult to know what resolved a problem. A simple log helps you avoid repeating the same uncertain experiment on the next visit.
After rain or unusually rough conditions
Check feed condition and inspect the installation before adding more material. Remove unsuitable feed and clean according to the product instructions. If water entered, find the likely path rather than treating the next refill as a fix. Keep the lid seating area free from residue that can interfere with closure.
Recheck the supporting arrangement after storms or any visible disturbance. If a component appears damaged or its rating is uncertain, stop using that arrangement until it is assessed. The maintenance decision should follow the condition of the equipment, not a desire to finish the service visit quickly.
When storing or moving the feeder
Follow the manufacturer’s storage and battery instructions. Clean and dry the appropriate components, keep small parts together and label the unit with its SKU. That makes the next setup easier and reduces the chance of mixing hardware or power components between different feeders.
Before reinstalling, repeat the support and access checks. A location that worked last season may have changed, and the move may introduce different rain exposure or animal access paths. Treat reinstallation as a fresh check of the complete system rather than assuming last year’s arrangement settles everything.
Video demonstrations worth checking before buying
Videos can clarify tasks that photographs leave vague: opening a lid, reaching the timer, carrying an empty hopper and arranging a service area. They are most useful when the shown model is identifiable and the creator explains the conditions. A polished promotional clip and a long-term owner account answer different questions.
The links below were located through publicly indexed titles and descriptions. We could not review full playback, transcripts or comment sections, so we do not use them as proof of reliability, testing outcomes or customer satisfaction. Open them to evaluate the demonstrated steps and confirm the exact version yourself.
| Video lead | Why it may help | What to verify |
|---|---|---|
| Moultrie 5-Gallon All-in-One: one-year review | Possible longer-use perspective on a legacy model | Dates, actual use, modifications and model identity |
| Moultrie All-in-One setup and review | Possible view of assembly and access | Whether the shown unit matches the listing you intend to buy |
| Moultrie 40LB setup demonstration | Current-model setup lead | Battery access, lid handling and manufacturer instructions |
| Moultrie 40LB Directional introduction | Visual explanation of the directional option | Brand context and exact SKU |
| Treehugger gravity system product-test lead | Possible view of bag mounting and feeding | Affiliate disclosure, feed used and actual observations |
If you review comments, separate buyer questions from reports of completed use. A question about a broken timer does not establish a failure rate, and several comments under one video do not represent every owner. Look for a dated explanation, a specific model and enough context to understand what happened.
Questions buyers ask about hanging deer feeders
What is the best hanging deer feeder for a small property?
The best fit is one you can install legally, service comfortably and refill on a realistic schedule. Begin with the compact option if portability matters, but compare its refill burden with the rigid and directional alternatives. A small property does not automatically require the smallest hopper.
Is a hanging feeder better than a tripod feeder?
It depends on support, access and the feeding plan. Hanging removes the conventional tripod footprint but creates a suspended-load and servicing problem to solve. A tripod creates different placement and access considerations. Compare the complete arrangement, not a claim that one design is always superior.
Can I hang it from any sturdy-looking tree branch?
No visual description can establish a safe load rating. Follow the equipment’s installation requirements and use a suitable support with correctly rated hardware. Include feed, the empty feeder and attached components in the load assessment. Get appropriate help when the support is uncertain.
Are hanging feeders raccoon-proof?
Do not assume they are. The hopper, motor area and mounting paths need individual inspection, and animals can still consume dispensed feed. Owner reports show why the entire setup matters. Choose protective measures based on the observed access problem rather than a universal promise.
How often will I need to refill?
Measure output per run, multiply by daily runs and divide usable capacity by that daily amount. Treat the result as a starting estimate, then compare it with actual visits. Inspect before the calculated empty date because feed condition and unexpected access can change the routine.
Should I choose broadcast or directional?
Choose based on the useful feeding area and surrounding boundaries. Broadcast is worth comparing for an open location; directional is worth comparing when discharge toward one side matters. Check actual landing patterns after setup rather than assuming the label describes every kernel’s destination.
Can I add a solar panel to any hanging feeder?
No. Confirm the exact model’s supported power and charging arrangement before buying accessories. Similar-looking hoppers can use different systems. The comparison table identifies the manufacturer-listed distinctions in this shortlist, and the manual should settle the accessory selection.
Does Bluetooth mean I can change settings from home?
Do not assume that. Nearby control and remote management use different arrangements. Verify the compatible equipment, service requirements and connection method for the remote feature you want. Check the complete system before buying a feeder because of an app claim.
Can I use protein pellets instead of corn?
Follow the exact feeder’s approved feed guidance. Pellet size, condition and dispensing mechanism can matter, so a claim about one model does not establish compatibility with another. If your intended feed is not clearly covered in the manual, ask the manufacturer before filling the hopper.
Should I buy an older model on sale?
It can make sense when the version is identifiable, supported and suited to your needs. Compare its own features and package contents. Do not assume a familiar product name gives it the same controls, power arrangement or connectivity as a current model.
Choose the feeder you can maintain comfortably
A good purchase begins with a clear service plan. Decide where the feeder will operate, how it will be supported, how you will reach it and how often you can return. Then choose the mechanism and exact model that fit those answers.
Use the compact option when portability and manageable servicing lead the decision. Compare the rigid broadcast option when a metal hopper suits an established location. Consider the directional choice when the feeding layout justifies it. Treat a gravity bag as a separate passive-feeding alternative, not a substitute for timed release.
Before you click buy:
- Verify legal use and property authorization.
- Match the SKU to the model and features you selected.
- Confirm batteries, accessories and package contents.
- Plan rated support and comfortable service access.
- Compare delivered cost and return terms.
- Keep the manual and create a simple refill log.
Choose deliberately and keep the setup observable. A feeder that is accessible, correctly matched and supported by a sensible maintenance routine is a more useful purchase than one chosen for an impressive feature list alone.
Research method and sources
This is an evidence-based buying guide, not a report of firsthand product testing. We compared manufacturer information and attributed readable owner discussions. Inaccessible retail-review snippets, Facebook leads and unreviewed video comments were excluded from product verdicts. No independent battery-endurance, throw-distance or animal-resistance measurements were collected.
Manufacturer information was checked October 9, 2026. The unresolved timer-duration discrepancy is noted above. Confirm the current manual, seller package and relevant wildlife rules before buying or installing.
- Moultrie 30LB All-in-One, MFG-15100
- Moultrie 40LB Hanging, MFG-15101
- Moultrie 40LB Directional, MFG-15102
- Wildgame Treehugger manufacturer information
- Wildgame Quick-Set 50 legacy manufacturer page
- GON owner discussion: animal access and hanging service arrangements
- GON owner discussion: homemade feeder weather exposure
- GON owner discussion: broadcast, gravity and service access


