
Deer Feeder Replacement Motor: 9 Powerful Buying Checks
Feeder repair and parts guide · Research checked October 8, 2026
A deer feeder replacement motor should match your feeder’s voltage, shaft diameter and length, mounting pattern, spinner plate and electrical connection. Match those details before ordering. A 6V label does not tell you the shaft size, and a timer that lights up does not prove the motor needs replacing.
You walk to the feeder, press the test button and hear a buzz. Maybe a few kernels fall. Maybe nothing happens. The barrel still looks sound, the legs are usable and the timer display works, so replacing the entire feeder feels wasteful. The difficulty is deciding which small part actually failed—and whether the replacement advertised online will fit what is hanging under your barrel.
This guide takes you through that decision in a practical order. First, check the power supply and feed path. Then record the measurements that decide fit. Finally, compare a motor-only repair with a complete kit using the parts you actually need. The goal is to help you buy once, install a compatible part and get your feeding schedule back without guessing from a product photograph.
Affiliate disclosure: As an Amazon Associate, I earn from qualifying purchases. Amazon buttons below open model-specific search results using this site’s affiliate ID. Confirm the exact model, voltage and dimensions in the listing before buying. Manufacturer and forum references are ordinary source links.
How this guide was researched: Manufacturer product pages and troubleshooting documents were compared with accessible owner discussions. We have not personally installed or durability-tested the motors below. Owner accounts are identified as reports, and older experiences are not treated as evidence of current product quality. Inaccessible Amazon reviews and YouTube comments were not used as verified findings.
The quickest buying rule: Keep the original voltage unless the manufacturer approves a complete conversion. Measure the shaft instead of assuming its size. If the mounting, connector or plate fit is unknown, ask support before ordering a “universal” motor.
REPAIR & UPGRADE / USA BUYING GUIDE
Match the motor. Keep the feeder.
Start with your original voltage and measured shaft size. Compare these two product examples, then use the detailed fit checklist before buying.
Affiliate disclosure: As an Amazon Associate, I earn from qualifying purchases. These are researched product examples, not hands-on test winners.
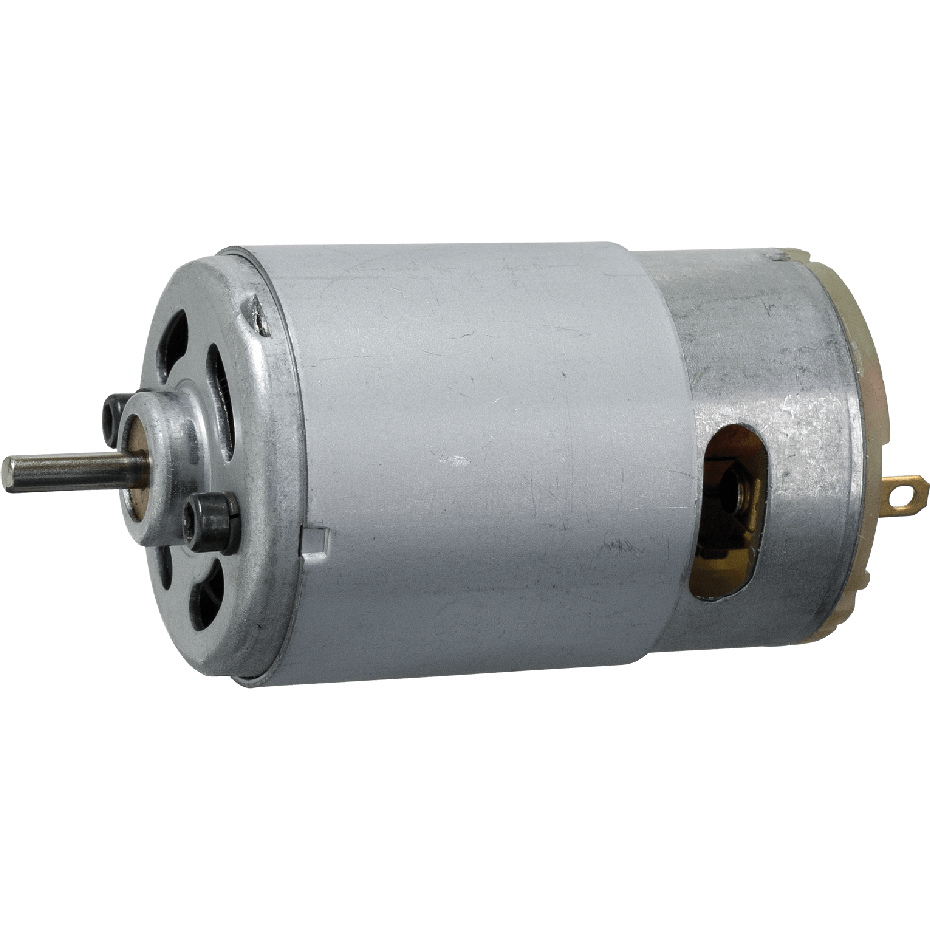
Manufacturer photo · Click to compare matching Amazon listings
Wildgame Innovations 6V motor
Consider for: A confirmed 6V assembly requiring the listed 1/8-inch shaft.
Check before ordering: shaft length, mounting holes, connector and spinner compatibility. Voltage and shaft size alone do not establish fit.
Compare 6V listings on Amazon ↗Opens Amazon search results. Match the exact item before checkout.
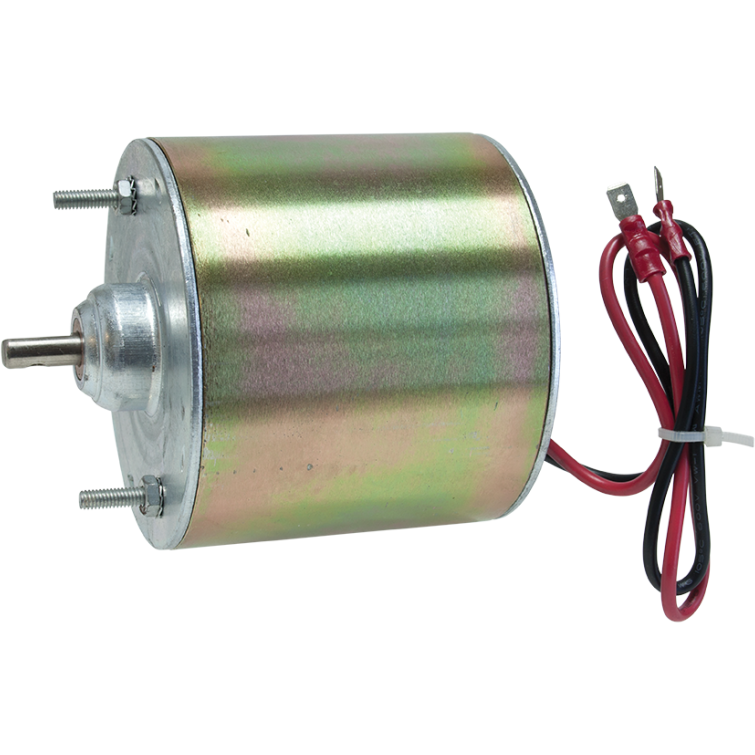
Manufacturer photo · Click to compare matching Amazon listings
Wildgame Innovations 12V motor
Consider for: A confirmed 12V assembly requiring the listed 1/4-inch shaft.
Check before ordering: shaft length, mounting holes, connector and spinner compatibility. Voltage and shaft size alone do not establish fit.
Compare 12V listings on Amazon ↗Opens Amazon search results. Match the exact item before checkout.
Compare all listed motor specifications ↓ · Check the 9 fit requirements ↓
Before buying a deer feeder replacement motor, diagnose the symptom
A motor is one part of a system. Power travels from the battery through connections and the timer to the motor. The shaft turns the spinner, and feed must move from the hopper to that spinner. A problem anywhere along that path can look like a dead motor when you are standing beside a barrel in the field.
Start by writing down exactly what happens during the feeder’s built-in test. Does the display go blank? Does the motor make a sound? Does the spinner move freely but receive no feed? Does the plate turn briefly and stop? Those details are more useful than “the feeder is broken,” especially when you ask a manufacturer which part to replace.
If nothing lights up, start with the power supply
An unlit display does not identify a failed motor. Check the battery type against the manual, look for an unplugged connector and examine the accessible terminals for damage. If your model permits a battery swap, a known-good battery of the specified type is a useful first check. Buying a motor before resolving a power problem can leave you with two motors and the same nonworking feeder.
Read the label on the battery itself. Voltage and capacity describe different things: 6V is nominal voltage, while 5Ah is a capacity rating. A larger amp-hour number does not automatically make a battery compatible, and it is not the same as the current the motor draws. The battery still needs the right voltage, terminal arrangement, dimensions and chemistry for the feeder.
For example, Moultrie’s Pro Hunter II setup document identifies model MFG-13448 and recommends a 6V 5Ah battery. That is guidance for this identified model, not a specification for every Moultrie feeder. Our 6V and 12V deer feeder battery guide explains the buying details to compare before replacing the battery.
If the display works, check what the spinner actually does
A screen requires different electrical conditions from a motor starting under load. Treat a working screen as evidence that the screen has power, rather than proof that the entire electrical path is healthy. Use the test procedure for your exact model and stand clear of the spinner during powered operation.
In the All-In-One II MFG-15096 troubleshooting guide, Moultrie starts with the test button. If the plate rotates, the guide identifies the motor as functioning. Its later checks include the correct AA batteries, their orientation, timer seating, a jam and a test without feed. This model uses eight AA batteries; do not copy a 6V rechargeable-battery recommendation from a different kit onto it.
If your spinner rotates normally but the feeder does not run at the expected time, review the clock, schedule and enabled feed events before replacing hardware. A reset or battery change may alter settings. Our deer feeder timer programming guide is a useful companion, while your current manual remains the authority for the button sequence.
If the motor buzzes or throws weakly, avoid repeated forced tests
Buzzing tells you something is happening, but it does not tell you which component failed. Possible checks include the specified battery, an obstruction, a loose spinner hub and the timer’s own diagnostic procedure. Continuing to trigger a stuck assembly does not establish compatibility or improve your diagnosis.
Disconnect power before touching the plate, inspecting the shaft or clearing feed. A timed feeder can start without someone pressing its test button. If you cannot identify how the system is isolated, stop and ask the manufacturer. Keep hands, loose clothing and tools away from a powered spinner even when it appears reluctant to move.
| What you observe | Check before ordering | What remains uncertain |
|---|---|---|
| No display or test response | Specified battery, connections and model-specific reset | Whether the fault is power, timer, wiring or motor |
| Display works; spinner does nothing | Battery condition, timer connection and permitted no-spin checks | A working screen does not establish motor failure |
| Spinner rotates; no corn throws | Feed path, plate position and suitable dry feed | The motor may work while the feed path is blocked |
| Runs on test but misses scheduled events | Clock, day settings and enabled feed events | Whether programming or intermittent power is responsible |
| Repeated fuse warning | Exact timer manual, specified fuse and harness inspection | Whether the issue is motor, wiring or timer |
What FULL, FUSE and AA indicators can mean
Indicators are model-specific. The Boss Buck/American Hunter troubleshooting page explains that a Simple Set timer can show FULL while recognizing 6V, although the attached system needs 12V. Check the voltage indicated as well as the word. The same page notes that extreme cold can affect battery charge even with solar charging connected.
The Dickinson Feed page for The Timer describes a different arrangement. Its AA cells preserve time and settings when main power is disconnected. It also discusses a FUSE warning and says a repeated warning can involve the motor, harness or frayed wiring. Those explanations belong to that timer. They are not a reason to remove batteries or substitute fuse ratings in another brand.
Photograph the display exactly as it appears. Include whether a solar panel is attached, whether you are using the test function and what the battery label says. A support agent can work with those facts. A photograph of a “full” icon without the model or power arrangement leaves too many possibilities open.
9 buying checks for a deer feeder replacement motor
Once the diagnosis points toward the motor, turn compatibility into a written checklist. The measurements are especially valuable with older feeders, mixed-brand barrels and assemblies that a previous owner modified. You are matching the system in front of you, not reconstructing it from the brand name painted on the hopper.
1. Identify the feeder and the installed kit separately
Look for labels on the hopper, control box, timer and motor. A barrel may carry one brand while the power unit underneath came from another company. Photograph all visible part numbers before taking anything apart. Also record whether the feeder is a broadcast spinner, directional unit or another configuration, because a part intended for one mechanism may not suit another.
Keep a close-up and a wider photograph. The close-up makes the part number readable; the wider photograph shows how the assembly sits under the hopper. Include any adapter ring, bracket or homemade modification. If the label is missing, these views help support identify a legacy design without promising that a familiar-looking motor will fit.
2. Match nominal voltage across the system
Choose the voltage specified for the existing assembly. A 12V motor is not an automatic performance upgrade for a 6V feeder. Changing voltage can involve the timer, battery, harness, solar charger, motor and other components. A compatible conversion is a system-level decision, not simply a different battery connected to an old kit.
Write the original motor voltage beside the battery and timer ratings. If these disagree or a label is unreadable, have the manufacturer identify the correct arrangement. Do not rely on the idea that “it spins when connected” as proof that an improvised voltage change is supported. Correct operation includes electrical compatibility and the intended mechanical load.
3. Measure shaft diameter instead of inferring it from voltage
This is the detail most likely to save an unnecessary return. Manufacturer pages list some 6V replacement motors with 1/8-inch shafts, but other 6V options have 1/4-inch shafts. Voltage describes the electrical supply; shaft diameter describes a mechanical connection. They must be checked independently.
A ruler helps distinguish large differences, while a caliper is more useful when a close measurement decides fit. Measure the accessible shaft itself, not the surrounding hub or collar. For reference, 1/8 inch is 3.175mm and 1/4 inch is 6.35mm. These conversions describe nominal dimensions; they do not establish tolerances for an unknown spinner.
4. Record usable shaft length and how the hub attaches
Diameter alone cannot establish compatibility. The shaft must reach the spinner in the intended position, and the hub needs enough supported engagement. Photograph the existing position before removal. Record protruding shaft length, visible flats or grooves, and the retention method shown in the manufacturer’s instructions.
Do not assume that every hub unscrews, that every shaft is threaded or that a seized plate should be hammered off. If the retention method is unclear, request an exploded diagram or removal instructions. Damaging a usable hub while removing the motor can turn a small repair into a more expensive kit replacement.
5. Compare mounting pattern and body clearance
Measure the spacing between mounting-hole centers and record the number of fasteners. Then check the motor body diameter, body length and room for the terminals. A motor can have the correct shaft but still collide with a bracket, lid or battery compartment. A picture of a replacement beside a tape measure is much more useful than a photograph with no scale.
Ask which adapter is included, if any. “Fits most feeders” does not establish that a particular bracket matches your bolt pattern. Before drilling, consider whether the modification would affect the enclosure, feed path, warranty or access for later servicing. A supported adapter may be a better purchase than making a new motor fit by trial and error.
6. Check the connector, harness and polarity instructions
Photograph both sides of the existing connector while power is disconnected. Compare its shape, number of contacts and locking arrangement with the replacement documentation. A matching-looking plug does not establish that its electrical arrangement is the same. Confirm compatibility through the part number or manufacturer rather than a visual guess.
Some replacements include a pre-wired timer plug; others may require a separate harness. Find out before checkout. Include damaged wiring in the repair scope, because a new motor cannot restore an interrupted connection. Avoid improvised exposed connections in the enclosure and follow the maker’s instructions for routing and protecting the supplied wiring.
7. Match spinner load, clearance and intended feed
The motor and plate operate together. Check the plate’s specified position relative to the outlet, guard and surrounding enclosure. A taller or heavier replacement plate can introduce a different load or interfere with parts that previously cleared. Correct shaft diameter does not resolve those differences.
Check specific exclusions as carefully as compatibility claims. Elusive Wildlife’s 1/4-inch-shaft high-output motor page warns against using its 6V version with THE ELIMINATOR spinner plate. That makes plate selection part of the purchase decision. Keep your feed type within the feeder manufacturer’s recommendations as well; a parts upgrade does not make every pellet, mineral blend or grain suitable.
8. Confirm exactly what the listing includes
Motor, motor kit, power control unit and complete feeder kit can describe very different packages. Read the included-items list. You may need a spinner, funnel, adapter, hardware, wiring or timer in addition to the motor. A photograph showing a full assembly is not enough to establish that every pictured item ships in the box.
Write down which existing parts are reusable. If the timer, housing and spinner are all sound, a compatible motor-only repair may preserve useful equipment. If several parts are damaged or missing, a complete kit may reduce the number of uncertain interfaces. The better option depends on condition and fit, rather than the lowest advertised component price.
9. Check support, return terms and repair timing
Before ordering a deer feeder replacement motor, confirm availability for the selected voltage and variant. Product pages can show contradictory stock messages when one option is available and another is backordered. Check the cart or contact the seller if the repair has a firm deadline.
Read the applicable return terms before modifying the part or discarding packaging. Keep the order confirmation, listing specifications and support response together. If the item arrives with a different shaft or connector, that record makes it easier to explain the mismatch. For a remote property, verified fit and reliable delivery can matter more than saving a few dollars on an uncertain part.
Deer feeder replacement motor comparison: listed voltage and shaft sizes
The following table compares published specifications, not results from our own bench tests. It is a starting point for checking fit. Blank or unstated dimensions remain unknown, and a listed brand application does not establish compatibility with a modified feeder. Click the source for the specific product rather than treating this as a universal interchange list.
| Replacement option | Listed voltage | Listed shaft diameter | What to verify next |
|---|---|---|---|
| Wildgame Innovations WGI-WGIMT0011 | 6V | 1/8 inch | Length, mount, hub and wiring |
| Wildgame Innovations WGI-WGIMT0003 | 12V | 1/4 inch | Length, mount and connector |
| Highwild 6V motor | 6V | 1/8 inch | Exact Highwild unit and other fit dimensions |
| Highwild 12V motor | 12V | 1/4 inch | Exact unit, mounting and load |
| Elusive Wildlife high-output motor | 6V or 12V variants | 1/4 inch | Selected voltage, mounting and spinner exclusion |
| Monarch Stubby HD, SKU 1116 | 12V | 1/4 inch | Shaft length, plate and mounting |
| Texas Hunter MOTOR TF | 12V | Not stated in checked text | Listed Trophy, hanging or road feeder model |
| Texas Hunter MOTOR KIT 12V | 12V | Not stated in checked text | TH70 kit identification |
The useful conclusion is that a 6 volt deer feeder motor can appear with different shaft diameters. The Wildgame and Highwild options above list 1/8 inch; the Elusive Wildlife high-output page offers a 6V variant with a 1/4-inch shaft. If your spinner hub was made for one diameter, choosing the other requires more than matching the battery label.
The table deliberately avoids a “best overall” winner. Without controlled installation, startup-load and durability comparisons, a ranking would imply evidence we do not have. A model-specific option that fits your equipment is more useful than a popular motor that needs an unsupported adapter or a different spinner to work.
A measurement worksheet you can take to the feeder
Use the worksheet before shopping. Write “unknown” where a specification is unavailable rather than filling it with a guess. If you can photograph a feature but cannot measure it safely, send the photograph to support. Record the units as well as the number so inches and millimeters do not become an avoidable ordering mistake.
| Fit detail | Your existing assembly | Candidate replacement |
|---|---|---|
| Kit model / part number | ________________ | ________________ |
| Nominal motor voltage | ________________ | ________________ |
| Shaft diameter | ________________ | ________________ |
| Usable shaft length / profile | ________________ | ________________ |
| Mounting-hole spacing | ________________ | ________________ |
| Body size and clearance | ________________ | ________________ |
| Connector / harness part | ________________ | ________________ |
| Spinner and guard fit | ________________ | ________________ |
A useful fit decision has three possible outcomes. A confirmed match has documented compatibility and the necessary dimensions. A mismatch has a known difference, such as voltage or shaft diameter. An unresolved choice has missing information. Treat the third outcome as a question for support, rather than letting an attractive price turn uncertainty into a presumed match.
Which deer feeder replacement motor or kit should you consider?
Choose by the equipment you own. The options below explain the strongest documented use case and the remaining checks. The purchase buttons are optional shortcuts to Amazon search results; they do not certify that every result fits your feeder. The source buttons let you inspect the relevant manufacturer specifications first.
Wildgame Innovations 6V: start here for a matching 1/8-inch shaft
This is a reasonable motor-only candidate when your existing assembly calls for 6V and a 1/8-inch shaft. Wildgame identifies the current product as WGI-WGIMT0011. Compare the rest of the fit checklist, particularly the usable shaft length and mounting arrangement, before treating it as a replacement for a different brand’s unit.
The advantage of a motor-only option is that you may keep a working timer, sound housing and usable plate. The limitation is that you are responsible for matching those retained parts. If the old hub is damaged or the mounting information is missing, resolve that before buying the motor. A correct electrical label cannot fix a mechanical mismatch.
Wildgame Innovations 12V: a separate 1/4-inch-shaft option
The 12V product is a different replacement, identified as WGI-WGIMT0003. Its listed shaft diameter is 1/4 inch. Consider it when the existing system is specified for 12V and the dimensions match, not as an automatic upgrade from the company’s 6V motor.
Pay attention to the exact option selected in an online listing. If a seller combines voltages into one product page, verify the variant in the cart and order confirmation. Keeping a screenshot of the selected specifications can help if a package arrives with the wrong part. Also compare the spinner fit rather than assuming your old plate transfers because both motors share a brand.
Highwild: compare the motor with the exact control unit
Highwild lists a 6V motor with a 1/8-inch shaft and a 12V motor with a 1/4-inch shaft. Its 6V page connects the shaft choice to its own 6V digital power control unit. That is a more useful starting point than an unsupported claim that the motor fits every feeder with the same voltage.
If you already have a Highwild unit, photograph its identifying details and compare them with the current replacement listing. If your feeder uses another brand, check the other dimensions independently. Manufacturer descriptions of smooth operation are marketing claims unless accompanied by relevant test evidence; they do not substitute for a verified mount or connector.
Elusive Wildlife: useful when a 6V assembly needs a 1/4-inch shaft
Elusive Wildlife’s high-output motor page offers 6V and 12V variants under a 1/4-inch-shaft product. This helps explain why selecting only by voltage can fail. It also states that the 6V version is not recommended with THE ELIMINATOR spinner plate, so the intended plate matters alongside the shaft.
Do not infer that a larger shaft produces better feed distribution or longer service life. Those outcomes need testing in a particular assembly. Use the product’s dimensions and exclusions to decide whether it is a candidate, then request any missing body, mounting or connector information. Select the voltage explicitly when comparing marketplace results.
Monarch Stubby 12V HD: check the existing Monarch assembly
Monarch lists its Stubby 12V HD motor as SKU 1116 with a 1/4-inch shaft. The page describes use in Monarch spin-cast feeders and makes a broader claim about standard 12V units. Treat the Monarch application as the place to start and the broader fit wording as a claim that still needs measurements for another brand.
This option deserves a closer look when the model and mechanical arrangement match, especially if retaining an existing spinner is important. Ask about the relevant shaft length and mounting pattern rather than relying on the word “stubby.” A short product name cannot tell you whether a terminal will clear the enclosure or whether the spinner sits correctly below your funnel.
Texas Hunter: choose the part tied to your feeder family
Texas Hunter lists MOTOR TF for its 12V Trophy wildlife, road and hanging feeder applications, with named examples including TF300, TF650, HF100 and RF50/RF100. It separately lists MOTOR KIT 12V for the TH70 feeder kit. Both pages describe pre-wired connections, but they are different product applications.
Use the exact feeder label to select between them. A matching brand and voltage do not erase the difference between a Trophy assembly and a TH70 kit. If a previous owner fitted another control unit, send a photograph of that unit as well. Buying the manufacturer’s named replacement is useful only when the installed equipment is actually the application named on the page.
Moultrie owners: identify the generation before shopping
Moultrie owners should begin with the kit model, not only the barrel capacity. The Pro Hunter II setup document and All-In-One II troubleshooting document describe different power arrangements. A replacement advertised for one generation should not be assumed to fit another because the feeder still holds the same amount of corn.
For a Moultrie feeder replacement motor search, ask whether the supported repair is a bare motor, complete head or current kit with an adapter. Include photographs of the attachment underneath the hopper. Older owner discussions show that this attachment can be the decisive detail, while current part availability still needs to be confirmed directly.
Real owner evidence: lessons worth using, without exaggerating them
Owner accounts reveal the problems that product descriptions often skip: confusing mounts, inconvenient programming, water entry and the cost of replacing more than one component. They are useful for building better buying questions. They are not controlled tests and cannot establish how often a brand fails.
A short motor versus a complete replacement head
In a 2014 GON discussion about a Moultrie tripod feeder motor, an owner described an EZ Fill motor that was shorter than the replacements they found. The reported solution came from the manufacturer: a head containing motor, spinner and funnel. This is a historical experience, not a promise that the same head is stocked today.
The buying lesson is about geometry. A motor-only repair can make sense until a distinctive body length or assembly position complicates it. Photograph the whole head and ask support whether replacing that assembly preserves the intended spacing. That question is more useful than ordering the first motor with a similar casing.
An older Sweeney feeder needed a longer shaft
A 2011 TexAgs replacement-motor thread describes the opposite difficulty. The owner’s older Sweeney feeder placed the motor inside the hopper and needed a long shaft to reach the spinner. The post sought an affordable replacement rather than a full conversion. The discussion does not document a verified final installation.
That unanswered question still illustrates why shaft length belongs in your worksheet. A motor can match voltage and diameter yet fail to reach the plate. Ask the manufacturer for the required shaft length and supported part number, particularly when the motor sits in an unusual position. Do not convert the old forum’s prices or retailer suggestions into current buying advice.
Programming ease matters when replacing a complete kit
In the GON deer feeder motors discussion from December 2022, one owner praised a simple Wildgame replacement and another disliked the effort involved in changing Pro Hunter II timer settings. These are individual experiences with different equipment. They support checking usability, not declaring a whole brand reliable or unreliable.
If you are buying a full kit, read the programming instructions before purchasing. Consider whether someone else at deer camp can operate it, whether settings are easy to confirm and whether the manual is available offline. A replacement with features you rarely use may make routine maintenance harder than necessary. Decide which functions solve a real problem on your property.
Helpful support and mechanical frustration can coexist
A feeder-related comment in a Reddit discussion about Moultrie customer service reports repeated warranty help alongside frustration with a later feeder’s knob and clogging. The exact generations are uncertain, and the account is not independently verified. Historical warranty treatment should not be generalized to current models.
The useful distinction is between service and performance. Ask about both: what support covers for the exact replacement, and whether its feed path suits your intended material. A strong service response does not prove that every assembly handles every feed well. Conversely, an owner’s troublesome unit does not establish a brand-wide failure rate.
Deer feeder replacement motor or complete kit: compare the full cost
A cheap motor can be an expensive repair when it also needs a spinner, bracket, harness and separate delivery charges. A complete kit can be wasteful when it duplicates sound parts you already own. Put both options on the same list before comparing totals.
For a motor-only repair, count the motor, any necessary adapter, hub or spinner, damaged wiring and shipping. For a kit, count the kit, any required barrel adapter, battery or charger not included, and shipping. Keep sales tax consistent when comparing checkout totals. Use actual quotes for your location rather than a historical forum price.
| Illustrative cost only | Motor repair | Complete kit |
|---|---|---|
| Main part | $20 motor | $65 kit |
| Additional needed parts | $12 spinner + $10 harness | $0 in this example |
| Shipping | $8 | $8 |
| Total before tax | $50 | $73 |
These are invented arithmetic examples, not prices for a recommended product. In this example, the motor repair is $23 cheaper. Change the missing parts or adapter requirement and the answer changes. Also verify that the kit really includes the components you assumed were included; otherwise the comparison understates its cost.
When a motor-only repair is the stronger candidate
Consider retaining the existing assembly when diagnosis supports a motor fault, the timer is functional, the enclosure is sound, the plate is usable and fit is documented. That keeps the decision focused on replacing a failed component. It also lets you retain programming and controls you already understand.
Before choosing this route, inspect the parts you plan to keep. A cracked hub, corroded connector or distorted mount can undermine the new motor. Record any uncertainty in the comparison rather than assuming those components are good because they were working last season. The simplest repair is the one that addresses the confirmed problem with compatible parts.
When a complete deer feeder motor kit may be more practical
A full kit deserves consideration when several components are damaged, the original motor has unusual geometry, an adapter is supported only with the new assembly or the replacement parts are unavailable individually. It can reduce the number of old-to-new interfaces you must verify.
Still check how the kit attaches to the hopper. A complete power unit does not necessarily include the bracket or adapter for an older barrel. Compare battery requirements, feed direction and scheduling controls before buying. If the feeder itself is deteriorated, our complete deer feeder guide can help you decide whether investing in the existing barrel still makes sense.
Plan the installation before the replacement arrives
Good preparation starts while the old assembly is intact. Save photographs of the plate position, bracket, connector routing and attachment under the hopper. Put removed fasteners in a labeled container. Record which items belong to the motor and which belong to a guard or adapter, so the repair does not depend on remembering their order later.
Read the replacement instructions before touching the feeder. Arrange stable support, control the feed weight as directed by the manufacturer and disconnect all relevant power sources before mechanical work. Do not loosen a loaded assembly and rely on its remaining fasteners to hold the barrel or motor head. If the installation procedure is unclear, obtain instructions for the exact model.
Inspect the part before modifying or connecting it
Compare the delivered label with your order, then compare the shaft, connector and mounting dimensions with your worksheet. Check for visible shipping damage. Do this before cutting wires, enlarging holes or trying to force the spinner onto the shaft. A mismatch identified at this stage is easier to resolve than one discovered after irreversible modification.
Keep the old motor until the replacement has passed the permitted checks. It can provide useful dimensions if support asks for another photograph. Do not use the new part’s resemblance as permission to ignore a different connector, different terminal position or unexplained voltage marking. Any unresolved difference belongs in a support question.
Check the feed path with the power disconnected
Follow the manual’s mounting and plate-position instructions. Ensure the plate has the prescribed clearance from the outlet and guard, and that the supplied wires follow the intended route. Use the specified hardware and tightening guidance rather than guessing at torque. A loose connection or mispositioned plate can make a compatible motor appear faulty after installation.
If the manual calls for checking free movement, do so only with the power safely isolated. Do not increase clearance or bend a spinner as a generic cure for a jam. Those adjustments can change feed delivery and may conflict with the product design. Ask the maker what adjustment, if any, is approved for your model.
Use the built-in test and record the result
After completing the installation as instructed, restore power in the specified order and run the manufacturer’s test while standing clear. Record whether the motor starts, whether the plate turns without contact and whether the timer completes the test event. Use a no-feed test only where the manual calls for or permits it.
Then test with the recommended feed and confirm the scheduled settings. A successful test-button event is useful, but it does not prove that the next programmed event is enabled. Verify the clock, duration and days after any reset. Keep the first few observations in a simple log rather than assuming one spin establishes long-term reliability.
Calibrate feed delivery instead of copying the old duration blindly
A different assembly or plate position may change how much feed comes out during the same number of seconds. Where the manufacturer permits collection and measurement, record the feed delivered during a defined test. Repeat the same setup and feed type if you want comparable observations. Treat the result as a measurement of that setup, not a promise for every feeder.
For example, if an approved test delivers a measured half-pound in five seconds, that observation helps you review the programmed duration. It does not establish that every longer run will remain perfectly proportional, particularly if feed flow changes. Our feeding-frequency guide discusses schedule planning separately from the mechanical repair.
Protect the replacement by fixing the surrounding problem
A new motor should not go back into an assembly with the same unresolved obstruction or water-entry problem. Use installation as an opportunity to inspect the lid, enclosure, connections and feed path. Replace damaged protective parts with approved equivalents rather than expecting the motor housing to compensate for them.
Look for the route water is taking
Inspect visible seals, damaged lids and places where water could follow wires or collect in the enclosure. The old GON owner account about moisture is a reason to ask better questions, not proof that a particular current motor is waterproof or defective. Follow the maker’s sealing and drainage guidance; do not drill drainage holes or apply chemicals to internal components without instructions.
For a property you visit infrequently, photograph the inside of the enclosure during routine checks. Changes in corrosion, dirt or moisture can help you notice a developing problem before the next feeding event fails. Keep the photographs dated and tied to the actual model so they are useful when asking support about a recurring issue.
Keep the feed appropriate for the control unit
Use the feed specified for the feeder, and check stored material before filling the hopper. If you change feed type, review the manual’s restrictions and confirm flow before leaving the system unattended. A replacement motor does not automatically expand what the funnel and plate can handle.
Boss Buck’s troubleshooting page specifically warns that salt-based mineral blends can accelerate corrosion in its control system and affect parts warranty coverage. That is a brand-specific warning worth checking before putting an attractant blend through a spinner. Keep feeding-material decisions separate from the motor’s electrical rating.
Check charging and pest protection together
If the battery keeps losing charge, inspect the specified solar charging arrangement instead of replacing motors repeatedly. Confirm the panel matches the battery and feeder requirements, its connections are intact and the installation follows the product instructions. Our deer feeder solar-panel guide covers the compatibility questions in more detail.
Inspect accessible wiring and guards for animal damage. Add only protection that leaves the spinner and feed path the required clearance. Our squirrel-control guide offers related planning ideas, but any motor enclosure or guard must still suit the exact assembly you install.
Ask support for the part number, not just a general recommendation
A short, complete request can save several rounds of email. Give the feeder model, installed kit number, symptom and measurements, then ask for the exact supported replacement. Include photographs if the company accepts attachments. Request the manual for the replacement as well as the sales link.
Hello, I need help identifying a replacement motor or complete kit for my [brand and model]. The installed kit number is [number]. During the built-in test, [describe what happens]. I have checked [checks permitted by the manual].
My recorded measurements are [voltage, shaft diameter and usable length, motor body size, mounting-hole spacing and connector details]. Could you confirm the exact part number, spinner compatibility, required adapter and included wiring? Please also send the installation instructions and applicable return or warranty terms. I can provide photographs of the labels and assembly.
Keep the answer with the order record. If support recommends a complete conversion, ask which existing components remain usable and which must change together. If the reply only says “universal,” ask for confirmation against the measurements you supplied. A written model-specific answer is more useful than a broad claim copied into a marketplace title.
FIELD CHECK • Updated October 12, 2026
Deer feeder not spinning: a symptom-first service record
Do not order a motor from a blank display alone. First identify the complete feeder, timer and power configuration. A missed automatic feeding, an unsuccessful app command and a local test that fails are different observations. Record which one happened before changing components.
This checklist organizes your evidence; it is not a substitute for the exact model manual. Disconnect power before examining moving parts, and keep people clear during a manufacturer-approved test. Do not bypass the timer or copy electrical test instructions from a different kit.
| Observation | Record before changing anything | Next decision |
|---|---|---|
| Display remains blank | Battery label, connector orientation and any visible damage | Follow the model’s power checks; do not assume motor failure |
| Local test works; scheduled feed does not | Time, active schedule and operating mode | Investigate schedule behavior before purchasing a motor |
| App command fails; local test works | Phone position, connection indication and exact error | Use the model’s app troubleshooting route |
| Local test fails too | Sound, display behavior and visible interference | Follow the approved obstruction check, then contact support |
A verified model-specific example
Moultrie’s Universal Digital Timer III support page identifies MFG-15095. It separates power, missed schedules and on-demand failures. For this device, enabling Sunrise/Sunset changes how standard schedules operate. Its local Test button helps separate an app problem from a motor that will not turn. A reset erases scheduled feeding times. These details apply to that model, not every Moultrie feeder.
Send support a useful report
Use this format: “Feeder model: __. Timer model: __. Battery label: __. Last successful feed: __. Display now shows: __. Local test result: __. App result: __. Visible obstruction or damage: __.” Add clear photographs of labels and connectors with power disconnected. Ask for the correct replacement part number and an approved next test.
Change one thing at a time and record the result. If you replace several parts together, you may restore operation without learning what failed. Keep the original component until support confirms whether it is needed for inspection or warranty handling.
Purchase gate: buy a motor only after identifying both the fault and the fitting requirements. Compare voltage, shaft, mounting and connector details in the table above. Our parts catalogue uses affiliate shopping links; a search result is not a compatibility guarantee.
Deer feeder replacement motor FAQs
Can I use a 12V motor on a 6V deer feeder?
Do not assume it is compatible. Use the voltage specified for the existing system unless the manufacturer approves a complete conversion. A conversion may involve the timer, battery, harness, charger and spinner as well as the motor. Ask for a supported parts list rather than changing one component by guesswork.
Are all 6 volt deer feeder motor shafts the same size?
No. The checked Wildgame and Highwild 6V pages list 1/8-inch shafts, while Elusive Wildlife’s high-output product offers a 6V variant under a 1/4-inch-shaft listing. Measure your shaft and hub, then verify the other dimensions. Voltage alone does not establish mechanical fit.
Why does my timer display work but the motor will not spin?
A working display does not identify the failed component. The specified battery, connector, timer output, jam or spinner attachment may still need checking. Follow the no-spin procedure for your exact model. If those checks do not resolve it, send the symptom and model photographs to support before buying parts.
Will a universal deer feeder replacement motor fit my barrel?
Only if the relevant electrical and mechanical details match. Confirm voltage, shaft dimensions, mounting, body clearance, connector and spinner compatibility. Some assemblies also need a specific barrel adapter. Treat “universal” as a claim to verify, especially on an older or modified feeder.
Should I replace the spinner plate or the motor?
Identify what is failing. A damaged hub or loose plate can create a different repair need from a motor that does not operate. Inspect with the power disconnected and follow the manual’s test procedure. Avoid forcing the plate or running a jam repeatedly to decide which part is bad.
Is a complete kit cheaper than replacing the motor?
Sometimes, depending on the extra parts required. Compare the motor, necessary spinner or harness, adapter and shipping with the full kit and its missing accessories. Use current checkout totals. A low motor price is not the whole repair cost when other damaged components also need replacing.
Can I test the motor directly from a battery?
Use only a procedure approved for the exact motor and system. Owner forums describe direct-battery tests, but they do not establish safe wiring, polarity or voltage for your equipment. The built-in test and manufacturer troubleshooting steps are the appropriate starting point; ask support before bypassing controls.
Does a solar panel mean the motor battery is healthy?
No. A connected panel does not establish that the battery is in good condition or that the charging arrangement is correct. Follow the model’s battery-check instructions and confirm the panel is compatible. Resolve recurring power problems before assuming another motor has failed.
Which replacement should I buy for an old feeder with no label?
Photograph the hopper attachment, control box, timer, motor and spinner, then record the measurable dimensions. Contact the manufacturer or retailer that supplied the assembly. If no supported motor can be identified, ask whether a documented complete kit and adapter is available for that hopper.
What should I check immediately before clicking a price button?
Confirm the selected voltage, shaft size, exact model and included parts against your worksheet. Check the seller’s current stock and return terms. If a required fit detail is unknown, resolve it first. A compatible deer feeder replacement motor is the useful purchase; a similar-looking result is only a candidate.
Your final purchase checklist
Before checkout, you should be able to explain why this specific part fits this specific assembly. Keep the diagnosis, model identification and measurements together. If the old motor is not the confirmed problem, finish the troubleshooting first. If fit is unresolved, contact support instead of buying a part to experiment with.
- The installed kit and nominal motor voltage are identified.
- The manual’s power, timer and feed-path checks have been completed.
- Shaft diameter, usable length and spinner attachment are compatible.
- The mounting, body clearance and connector are confirmed.
- The replacement supports the intended plate and feed arrangement.
- The price comparison includes missing parts, adapters and shipping.
- The selected variant, instructions and return terms are saved.
Choose a motor-only repair when the remaining parts are usable and compatibility is documented. Choose a supported complete kit when it resolves several damaged parts or an awkward legacy fit. Either way, the strongest purchase decision comes from a clear diagnosis and measured fit, rather than a brand name, star rating or voltage label alone.


