
Deer Feeder Not Working? Diagnose It in This Order
Affiliate disclosure: BestDeerFeeders.com is reader-supported. As an Amazon Associate we earn from qualifying purchases, at no extra cost to you. Our picks are not sponsored and no brand reviewed or paid for placement.
Deer feeder not working: the short answer
When a deer feeder is not working, the cause is almost never the part owners replace first. Across manufacturer troubleshooting guides and owner reports, the failures stack up in a fixed order: a dead or weak battery accounts for the largest share of “dead feeder” complaints, followed by a timer left in the wrong mode or with an unsaved schedule, then a jammed spinner plate, and only after that a genuinely failed motor. Feed problems — bridging, moisture-clumped corn, a blocked throat — imitate all of the above while the electrics are perfectly healthy.
So work the chain in order: power → timer → motor → plate → feed. The 60-second diagnosis below separates those five in one visit, without tools beyond your hands and eyes. Only buy a part when a check has actually condemned it — our replacement motor guide and timer guide exist because so many owners order electronics for what turned out to be a $0 fix.
Safety first: a timed feeder can start on its own at any moment. Disconnect the battery before you touch the spinner plate, reach into the throat, or clear feed — every time, even if the feeder “looks dead.” A weak battery can still turn a plate hard enough to hurt fingers.
Three fast choices
Pick by the fault you proved. Read the trade-off before opening the retailer.
Disclosure: Some shopping links may earn us a commission at no additional cost to you. As an Amazon Associate I earn from qualifying purchases.
Mighty Max ML5-6S
A dead or weak battery accounts for the largest share of “dead feeder” complaints. The ML5-6S (6V, 5Ah AGM, spring S2 terminals) is the documented example for spring-contact 6V feeders.
Caution: match the label, not the shelf — voltage, terminal type and physical size all have to match your kit. Tab-connected 6V feeders need the Power-Sonic PS-640 F1 instead; a 6V battery with the wrong terminals is a paperweight.
Moultrie Universal Digital Timer III
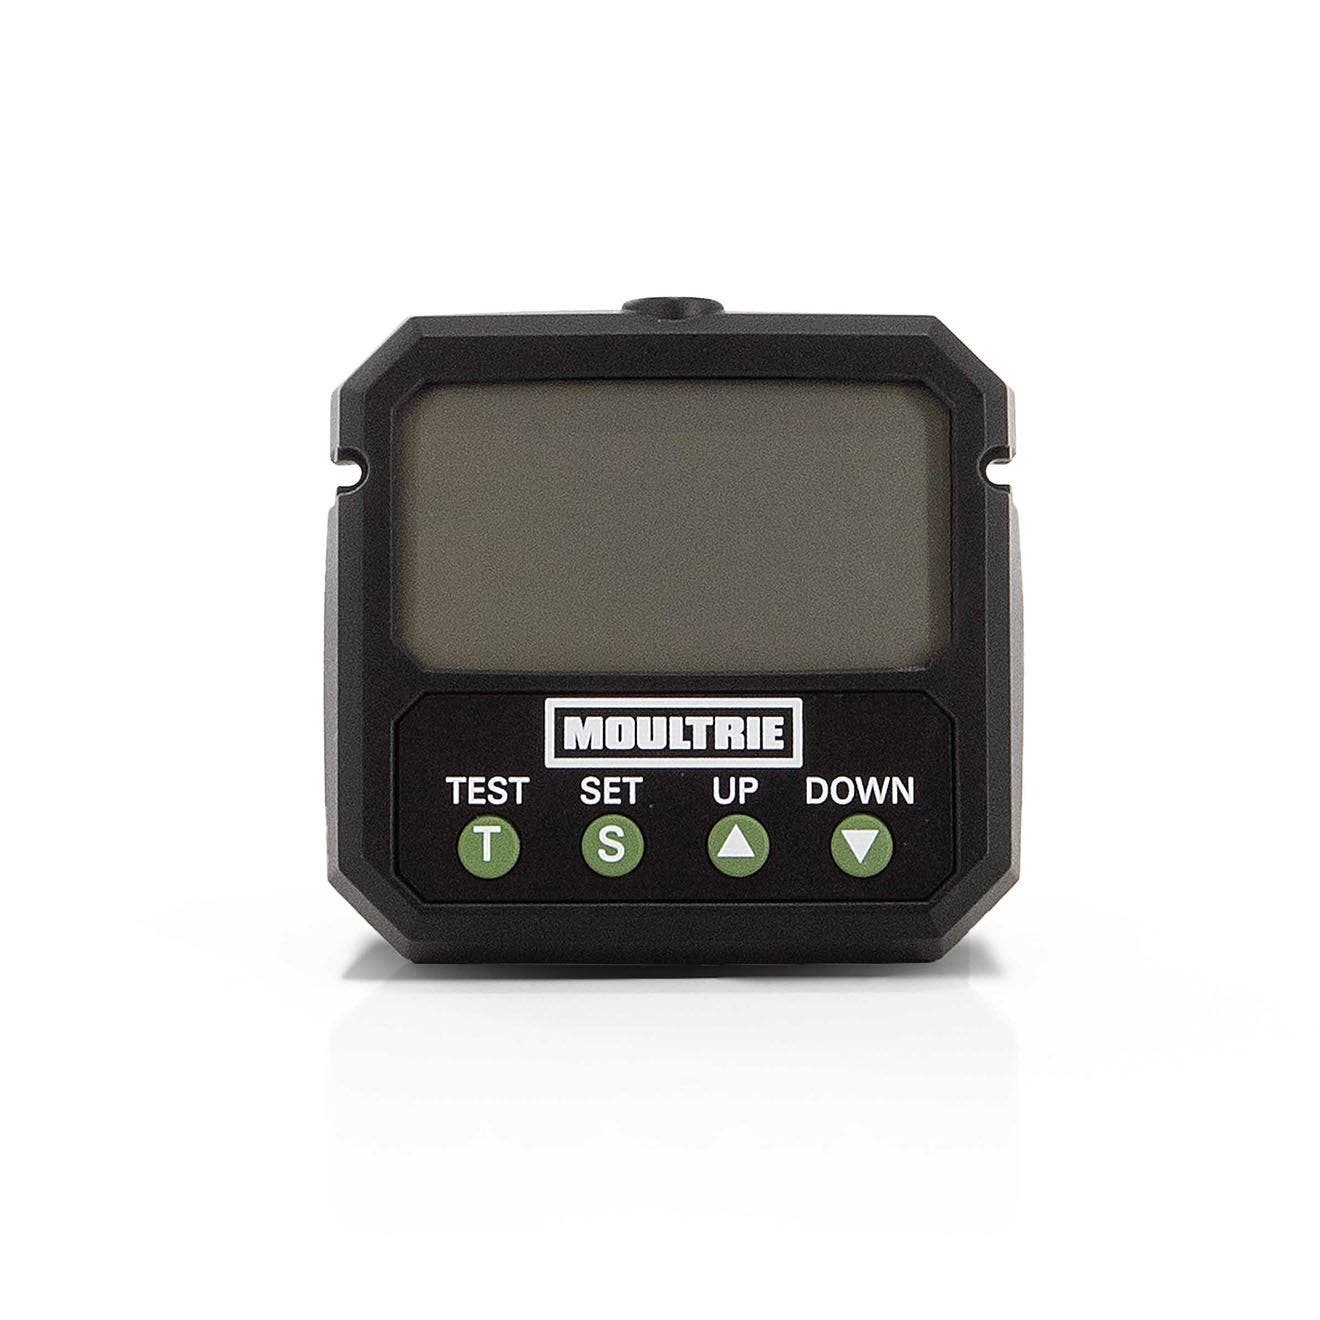
For supported Moultrie kits, the Moultrie Universal Digital Timer III (MFA-15095) adds local Bluetooth control, up to 10 daily events and 1–60-second runs on 6V/12V systems.
Caution: buy for your kit, not by brand name alone — timer generations differ in connectors and housing fit even within one brand, and neither timer in the guide is cross-brand universal.
Wildgame Innovations 6V Replacement Motor
Wildgame’s documented pair shows why: the 6V motor (WGI-WGIMT0011) runs a 1/8-inch shaft, the 12V motor (WGI-WGIMT0003) a 1/4-inch shaft.
Caution: four numbers decide fit — voltage, shaft diameter, shaft length, mounting pattern. Miss one and the motor goes back in the box, so measure your old motor before ordering.
The 60-second diagnosis: power → timer → motor → plate → feed
Stand at the feeder and answer five questions in order. Each answer either fixes the problem or sends you to exactly one section of this page — this is the same sequence manufacturer support pages walk through, compressed into a minute.
Two habits make every later visit faster. First, photograph the timer display and the battery label before you change anything — support agents and parts listings both work from those two photos, and a hopper’s brand name does not identify the electronic kit hanging under it (previous owners swap kits). Second, write down the exact symptom in one sentence: “display on, test runs, motor buzzes, plate stuck” is a diagnosis; “feeder’s broken” is not.
Feeder won’t spin at all: it’s usually the battery
A completely dead feeder — no display, no test response, no sound — is a power problem until proven otherwise. Motors and timers do fail, but they rarely fail silently and all at once; batteries fail quietly, gradually, and far more often. Work through the power chain in this order before you price a single electronic part.
1. The battery: dead, weak, or the wrong one
Owner reports collected in our battery research show the same pattern season after season: the feeder worked at the last visit, then nothing — and the fix was the battery. A rechargeable 6V battery on a solar panel typically lasts two to three years before it stops holding a useful charge; a disposable 6V battery running four six-second feedings a day can be flat in six to eight weeks. Age and schedule, not bad luck, kill most feeder batteries.
Test it properly. A battery icon on the timer display is not a test — Boss Buck’s own troubleshooting page warns that its Simple Set timer can show FULL while reading a 6V supply on a system that needs 12V, leaving a motor that will never run. The reliable check is a basic multimeter on the battery’s terminals, battery rested (disconnected for a few minutes):
- 6V lead-acid battery: about 6.3V or higher = charged. Around 6.0V = roughly half discharged. Below about 5.9V = flat or failing — charge it fully and retest; if it falls back within days, replace it.
- 12V lead-acid battery: about 12.7V = charged. Around 12.2V = half. Below about 11.9V at rest = discharged or dying.
- AA-powered kits (Moultrie’s All-In-One II, model MFG-15096, runs on eight AAs): replace the full set with fresh cells of one type, seated in the correct orientation — Moultrie’s own troubleshooting for that kit starts exactly there, and mixed old/new cells are a classic false “dead timer.”
If the battery tests low, also ask why: a battery that dies young usually has a cause — a shaded solar panel, a schedule that grew, or corroded terminals adding resistance (next checks). Our 6V and 12V feeder battery guide covers replacements in detail, including why terminal type (F1 tabs vs spring tops) matters as much as voltage.
2. Terminals and connections
Corrosion is the second power fault. The white or green crust that builds on feeder battery terminals — the feeder lives outdoors, often under a hopper that drips condensation — insulates the connection until the timer starves. Signs: the display flickers, the feeder works after you wiggle a lead, or the test run starts strong and fades. Disconnect the battery, clean the terminals and clips to bright metal, reconnect firmly, and protect the joint. Also check the whole lead: rodent-chewed insulation and a clip hanging by two strands of wire both pass a casual glance and fail under motor load.
3. The fuse, where one is fitted
Some timers carry an inline or board fuse, and some display a FUSE warning. A single blown fuse after a known event (a short during a battery swap, a storm) is a replacement part; a fuse that blows repeatedly is a symptom — Dickinson Feed’s troubleshooting for its timer notes a recurring FUSE warning can point back to the motor, the harness, or frayed wiring. Replace a fuse only with the exact rating in your manual, and if the new one goes quickly, stop replacing fuses and start looking for the short.
4. The timer itself: OFF mode, manual mode, unsaved schedule
Before condemning the timer, rule out the settings that imitate death. Timers ship with an OFF position; many have a manual/test mode that disables the schedule; and on several common units, editing a feed time without pressing the final save/set step leaves the new schedule unstored. A battery change can also reset the clock — a feeder running at 2 a.m. instead of dawn looks “broken” from the stand. Work through your unit’s programming sequence once, slowly, exactly as the manual writes it; our step-by-step timer programming guide covers the common Moultrie, Wildgame and All Seasons sequences. If the display is lit, the mode is RUN, the schedule is saved, the battery is proven good — and the test button still does nothing — then the timer is the suspect, and the next section applies.
Timer runs but the motor doesn’t
The display is alive and the test cycle runs, but the plate doesn’t move. You are now between the timer and the plate — and the fault is still more likely mechanical than electrical.
Silent motor: no sound at all
Silence during a test run means power isn’t reaching the motor or the motor has failed open. Check in order: (1) the connector between timer and motor — pulled half-out during a battery swap is the classic; reseat it. (2) The voltage at the battery under load — a battery that reads fine at rest can collapse when the motor draws current; if the display dims or dies during the test, the battery is weak regardless of its resting voltage. (3) The leads themselves, flexing them gently while watching for the motor to twitch (a break inside the insulation). If connections and battery are proven and the motor stays silent, it has likely failed — motors wear out brushes and bearings, and water in the housing finishes them. Confirm the exact replacement before ordering: match the original voltage, shaft diameter and length, mounting pattern and spinner attachment. Wildgame’s documented motors make the point — its 6V motor (WGI-WGIMT0011) uses a 1/8-inch shaft while its 12V motor (WGI-WGIMT0003) uses a 1/4-inch shaft, so “a Wildgame motor” is not a specification. Full matching worksheet: our deer feeder replacement motor guide.
Buzzing or humming: the motor is trying
A buzz means the motor has power and is straining against something that won’t move. Do not keep triggering the test — a stalled motor draws heavy current and can cook itself or the timer’s output. Disconnect the battery, then find the jam:
- Packed feed around the plate. Corn dust, fines and moisture cake into a hard ring at the throat and around the spinner hub — the most common jam, especially after wet weather or a long sit.
- A wasp or mud-dauber nest in the motor housing or around the shaft. Owners find these constantly on feeders that sat through summer; the nest locks the shaft like a wedge.
- A bent spinner plate or shifted hub — a plate that took a knock (or a raccoon’s weight) can ride against the housing. Spin the plate by hand with the battery off: it should rotate freely with no scrape or tight spot.
- Debris — a stick, a piece of bag plastic or a clump of moldy feed wedged between plate and throat.
Clear the obstruction, clean the plate and throat, reconnect, and test once. If the plate now spins freely by hand but the motor still only buzzes on a proven battery, the motor itself is weak — that is a genuine motor replacement (same matching rules as above). One more model-specific note from Moultrie’s support for the All-In-One II kit: if the plate rotates on test, Moultrie counts the motor as functioning — so a kit that passes its test but misses scheduled runs has a timer/schedule problem, not a motor problem. Don’t buy a motor for a scheduling fault.
Spins but throws no feed
The plate spins, the motor sounds healthy, and nothing — or almost nothing — comes out. The electrics have passed; this is a feed-path problem, and it fools owners into buying motors every season.
First, the empty hopper that looks full
Check the obvious with fresh eyes: climb up and look into the hopper, don’t judge from the ground. Feeders with opaque lids get “checked” by shaking a leg. If there is feed in there, look at its shape — a hollow cone or tunnel eaten out of the middle, with feed standing in a ring around the walls, is the signature of the next problem.
Corn bridging: the arch that stops the flow
Bridging is when feed packs into a stable arch over the outlet at the bottom of the hopper. The feeder throws what little feed sits below the arch, then spins dry while 150 lb of corn hangs suspended above it. It happens because corn kernels interlock, and it gets dramatically worse with the fines, dust and broken kernels in the bottom of a bag, with high-moisture corn, and in the cone of older drum-style hoppers. Pellets can bridge too, especially after they’ve absorbed humidity and swollen.
The fix: with the battery disconnected, break the arch from below with a stick through the throat (never your arm up into a hopper over a plate you haven’t isolated), or empty the hopper from the top and refill. The prevention: fill with clean, dry, whole-kernel corn and pour the dusty tail of each bag somewhere else — fines are bridge fuel; keep the lid sealed so rain and condensation stay out; and on a feeder that bridges repeatedly, a hopper vibrator/agitator or switching to a cleaner feed lot solves it where stirring only delays it. How fast you should be going through a fill in the first place — so you can spot an abnormal standstill early — is in our guide to how long feeder corn lasts.
Moisture-clumped feed
Corn or pellets that took on water — a cracked lid, a perished lid seal, condensation cycling in a steel drum — swell and set into a solid mass around the throat. The spinner may shear off the bottom layer for a day or two, then starve. Clumped feed has to come out entirely; mixing fresh feed on top just buries the problem, and moldy feed is a genuine reason to dump a fill (aflatoxin risk in moldy corn is the standing warning from university deer labs). Find the water’s entry point before refilling, or you’ll be back in a month.
Plate gap and feed size
Two quieter causes. If the spinner plate sits too far below the throat — a hub that slipped down the shaft after its set screw loosened — feed trickles instead of being metered onto the plate, and throw distance collapses. And feed size matters: a kit set up for corn may not meter large pellets or cubes through the same gap, and fine crumbles can pour straight past a plate set for whole corn. Check the plate height against your manual, tighten the hub set screw, and match the feed to what the kit was built to throw.
Feed dumps out or leaks while it sits
The opposite failure: corn on the ground when the feeder never ran — or a hopper emptied in a night. Every pound on the ground between feedings came through the plate gap, and something moved the plate or opened the path.
The plate and dispenser
On many spin feeders the spinner plate itself seals the throat at rest. If the plate sits low (slipped hub, worn shaft), is warped, or its edge is chipped, feed sifts past continuously — a slow leak that owners notice as a permanent corn pile and a hopper that empties “too fast.” Reset the plate height per the manual and inspect the plate edge. On gravity and tube-style dispensers, check the port plates and any adjustable gate: a gate left at its widest after cleaning, or a cracked port housing, leaks the same way.
The raccoon did it
The classic overnight emptying isn’t a leak at all: raccoons climb the legs, hang from the spinner, and spin the plate by hand, augering feed out kernel by kernel until the hopper is dry. Hogs rub and shake tripod legs to the same effect. The evidence is at the scene: tracks and droppings concentrated at the feeder, greasy rub marks on the legs, a plate that shows fresh scrape marks, and a pile that’s eaten rather than scattered. Mechanical fixes to the feeder won’t stop an animal with all night to work — this is a varmint problem, and it has varmint solutions: a rigid spinner cage/guard, leg guards, and placement changes. We cover the full playbook in keeping raccoons and hogs off a deer feeder — start there before you buy a new plate for a feeder whose only fault is being reachable.
Solar panel connected but the battery still dies
“It has a solar panel, so the battery can’t be flat” is the most expensive assumption in feeder ownership. A panel only maintains a battery when four things line up — sunlight, panel health, wiring, and a battery still capable of holding charge. Test them in that order.
Shading: the usual suspect
Panels get mounted where the feeder is — under the tree canopy, on the shaded side, at an angle chosen for the bracket rather than the sun. Owner reports in our research describe shaded feeders needing their batteries pulled and bench-charged every three to four months with the panel connected; the panel was working, it just never saw enough direct sun to replace what the timer and motor drew. Check the panel’s sky at midday, not at dawn when you visit: it wants several hours of unobstructed sun, tilted toward the south (in the US), and the picture changes with the seasons as the sun drops and leaves return. Dust, pollen film and droppings cost output too — wipe the face while you’re there.
Panel or battery: the disconnect test
Separate the two suspects with the battery test from the power section. Charge the battery fully on a proper charger (or fit a known-good battery), note its rested voltage, and run the feeder with the panel disconnected for a week of normal schedule. If the battery holds up fine on its own, the feeder and battery are healthy and the charging side — panel, cable, connection — is at fault. If it sags anyway, the battery is done no matter what the panel does: a sulfated lead-acid battery can show a surface charge and still have almost no capacity, and no panel resurrects it. Then test the panel side: on a sunny midday, a disconnected panel should show its rated open-circuit voltage on a multimeter (the rating is on the panel’s label); little or nothing in full sun means a failed panel or a break in its cable. Chewed leads — squirrels again — are a frequent find between panel and control box.
Match and condition
The charging gear must match the system: a 6V feeder needs a charging accessory approved for 6V, a 12V system the 12V equivalent — panel names describe the system they serve, and a mismatched panel under-charges forever (our solar panel guide lists the documented options by SKU, including Moultrie’s 6V Deluxe MFHP-12349 and Wildgame’s Edrenaline 6V WGI-WGISO0010 / 12V WGI-WGISO0003). Cold is the last variable: lead-acid batteries deliver less in deep cold, and per Dakota Lithium’s guidance, LiFePO4 packs should not be charged below 32°F unless internally heated — a lithium setup that “stopped charging” in a January cold snap may be protecting itself exactly as designed.
Repair or replace? The cost logic
Once a check has condemned a part, the question is whether the repair makes money sense. Add up the whole repair — part, any hub/harness/connector it needs, shipping, and the cost of an extra trip to the property if you guess wrong — and compare it with the next step up. The ladder, cheapest first:
| Confirmed fault | Fix | Cost tier | Replace the feeder instead when… |
|---|---|---|---|
| Weak / dead battery | New battery, matched voltage + terminals | Lowest — always the first purchase | Almost never on its own |
| Corroded terminals, broken lead | Clean, re-terminate or replace the lead | Pennies to a few dollars | Never |
| Timer failed (proven on a good battery) | Replacement timer for your exact kit | Low–mid | The housing is also cracked / water-damaged |
| Motor failed (proven, plate free) | Matched motor: voltage + shaft + mount | Low–mid | Timer is also dying — price a complete kit |
| Two or more electronic parts gone | Complete feeder kit (timer + motor + plate) | Mid — cheaper than parts bought singly | Hopper rusted / legs bent / lid gone |
| Electronics + hopper + legs all tired | New feeder | Our top-rated feeder is $100–$130 (checked October 2026) | — |
The rule of thumb that falls out of the table: a single confirmed part on a sound feeder is nearly always worth replacing; the moment two electronic parts and their fittings are gone, a complete kit usually beats the parts bought one by one; and when the repair total approaches the price of a new mid-range feeder (see our best deer feeders guide), the new feeder wins on warranty alone. What never makes sense is the unordered part — every guide on this site repeats it because returns data backs it up: diagnose first, buy once.
If it’s the battery (most likely)
Documented examples from our battery guide: the Power-Sonic PS-640 F1 (6V, 4.5Ah AGM, F1 tab terminals) for tab-connected 6V feeders; the Mighty Max ML5-6S (6V, 5Ah AGM, spring S2 terminals) for spring-contact 6V feeders; and the Mighty Max ML7-12 (12V, 7.2Ah AGM, F1 terminals) for 12V systems. Full comparisons and lifespan evidence: deer feeder batteries, 6V vs 12V.

If it’s the timer (proven on a good battery)
For supported Moultrie kits, the Moultrie Universal Digital Timer III (MFA-15095) adds local Bluetooth control, up to 10 daily events and 1–60-second runs on 6V/12V systems. For compatible Wildgame power control units, the Wildgame Trophy Hunter Digital Timer (WGI-WGITM0003) is the conventional-scheduling equivalent — up to 6 daily events, 1–30-second runs. Neither is cross-brand universal; confirm your exact kit first with our deer feeder timer guide.
If it’s the motor (proven, plate spins free)
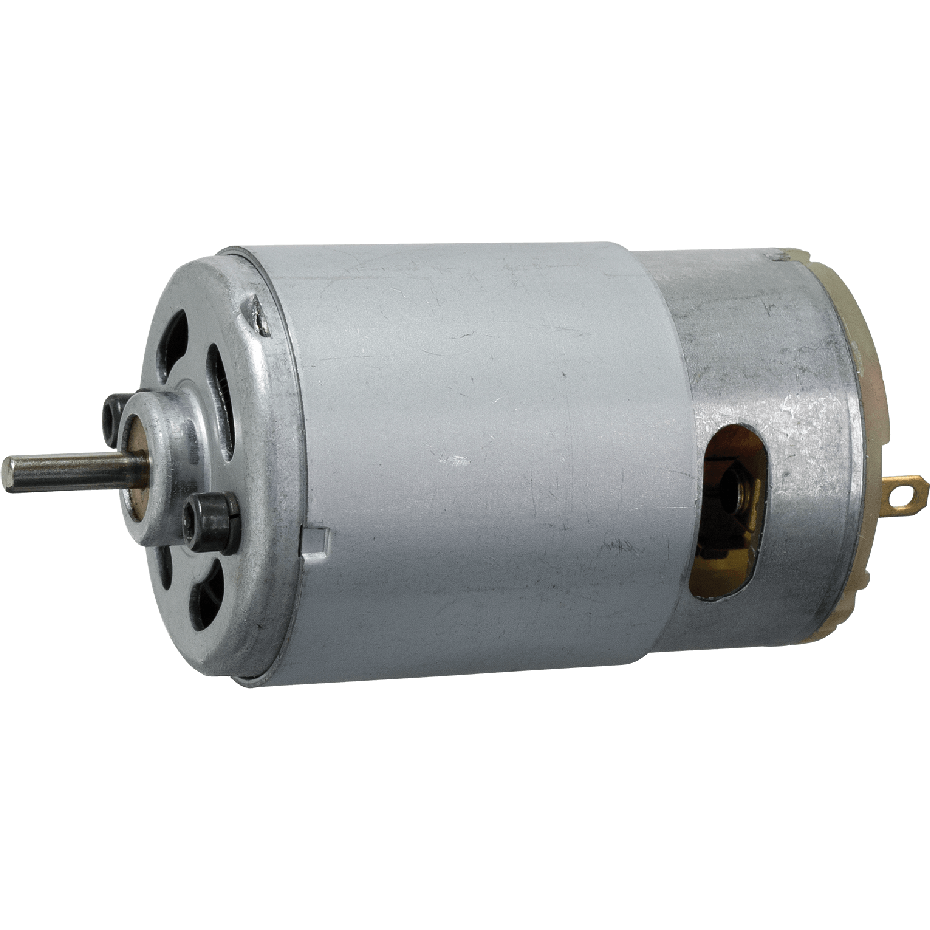
Wildgame’s documented pair shows why: the 6V motor (WGI-WGIMT0011) runs a 1/8-inch shaft, the 12V motor (WGI-WGIMT0003) a 1/4-inch shaft. Highwild lists matching 6V and 12V motors for its own control units. Measure your old motor before ordering and work through the fit worksheet in our replacement motor guide.
If it’s the solar charging side

Documented options: Moultrie’s 6V Deluxe Solar Panel (MFHP-12349) for approved Moultrie kits, and Wildgame’s Edrenaline panels in separate 6V (WGI-WGISO0010) and 12V (WGI-WGISO0003) versions for its control units. Compatibility checks and the full shortlist: our deer feeder solar panel guide.
Deer feeder troubleshooting FAQ
Why is my deer feeder not working at all?
In most cases, the battery. A dead or weak battery is the most common cause of a completely unresponsive feeder, ahead of timer failure and motor failure. Test the battery with a multimeter (about 6.3V or higher for a charged 6V battery, about 12.7V for 12V), check the terminals for corrosion, and confirm the timer is not in OFF mode before pricing any electronic part.
Why does the timer light up but the motor won’t spin?
A lit display only proves the timer has some power — a motor starting under load needs far more. The usual causes are a battery too weak to start the motor, a half-seated connector between timer and motor, or a jammed spinner plate. If the motor buzzes, it has power and is straining against a jam: disconnect the battery and clear the plate before testing again.
How do I test a deer feeder battery?
Disconnect the battery, let it rest a few minutes, and measure its terminals with a multimeter. A charged 6V lead-acid battery reads about 6.3V or more; around 6.0V is roughly half discharged and below about 5.9V it is flat or failing. A charged 12V battery reads about 12.7V. Do not trust the timer’s battery icon — some timers show FULL at the wrong voltage for the system.
Why does my feeder spin but not throw corn?
Feed is not reaching the plate. The most common cause is bridging — corn arching over the hopper outlet so the feeder spins dry under a full hopper — followed by moisture-clumped feed around the throat, a spinner hub that has slipped down its shaft, and feed too large or too fine for the plate gap. Look inside the hopper: a hollow cone in the middle of standing feed is the bridging signature.
What is corn bridging and how do I stop it?
Bridging is when kernels interlock into a stable arch over the outlet, suspending the feed above the spinner. Dust, fines and broken kernels make it much worse, as does damp feed. Break the arch with a stick (battery disconnected first), refill with clean, dry, whole-kernel corn, keep the dusty tail of each bag out of the hopper, and make sure the lid seals against rain.
Why did my feeder dump all its corn at once?
Usually something moved the plate or opened the feed path: a spinner plate sitting too low or warped so feed sifts past, a gravity port gate left wide open — or raccoons. Raccoons climb the legs and spin the plate by hand, augering feed out kernel by kernel until the hopper is empty. Fresh scrape marks on the plate and tracks at the base point to animals, not mechanics.
How do I know if my feeder motor is burned out?
Prove everything else first: a known-good battery at the right voltage, reseated timer-to-motor connector, and a spinner plate that turns freely by hand with the power off. If the motor is then silent on a test run, or only buzzes with a free-spinning plate, it has failed. Match the replacement on voltage, shaft diameter and length, mounting pattern and spinner attachment — shaft sizes differ even within one brand.
Why is my solar panel not charging the feeder battery?
Shade is the most common reason — owner reports describe shaded feeders needing a bench recharge every three to four months with the panel connected. After shade, check for a chewed or broken panel lead, a battery too old to hold charge (no panel fixes that), and a panel mismatched to the system voltage. A full-sun multimeter check of the panel’s open-circuit voltage against its label separates a dead panel from a dead battery.
My feeder works on test but not on schedule. What’s wrong?
The motor and battery are fine; the schedule is not. A battery change can reset the clock, edited feed times may never have been saved, the timer may be in manual/test mode, or days-of-week settings may exclude today. Work through the programming sequence for your exact model once, slowly — Moultrie’s own support treats a plate that rotates on test as proof the motor works, so a missed schedule is a timer-settings problem, not a motor problem.
How long should a deer feeder battery last?
It depends on schedule and charging. In owner reports collected for our battery guide, a rechargeable 6V battery maintained by solar typically served two to three years before replacement, while a non-rechargeable 6V battery running four six-second feedings a day lasted about six to eight weeks. More daily run-time, deep discharges and shade all shorten battery life.
What does a FUSE warning on my feeder timer mean?
It depends on the model — indicators are not standardised across brands. On the timer documented by Dickinson Feed, a repeated FUSE warning can involve the motor, the harness or frayed wiring, not just the fuse itself. Replace a fuse only with the exact rating in your manual; if the new fuse blows quickly, stop and find the short instead of feeding it fuses.
Is it worth repairing a deer feeder or should I replace it?
Repair when one confirmed part has failed on a feeder whose hopper, legs and housing are sound — a battery, timer or motor is a fraction of a new feeder’s price. Price a complete kit when two electronic parts are gone, and replace the feeder when the repair total approaches the price of a new mid-range model (our top-rated feeder runs about $100–$130, checked October 2026) or the hopper and legs are also damaged. If you shop second-hand instead, run our used deer feeder inspection checklist before you pay.
Final verdict
A deer feeder not working is a diagnosis problem before it is a shopping problem. Run the chain — power, timer, motor, plate, feed — and the feeder will usually tell you which single link failed: the battery far more often than the electronics owners replace first. Fix that link with a part matched to your exact kit, keep the panel in the sun and the corn clean and dry, and the same feeder will run for seasons. If the diagnosis lands on two dead electronic parts and a tired hopper, put the repair money toward a new feeder from our best deer feeders guide instead.
Last updated: October 2026.
Sources
- Moultrie support — All-In-One II (MFG-15096) troubleshooting & Pro Hunter II (MFG-13448) setup guidance
- Boss Buck / American Hunter — Simple Set timer troubleshooting (FULL indicator, voltage)
- Dickinson Feed — The Timer documentation (FUSE warning)
- Moultrie — Universal Digital Timer III (MFA-15095) specifications
- Wildgame Innovations — Trophy Hunter Timer (WGI-WGITM0003), motors (WGI-WGIMT0011 / WGI-WGIMT0003), Edrenaline solar panels (WGI-WGISO0010 / WGI-WGISO0003)
- Power-Sonic — PS-640 F1 specifications & charging guidance
- Dakota Lithium — LiFePO4 cold-charging guidance
Products mentioned in this guide
See this product on Amazon
Check Price on Amazon →Confirm price and availability on AmazonMoultrie Universal Digital Timer III
Check Price on Amazon →Confirm price and availability on AmazonPower-Sonic PS-640 F1 6V Feeder Battery
Check Price on Amazon →Confirm price and availability on Amazon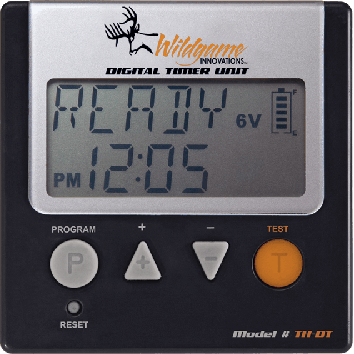
Wildgame Innovations Trophy Hunter Digital Timer
Check Price on Amazon →Confirm price and availability on Amazon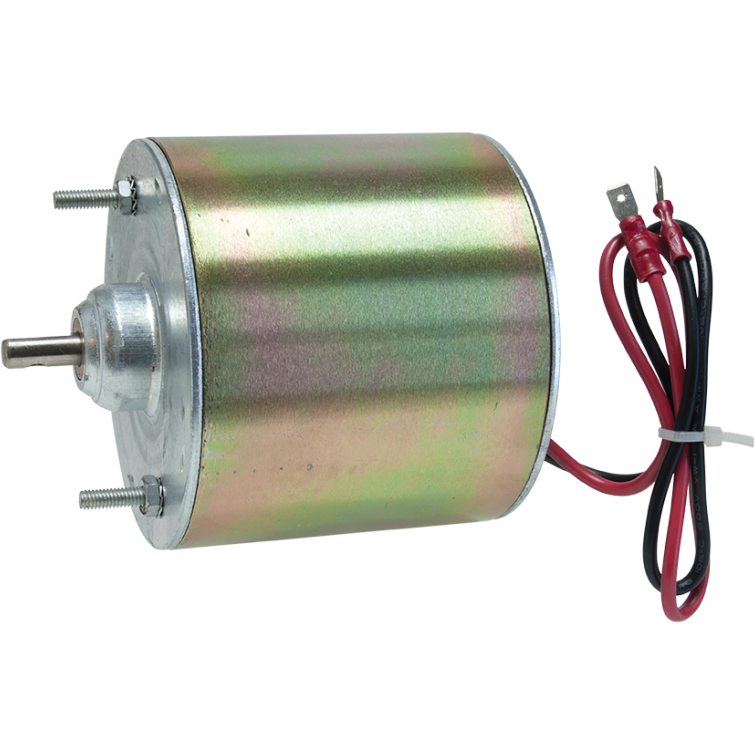
Wildgame Innovations 12V Replacement Motor
Check Price on Amazon →Confirm price and availability on AmazonAs an Amazon Associate, we earn from qualifying purchases.


